Features for the Replication Manager
Replication Manager features
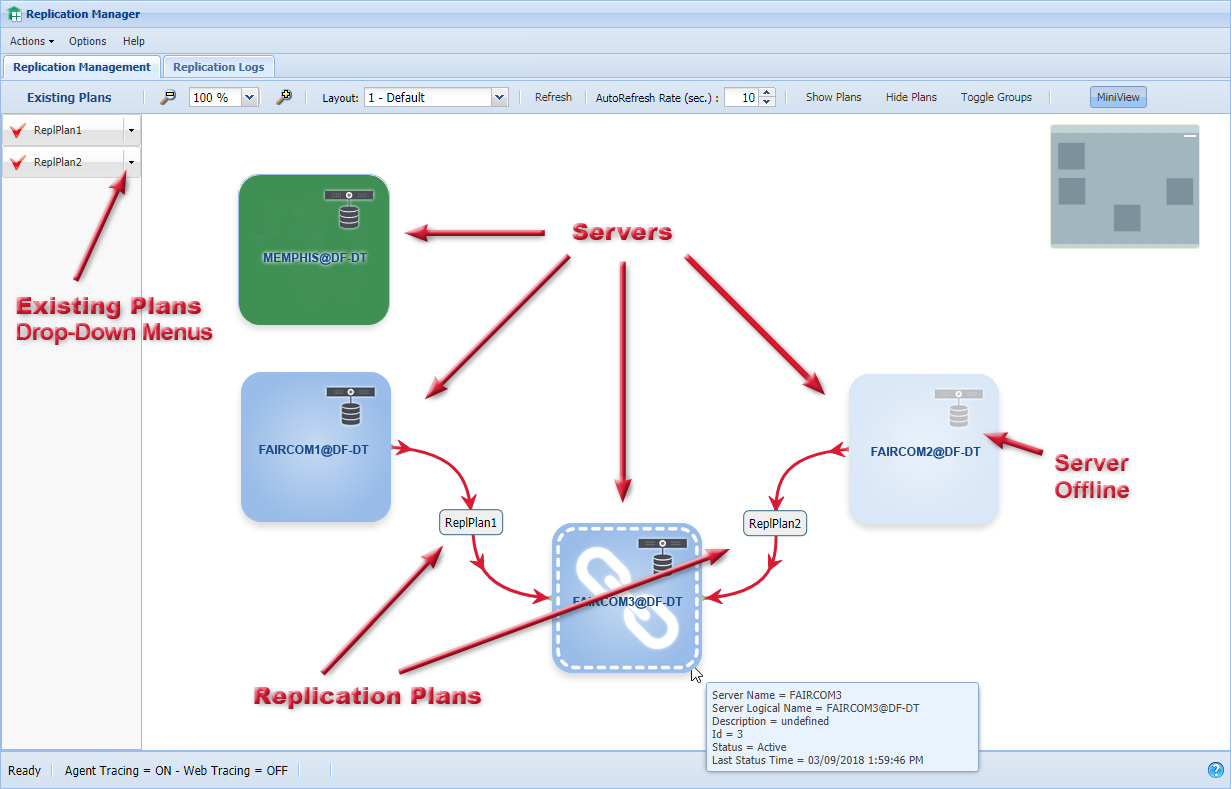
When you open Replication Manager, the Replication Management tab graphically depicts your entire site, with all registered server nodes. As all connections are TCP/IP, these can be via your local network, WAN, or even cloud-based sites with a valid secured connection.
All available plans are listed under Existing Plans.
Replication plans are displayed as lines connecting server nodes.
The central Replication Manager is shown as a unique green square
Registered server nodes are shown as blue squares.
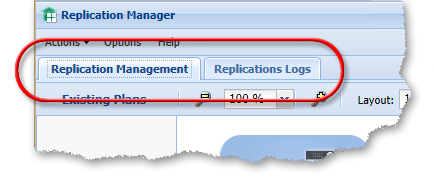
Replication Management tab
This is the default tab. This tab displays the servers and replication plans. This is where you will create replication plans and manage your replication.
Replication Logs tab
This tab displays the logs of replication activity. After you have defined your replication plans and deployed them, you can switch to this tab to monitor operation.
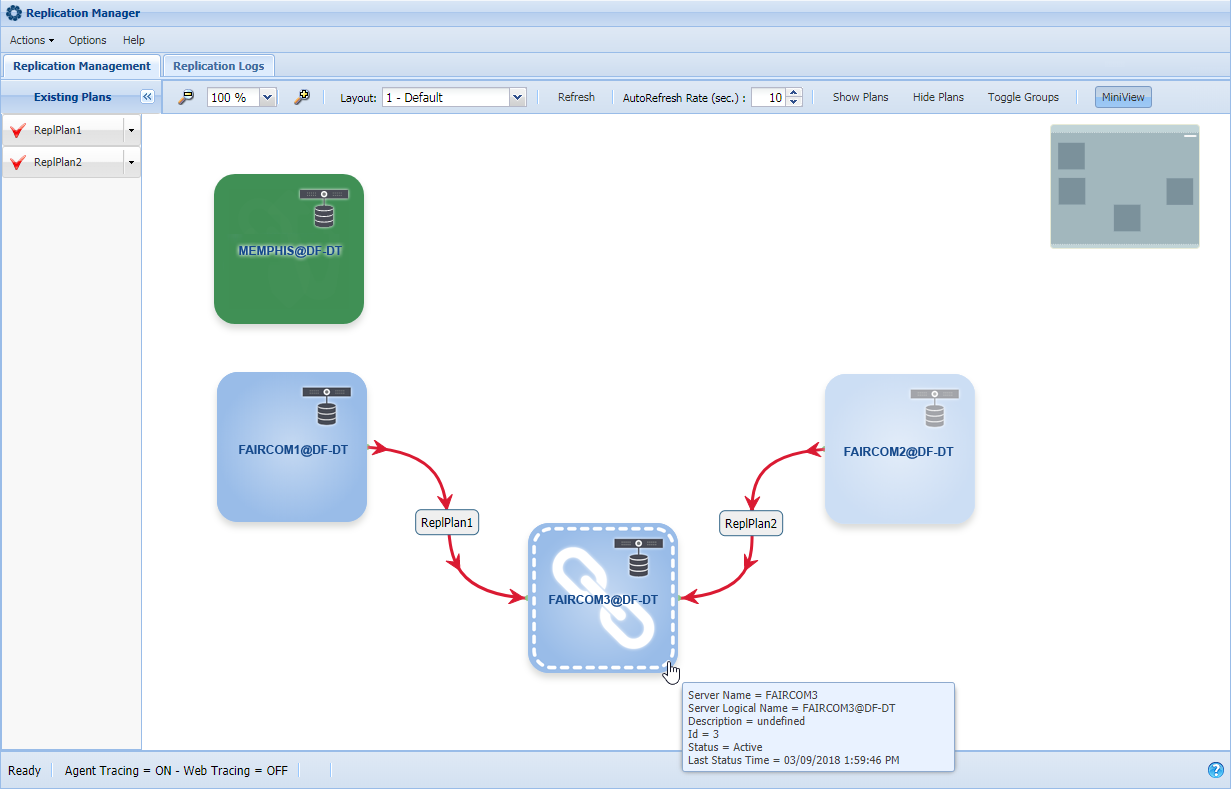
The central part of the Replication Management tab is a canvas that shows each FairCom server on the site. Each server is shown as a blue square containing a server icon and the name of the server.
Note
Use Refresh to scan the network and to refresh the display of servers and plans. Under normal operation that will not be necessary because the Replication Manager continually checks the site and refreshes its view. Use this option to force a refresh if you think a server may have stopped responding.
MEMPHIS
This is the server running the Replication Management studio, which can be any standard FairCom server.
FAIRCOM1
In Figure 3, “Replication Management server”, red arrows show that ReplPlan1 replicates data from this FairCom server to FAIRCOM3.
FAIRCOM2
In Figure 3, “Replication Management server”, red arrows show that ReplPlan3 replicates data from this FairCom server to FAIRCOM3. Notice that this server is dimmed to indicate it is currently offline.
FAIRCOM3
In Figure 3, “Replication Management server”, red arrows show that this FairCom server is the destination (target) for data replicated from FAIRCOM1 and FAIRCOM2. This server has a dashed outline and a large chain link to indicate that the mouse is hovering over its border, which will be important when you use drag-and-drop to create a replication plan.
You can drag the servers around on the canvas to create a layout that is meaningful to you — for example. you may want to arrange the servers geographically, with the west-coast servers on the left and the east-coast on the right. Alternatively, you may want to place all production servers in one row, all development servers in another, and all reposting servers in another row. The Replication Manager will remember the current layout when you load it again on the same machine.
Move the server
Hover the mouse pointer over the center of the server.
Observe the mouse pointer change from a hand pointer to a four-point arrow pointer.
Drag the server to any position on the canvas.
Move multiple servers as a group
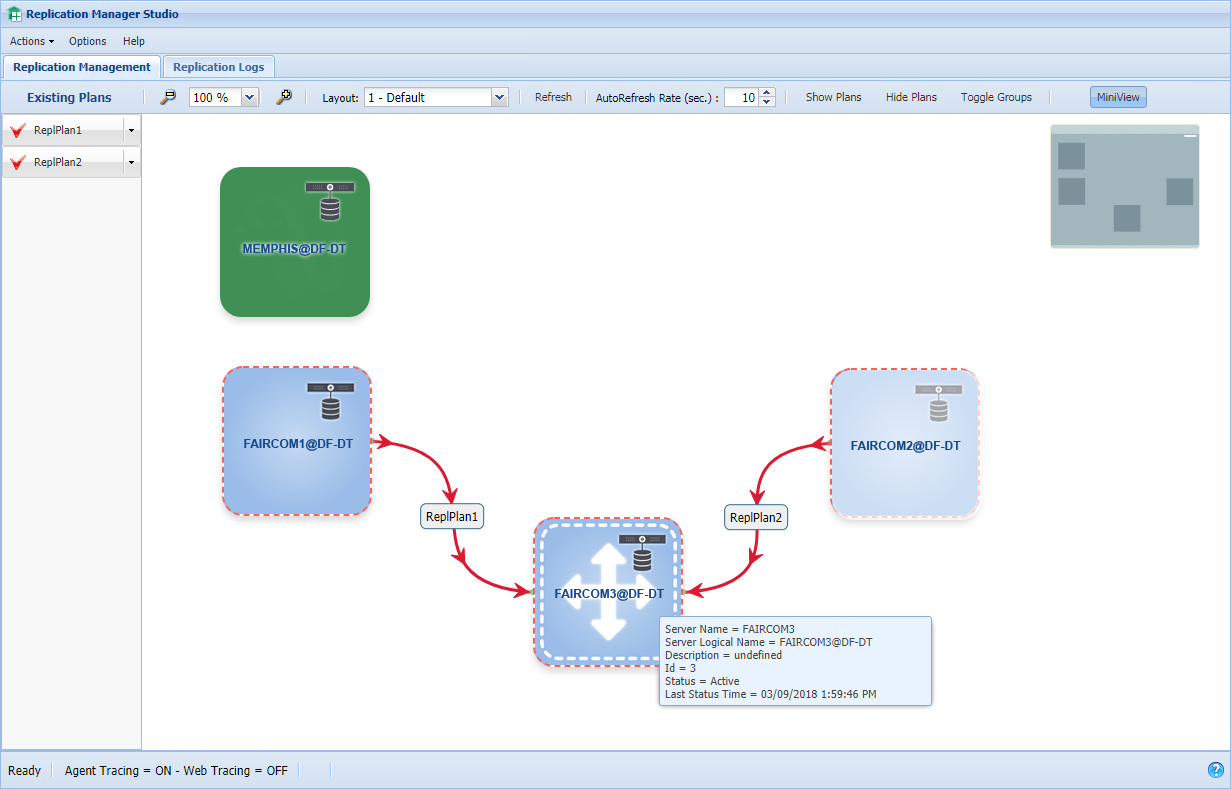
+ click on a server.
Observe a red dotted line around the server square, indicating the server is selected (see Figure 4, “Select multiple servers”).
Ctrl + click other servers to select them and observe the red dotted line around all of the selected servers.
Hover the mouse pointer over one of the selected servers.
Observe the mount pointed change from a hand pointer to a four-point arrow pointer.
Move selected servers as a group.
Click on any selected server again to remove the red dotted line and to deselect the server.
Resize the server
This can be useful if you want to collapse the server as small as possible to save screen space or enlarge a server to make a long name easy to read (or you can use the zoom control if you need to see a large number of servers).
Hold Shift while clicking on a server square.
Observe resizing handles appear around the edge of the server square.
Drag the server square to any size.
Hold Shift and click anywhere on the server to remove the resizing handles.
Zoom the display
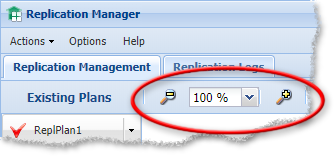
Using the zoom dropdown menu to select a zoom ratio.
Using the scroll wheel on your mouse.
Clicking the magnifying glass icons next to the zoom dropdown menu.
Move the canvas
You can drag the entire canvas around to see different parts of it. This is a useful feature if you have too many servers to fit them all on the screen.
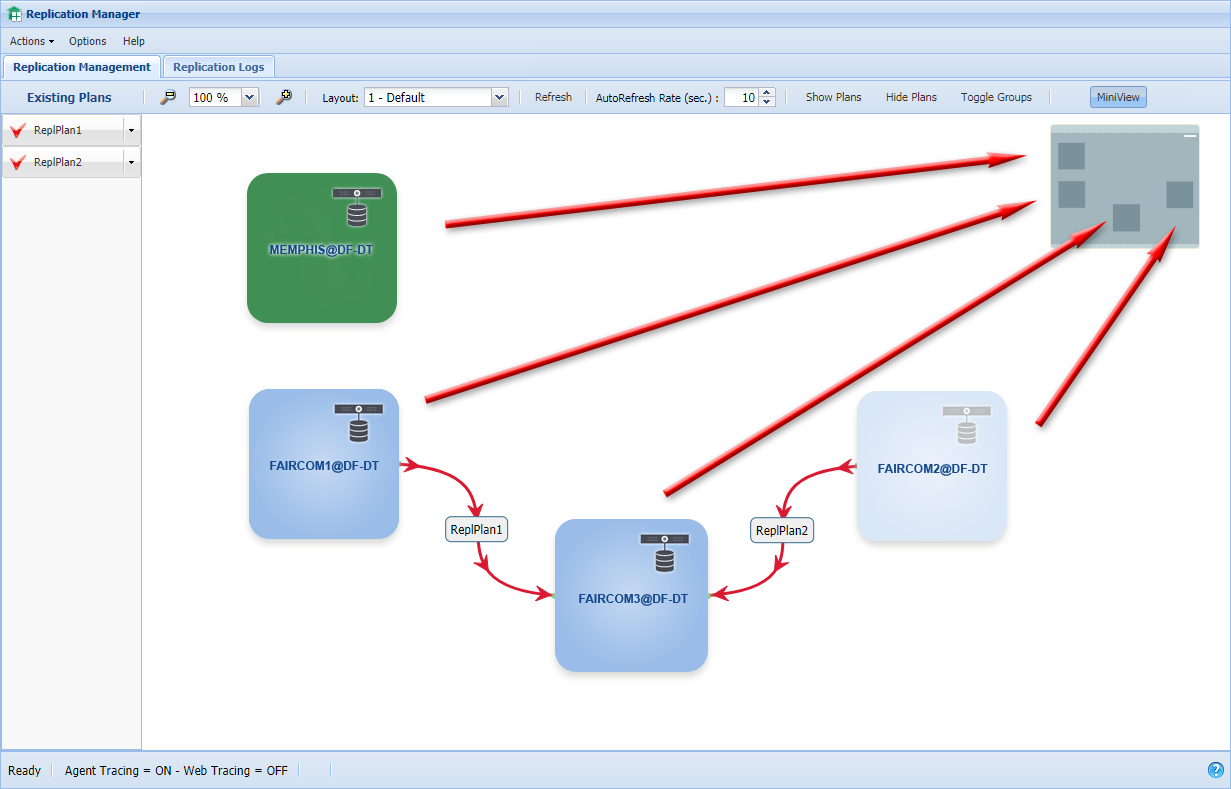
Hover the mouse pointer over any white space on the canvas.
Observe that the pointer becomes a hand pointer indicating that you can drag the canvas around to view different parts.
Use the MiniView to see an overview of the entire canvas.
Note
The MiniView is a less detailed grayscale version of the regular canvas display.
The MiniView provides a view of the entire canvas, which is scaled to fit the viewer. You can drag the canvas inside the MiniView to move the entire canvas in the main window.
Drag the MiniView to view different portions of the canvas.
Use the minimize button in the corner of MiniView or expand it.
Use the button to show or hide this tool.
The Replication Manager provides a Layout menu that allows you to manage the location of the servers and groups on the main viewing canvas.
Edit Description
This allows you to rename the selected layout.
New Layout
This allows you to create a new layout.
Enter a name for the layout.
Rearrange the servers on the canvas.
Note
The Replication Management studio will remember their positions the next time you reload the Replication Management studio or select that layout.
Delete Layout
This allows you to delete the selected layout.
Replication Manager provides several selections for managing your replication environment.
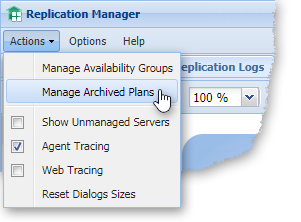
Actions menu (see Figure 7, “Replication Manager menus”)
This menu lists available actions.
Manage Archived Plans
This selection allows you to view archived plans and restore or delete them using the window. Replication plans can be archived using a selection in the Existing Plans dropdown menu (once archived, a plan is not displayed under Existing Plans).
Show Unmanaged Servers
This menu option controls the display of servers that are not included in replication. You can right-click on a server to unmanage it if you do not want to control it — for example, if it is going to be offline for an indefinite period.
Agent Tracing
This checkbox turns Agent Tracing on and off. If the checkbox is checked, Agent Tracing is on. The status of Agent Tracing is indicated in the status bar in the lower-left corner of the window.
Web Tracing
This checkbox turns Web Tracing on and off. If the checkbox is checked, Web Tracing is on. The status of Web Tracing is indicated in the status bar in the lower-left corner of the window.
Reset Dialog Sizes
This option returns all dialog boxes to their original, default sizes. It can be used as a quick way to clean up the display if windows have been moved.
Options menu
The Options menu opens the Options window allowing you to set properties for the Replication Manager.
Help menu
This menu displays help for Replication Manager.