ThingWorx tutorials
ThingWorx connector tutorials for FairCom Edge
This tutorial demonstrates the basics of using the FairCom Edge ThingWorx connector.
This tutorial assumes an existing ThingWorx platform is available and that you have installed and configured FairCom Edge to connect to ThingWorx using the ThingWorx AlwaysOn protocol, as described in Configuration.
Tutorials for connecting FairCom Edge to ThingWorx
When FairCom Edge starts, it connects to the ThingWorx platform and creates one or more new things with the
"thingName"that is specified in thectthingworx.jsonfile. Each of these new things is based on the existing"thingCreator"that is specified in that file.However, if a thing with the same
"thingName"already exists in ThingWorx, it will try to use it. If the template does not match, the connector initialization will fail. If this happens:Check the FairCom Edge
data\CTSTATUS.FCSfile for error messages.On the machine that is hosting ThingWorx, check the various ThingWorx log files, in the
C:\ThingworxStorage\logsfolder, for error messages.
Observe the new ThingWorx thing (see Figure 1, “New FairComThing2”).
Figure 1. New FairComThing2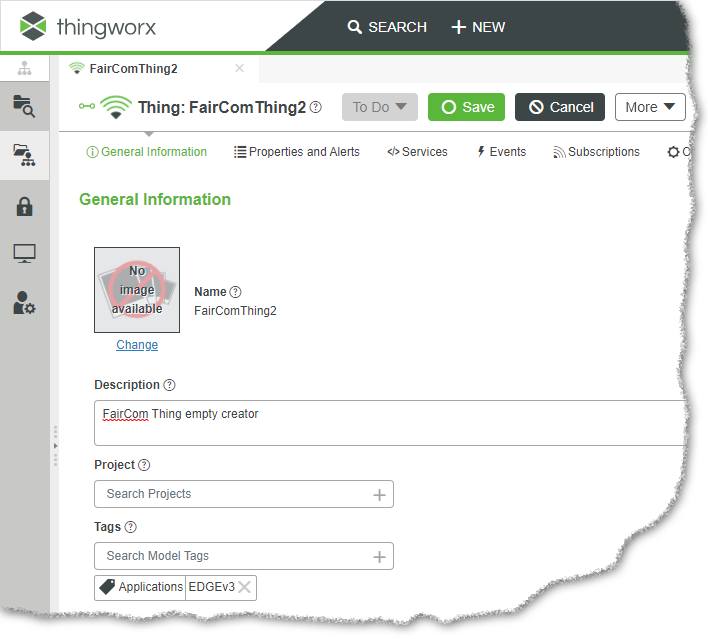
Confirm that the connection was successful by observing the Connected icon next to the Thing: FairCom Thing2 title:
When FairCom Edge is connected to ThingWorx, observe the Connected icon.
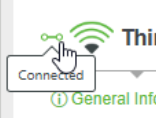
When FairCom Edge is not connected to ThingWorx observe the Disconnected icon (see Troubleshoot).

The FairCom Edge schema is a list of all the databases, tables, and table fields (columns) that exist inside FairCom Edge. The schema can be thought of as a directory listing that tells you what files exist and what their attributes are but not the data inside the files. In other words, the schema knows about the tables' columns but not about the tables' rows.
When ThingWorx receives a copy of FairCom Edge's schema:
Important
It is important to know that when FairComThing2 is first created inside ThingWorx, it is given a copy of the schema which describes FairCom Edge's databases, tables, and fields as they were at the time of FairComThing2's creation. However, if any of the tables, databases, or fields inside FairCom Edge change, FairComThing2 in ThingWorx is not notified of these changes, so FairComThing2 has out-of-date information. In order to update the schema information inside ThingWorx, the UpdateFairComServer service can be run.
When the FairCom Edge server starts, it connects to the ThingWorx platform. Once the connection is made, FairCom Edge will check if the FairComThing2 exists inside ThingWorx.
If the FairComThing2 is missing:
ThingWorx will create FairComThing2 with the information in the current schema. The FairComThing2 will know what tables and databases existed in FairCom Edge when the FairComThing2 was initially created.
If the FairComThing2 already exists:
This schema copy will not be repeated and therefore the ThingWorx copy could be outdated (see UpdateFairComServer service).
The property that contains the FairCom Edge schema is called
"FairComServer".You can navigate and visualize all the databases, tables, and fields in this property.
Figure 2. FairComServer property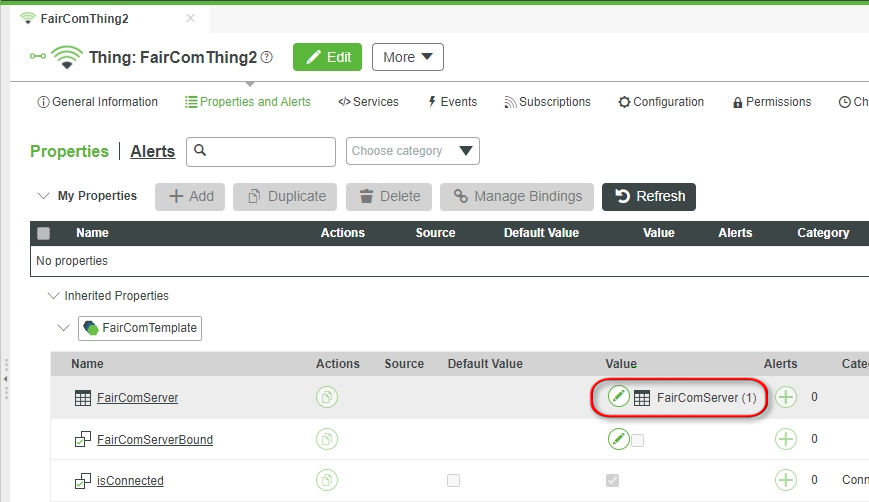
UpdateFairComServer service
The UpdateFairComServer service updates the schema information inside of ThingWorx each time the service is run. Running this service is useful when ThingWorx's copy of the schema becomes outdated due to changes that occurred after the initial creation of the FairComeThing2 thing.
Important
It is important to realize that this service does not copy any of the data from the tables (the tables’ rows). To copy table data, the columns of the tables must first be mapped to ThingWorx properties.
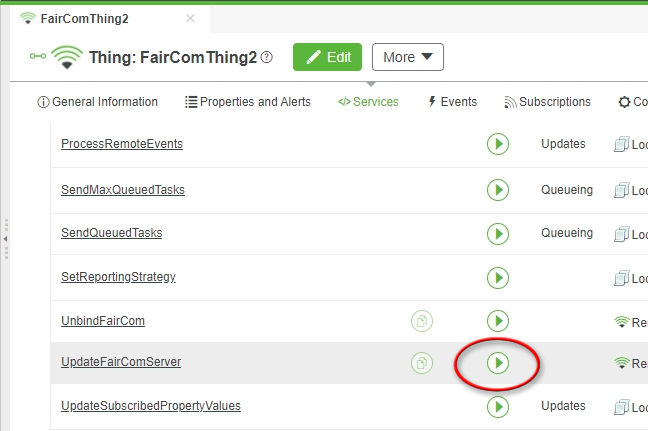
UdpateFairComServer execute button
Navigate to the Services tab.
Scroll to the UpdateFairComServer service.
Click the UpdateFairComServer button (
 ) (see Figure 3, “UpdateFairComService service”).
Click the button in the Execute window that appears.
Wait for the service to say it executed successfully.
Click to dismiss the Execute window.
Once ThingWorx's copy of the FairCom Edge schema is up-to-date, the columns of FairCom Edge time series tables can be mapped into ThingWorx.
A time series table is one in which new data values are stored by inserting new records/rows into the table, rather than by editing existing rows in the table — for example, a device with several sensors might periodically sample those sensors and store their values in a table by inserting a new row which contains that set of samples, often with a timestamp. This allows the table to track the sensors' values over time. When we map a column of that table into ThingWorx, ThingWorx receives the data from the last row that was inserted into the time series table.
Note
If you edit an existing row in the table, ThingWorx will not receive that update.
When you map a FairCom Edge table column into ThingWorx, you create a new property inside the single FairComThing2 thing in ThingWorx. This property is updated with the latest value from the FairCom Edge table column.
If you map four FairCom Edge table columns into ThingWorx, you will have four properties inside your single ThingWorx thing, each of which will display the latest value from its FairCom Edge table column.
Note
If you want ThingWorx to remember more than just the latest value from its FairCom Edge column, enable the property's "Logged" attribute.
While navigating through the FairComServer property when getting into the field level, we can set how the field value from FairCom Edge persistence should be mapped to a property in the current thing at the platform.
Click the Properties and Alerts tab.
Click the Set value of property button (
 ) for the
 FairComServerproperty.In the new FairComServer window, click Databases.
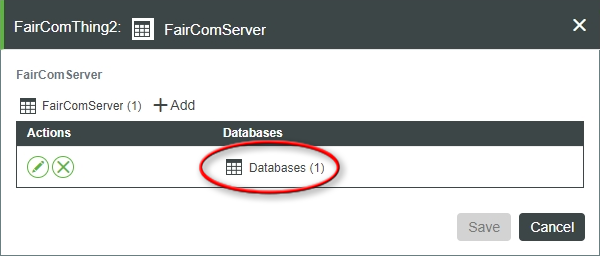
Click Tables for the database which contains the tables you wish to map into ThingWorx.
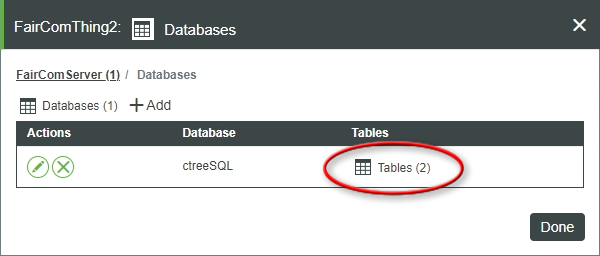
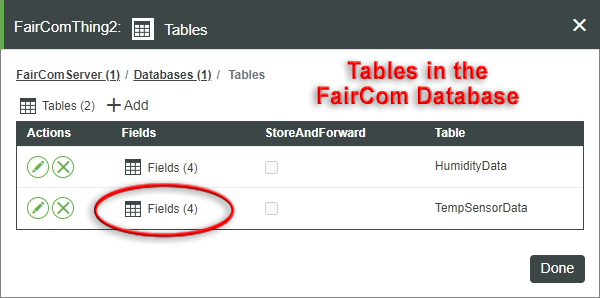
Click Fields on the row that shows the table you wish to map into ThingWorx.
Important
Leave the StoreAndForward checkboxes unchecked.
The Fields window lists the fields/columns in the selected table.
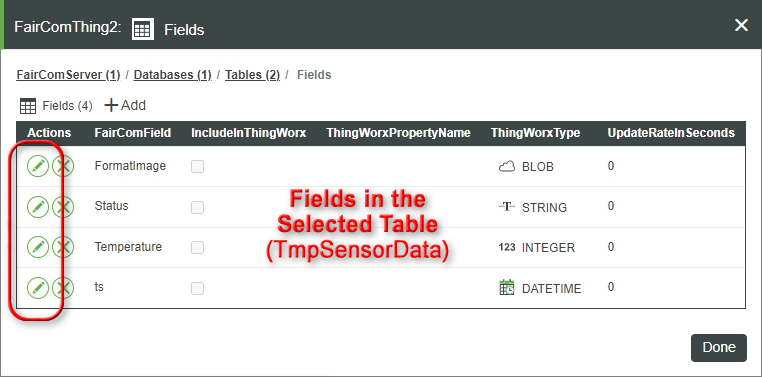
Click the button (
 ) in the Actions column of the field you wish to edit.
Observe the Fields window that appears.
The Fields properties window is used to edit the mapping of the selected field, whose name is shown under FairComField.
Fields properties window features
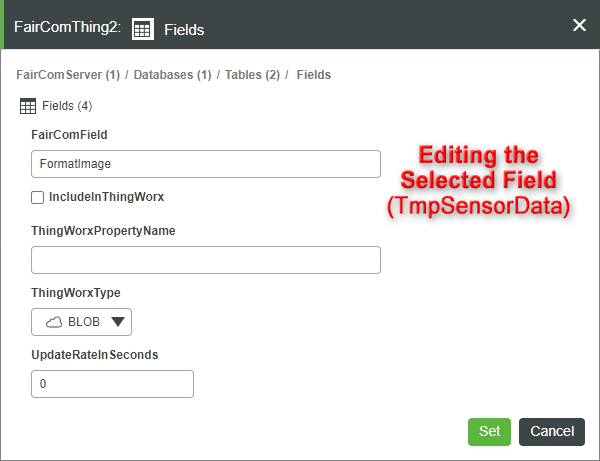
The FairComField textbox contains the name of the FairCom Edge table field/column.
Important
Do NOT edit this control.
The IncludeInThingWorx checkbox causes the selected field to be mapped into the current ThingWorx thing as a new property when checked.
The ThingWorxPropertyName textbox is used to give the new ThingWorx property a name in ThingWorx. If left blank, a name will be automatically generated following the pattern
<databaseName>_<tableName>_<fieldName>. Names should not start with numerical digits or contain periods.Note
Names should not start with numerical digits or contain periods.
The ThingWorxType dropdown menu controls how ThingWorx interprets the data values from this field/column. If the field contains a binary image (such as a GIF or JPEG) change this from lvarbinary to image.
The UpdateRateInSeconds textbox determines the ThingWorx update rate.
The default value of 0 specifies that FairCom Edge should update the value in ThingWorx as often as possible, skipping records as necessary in order to keep ThingWorx from falling behind.
A positive value tells FairCom Edge that it should not update this value in ThingWorx more than once in this many seconds.
It also means that this value in ThingWorx will not be more than this many seconds old/out-of-date.
The button is used to return to the Fields window when you are done editing the mapping values.
Mapping other fields
If you wish, you can now edit the mapping of a different field in this table, or click as many times as necessary, to back out to the point that allows you to edit the mappings of different fields, in different tables, in different databases, and so forth.
Click until you return to the FairComServer window.
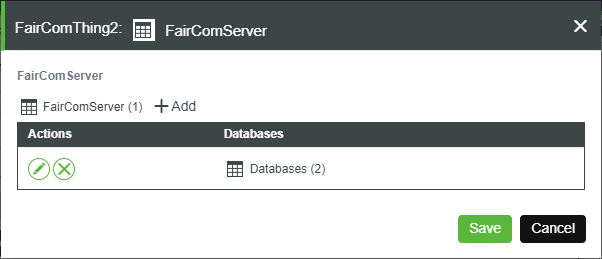
Click .
Warning
Be careful not to press too quickly as you back out of the previous windows, or you may accidentally press on this last window, due to the fact that on this window is the same color and in the same position as in the previous windows. This is a very easy mistake to make, and it will discard all the mapping changes you just finished.
After saving out of the FairComServer window, click for FairComThing2 to save your changes.
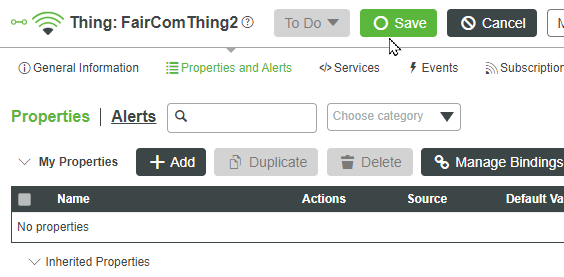
After configuring the mappings, it is necessary to run the BindFairCom service to create the mapped properties in ThingWorx and attach them to the columns in the FairCom Edge tables.
Click the Services tab.
Click the button (
 ) of the BindFairCom service.
Click the button in the Execute window that appears.
Wait for the service to say it executed successfully.
Click to dismiss the Execute window.
Note
The new properties will not appear in the thing until the next steps are completed.
Click the close () button, to close the FairComThing2 thing tab.
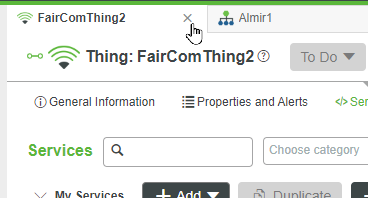
Note
The window's minimize button will not close the tab and will not cause the new properties to appear.
Re-open the FairComThing2.
Click the Properties and Alerts tab.
Observe your new properties under My Properties.
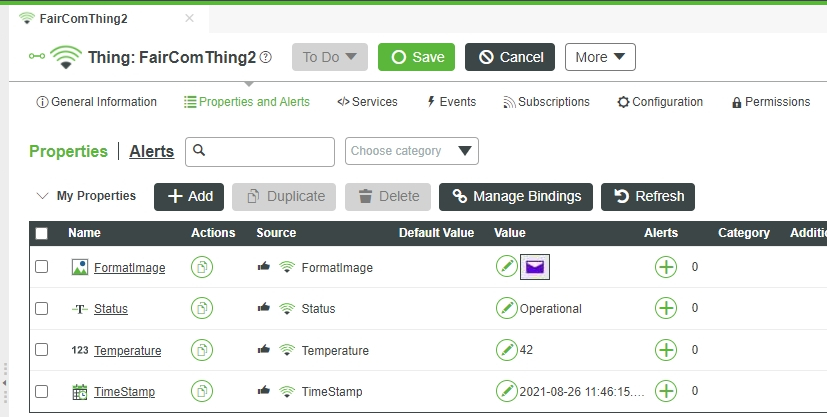
Note
The Properties and Alerts tab does NOT refresh/update automatically. When new rows are added to the mapped tables in FairCom Edge, the property values are automatically updated by the FairCom Edge ThingWorx connector. Even though the updates are taking place they will not be visible until you click (
 ).
).Each time is clicked, the Properties and Alerts tab will be redrawn to show the latest values that ThingWorx has received from FairCom Edge.
Modify mappings
Execute the UnbindFairCom service.
Make the desired mapping changes.
Rerun the BindFairCom service.
Disable mappings using the UnbindFairCom service
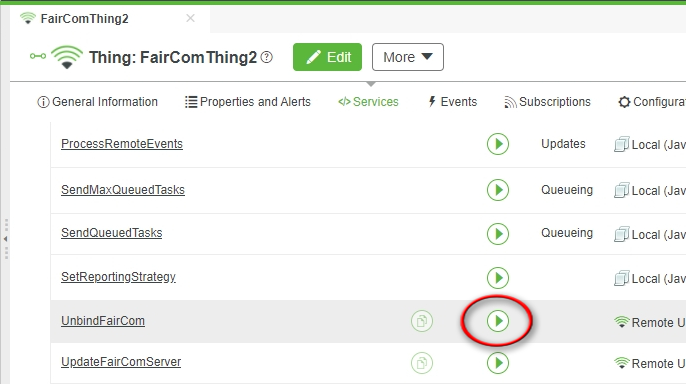
If you wish to disable the mapping between data persisted in FairCom Edge and the ThingWorx thing, execute the UnbindFairCom service.
Navigate to the Services tab.
Click the button (
 ) of the UnbindFairCom service.
Note
You may need to scroll to the bottom of the listed Services to locate the UnbindFairCom service.
The Type mapping table shows the data-type mapping between the table fields in FairCom Edge and ThingWorx properties.
FairCom type | ThingWorx type |
|---|---|
CT_BOOL | TW_BOOLEAN |
CT_CHAR CT_CHARU CT_INT2 CT_INT2U CT_INT4 CT_INT4U CT_INT8 CT_INT8U | TW_INTEGER |
CT_SFLOAT CT_DFLOAT CT_EFLOAT CT_SQLBCD CT_MONEY CT_CURRENCY | TW_NUMBER |
CT_DATE CT_TIMES CT_TIMES_MS | TW_DATETIME |
CT_FSTRING CT_FPSTRING CT_F4STRING CT_STRING CT_PSTRING CT_F2STRING CT_ARRAY CT_FUNICODE CT_F2UNICODE CT_UNICODE CT_2UNICODE CT_TIME_MS CT_TIME | TW_STRING |
CT_JSON | TW_JSON |
CT_ARRAY | TW_BLOB |
CT_2STRING CT_4STRING | TW_STRING or TW_BLOB NoteDepending on "binary flag" in FairCom Edge: CTDB_BINARY_VARCHAR causes it to be TW_STRING. |