API Explorer
API Explorer UI tutorials
These tutorials describe how to use the API Explorer web utility, which makes it easy to create and run FairCom’s jsonActions.
All FairCom JSON APIs can be tested using API Explorer. The JSON APIs include JSON Admin API, JSON Hub API, and JSON MQ API
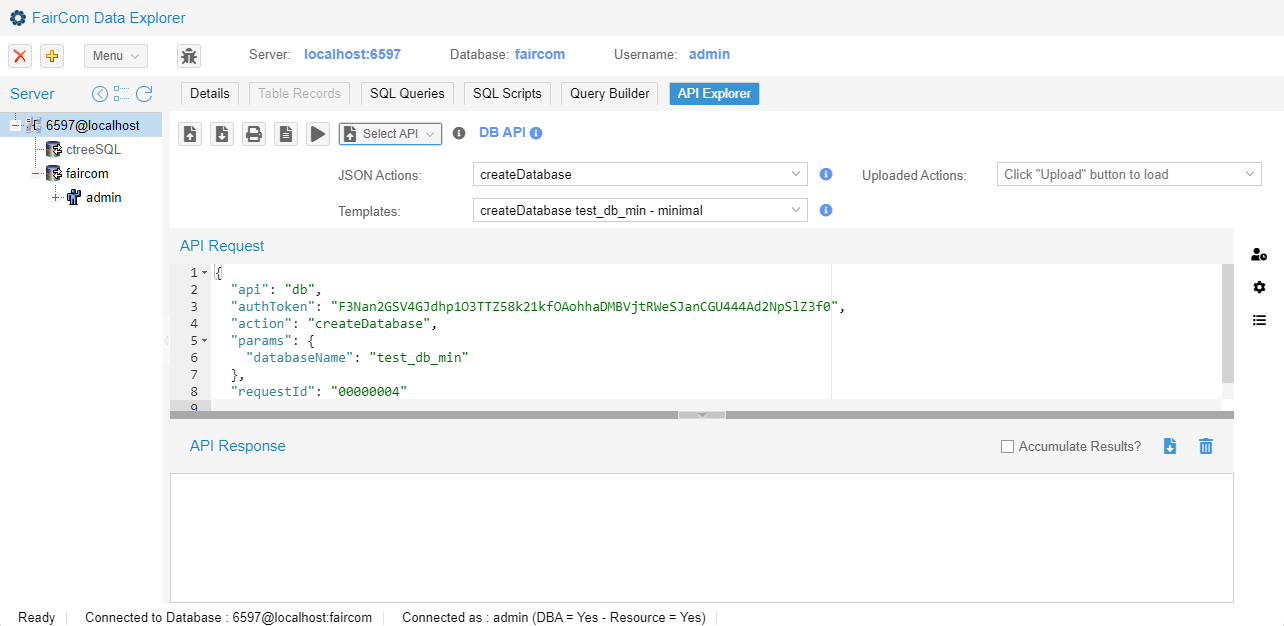
how to use API explorer UI and API explorer tutorials
API explorer
UI tutorials
how to use API explorer
select API
Connect to database
access API explorer
load example
save example
change default value
With the FairCom server running, open the browser-based menu (https://localhost:8443/) to access the FairCom graphical user interfaces.
Note
See Manage certificate warnings for issues accessing the tools.
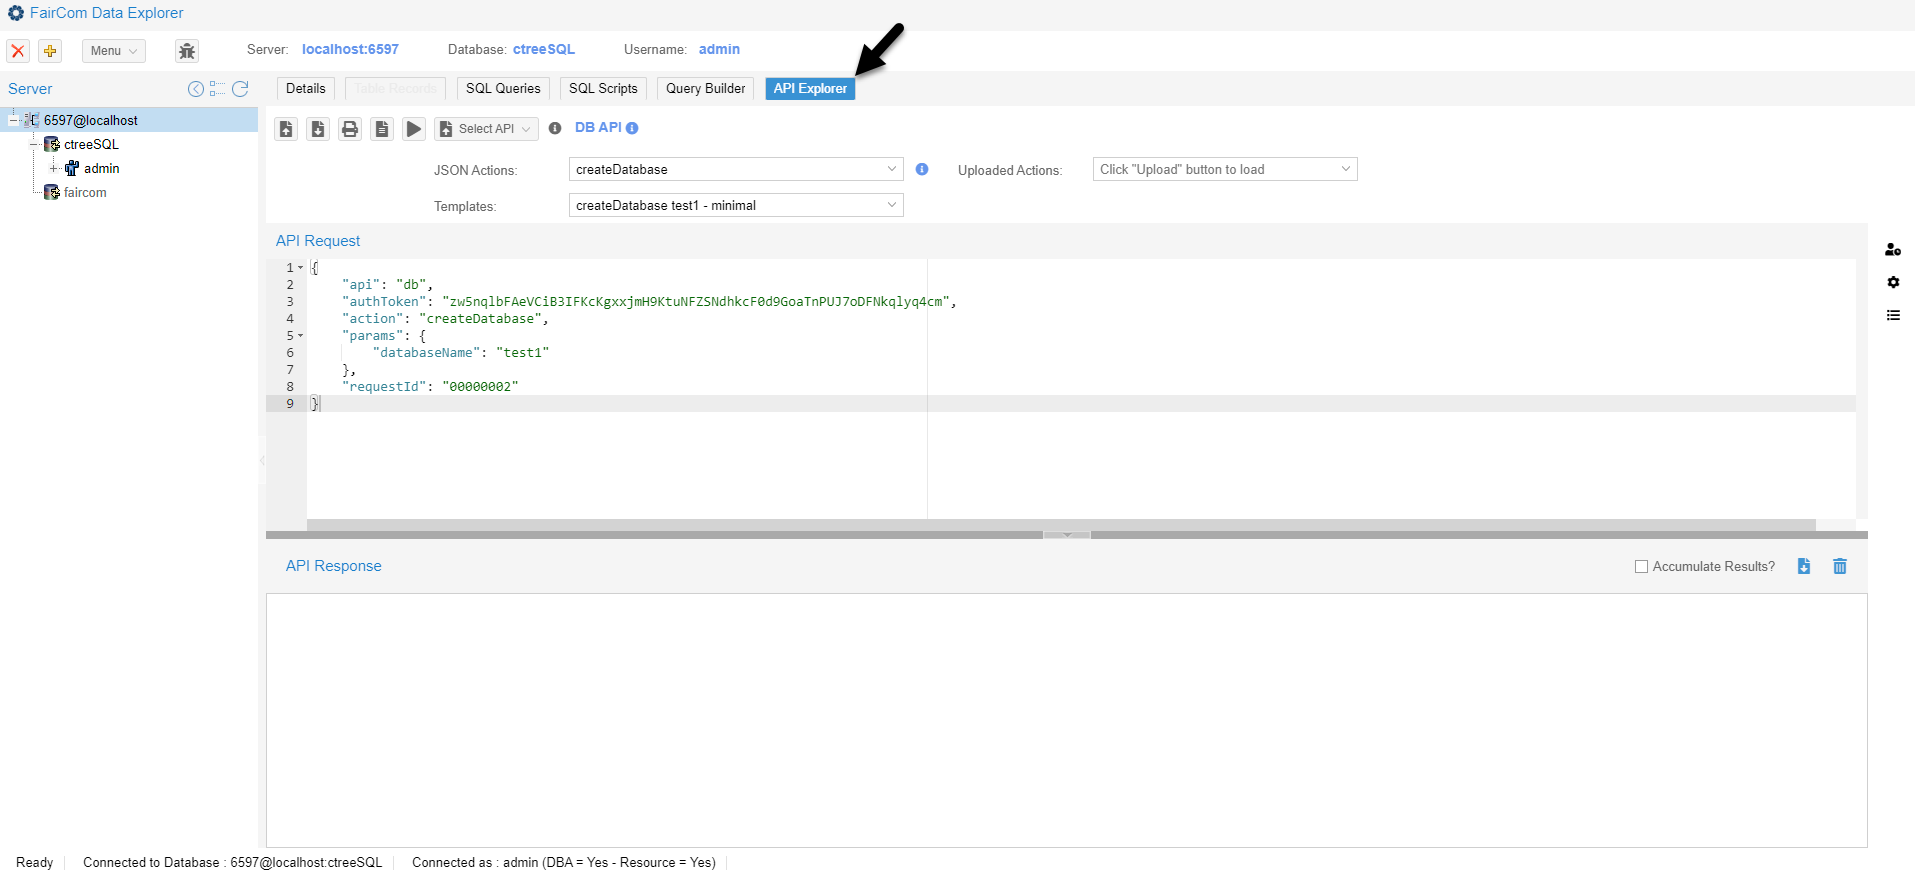
Access the API Explorer with either Data Explorer or MQ Explorer:
In the Data Explorer, through the API Explorer tab.
In the MQ Explorer, through the Control menu (
 ).
).
There are three ways you can connect to a database with a new session.
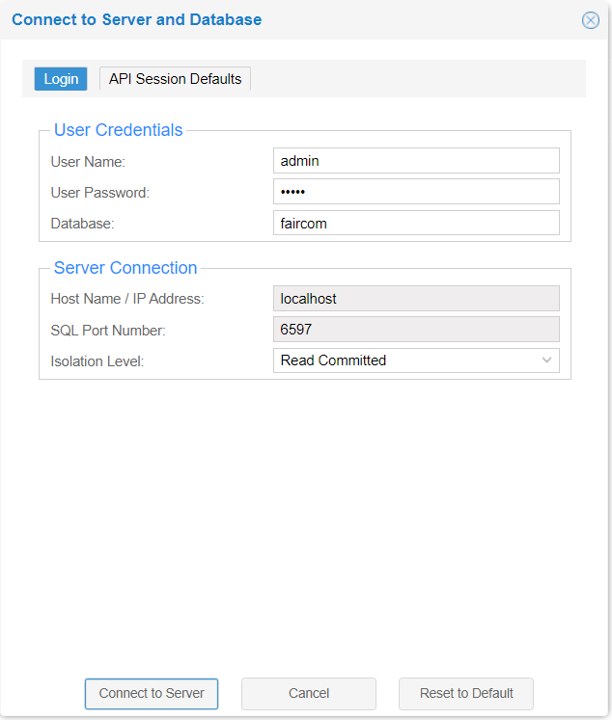
Connect to a database with no prior connection
Select the database you wish to connect to in the Server navigation window.
Click in the New Session pop-up window.

Click in the Connect to Server and Database window (see Figure 1, “Connect to Server and Database window”).
Observe your database in the new session.
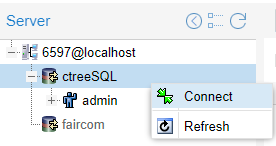
Right-click on a database you have a current connection to
Right-click the database you wish to connect to in the Server navigation window and click Connect (
 ).
).
Click in the Connect to Server and Database window (see Figure 1, “Connect to Server and Database window”).
Observe the connection to the database you selected in a new session (a new browser tab).
Select a database that you have a current connection to
Select the database you wish to connect to in the Server navigation window.
Select Connect (
 ) from the Menu dropdown menu.
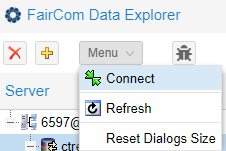
Click in the Connect to Server and Database window (see Figure 1, “Connect to Server and Database window”).
Observe the connection to the database you selected in a new session (a new browser tab).
Click Select API to open the API dropdown menu.

Select from the list of available APIs:
JSON Admin API
JSON DB API
JSON MQ API
JSON Hub API
Observe the selected API's actions, templates, and properties.
There are four separate ways you can load a JSON action into the request window:
You can select an action from the drop-down menu. This auto-populates the request window.
You can paste an action from the clipboard into the request window.
You can load an action into the request window from text that is stored in a file.
You can manually type or modify an action in the request window.
Here we show how to load the request using the drop-down menu.
Once an API is selected, the JSON Actions drop-down menu contains a list of the actions available.
Click the JSON Actions dropdown menu.
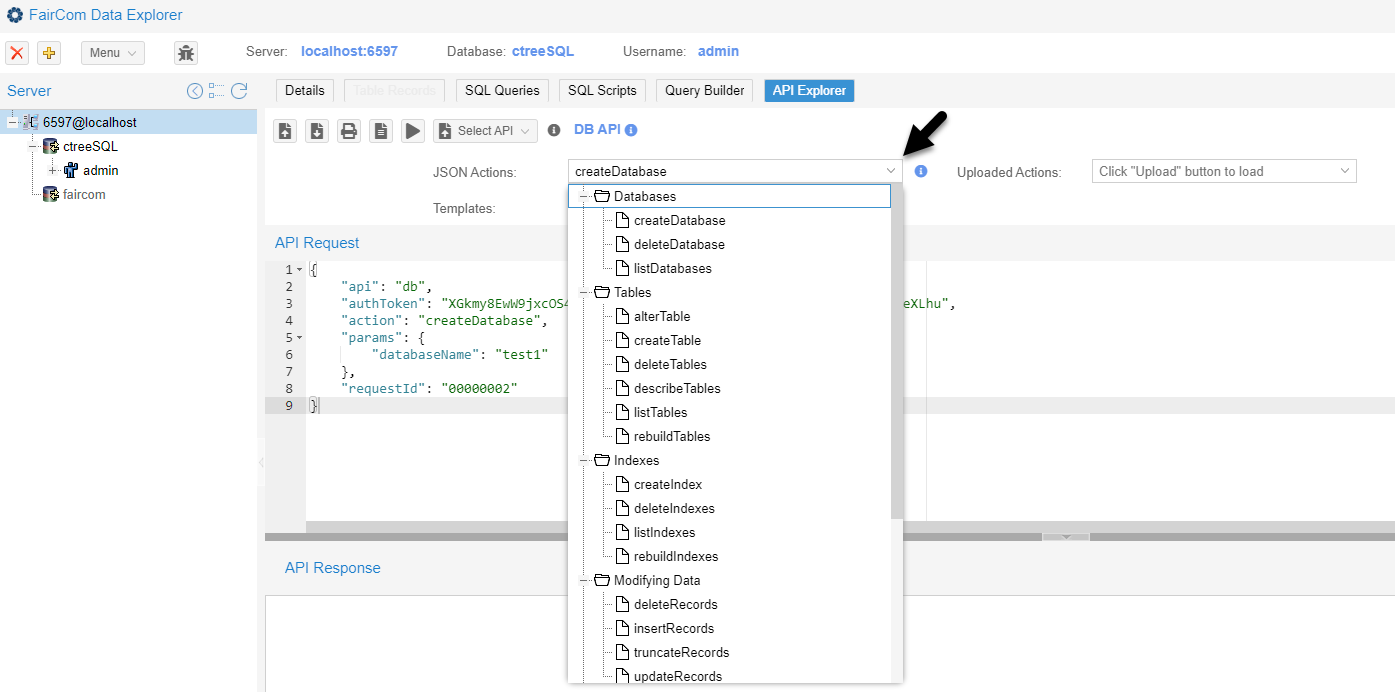
Select an action — for example,
createTable.Note
Some actions require preliminary actions to be run first — for example, before selecting and running
deleteTableyou must first have selected and runcreateTable.Observe the JSON request example in the API Request editor.
All API actions (except createSession and pingSession) require a valid authToken property value.
Click the Apply defaults to JSON request icon (
 ).
).Observe your supplied, valid
authTokenproperty value.Note
When API Explorer first runs, it automatically runs the
createSessionaction, creating a server session and returning a validauthTokenvalue. API Explorer uses this value when you click the Apply defaults to JSON request icon after you load examples from action templates.If you wish to use a different
authTokenthan the one supplied atcreateSession, use the Property Defaults feature to set theauthTokento a different authorization code.
Error 60025
"errorCode": 60025,
"errorMessage": "Invalid parameter - Missing authToken parameter in the request. The only actions that do not require authToken are createSession and pingSession in the admin API."
Error 60031
"errorCode": 60031,
"errorMessage": "Not possible to find valid session for the provided token."
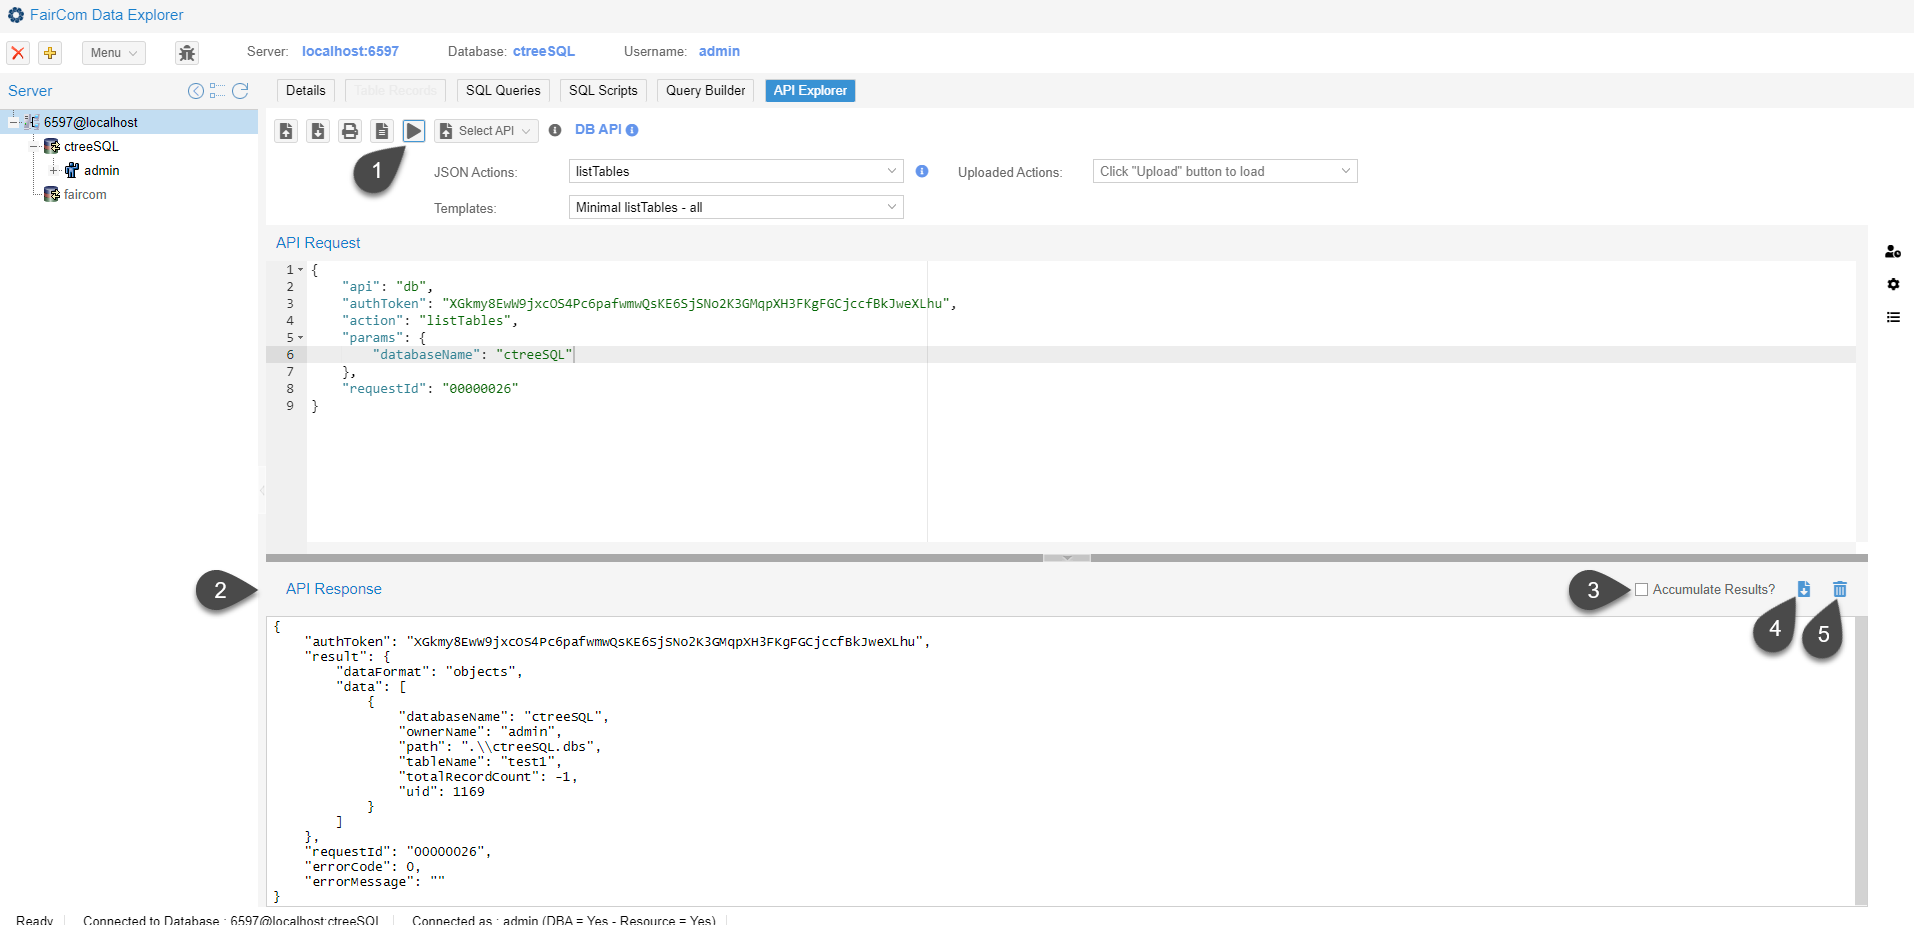
Click the Send Request icon (
 ) to run the current action with the properties in the API Request editor (see Figure 2, “Run an action”.
Tip
Keyboard shortcuts:For Windows use CTRL+ENTER.
For Linux use COMMAND+ENTER.
Observe the response and ensure the action completed successfully.
Note
"errorCode"with a value of0indicates success."errorCode"with a non-zero value indicates a failure. See Errors and contact FairCom for more information about an error.Check the Accumulate Results? checkbox in the API Response header to accumulate the results each time the API Request editor example is run.
Note
When the Accumulate Results? checkbox is left unchecked the API Explorer clears the results from the API Response viewer each time the request example is run.
Click the Download results icon (
 ) to download the results to a disk.
Click the Clear results icon (
 ) to clear the API Response viewer.
FairCom provides online documentation for each action.
Click the action's Show help for selected action icon (
 ) for available online documentation.
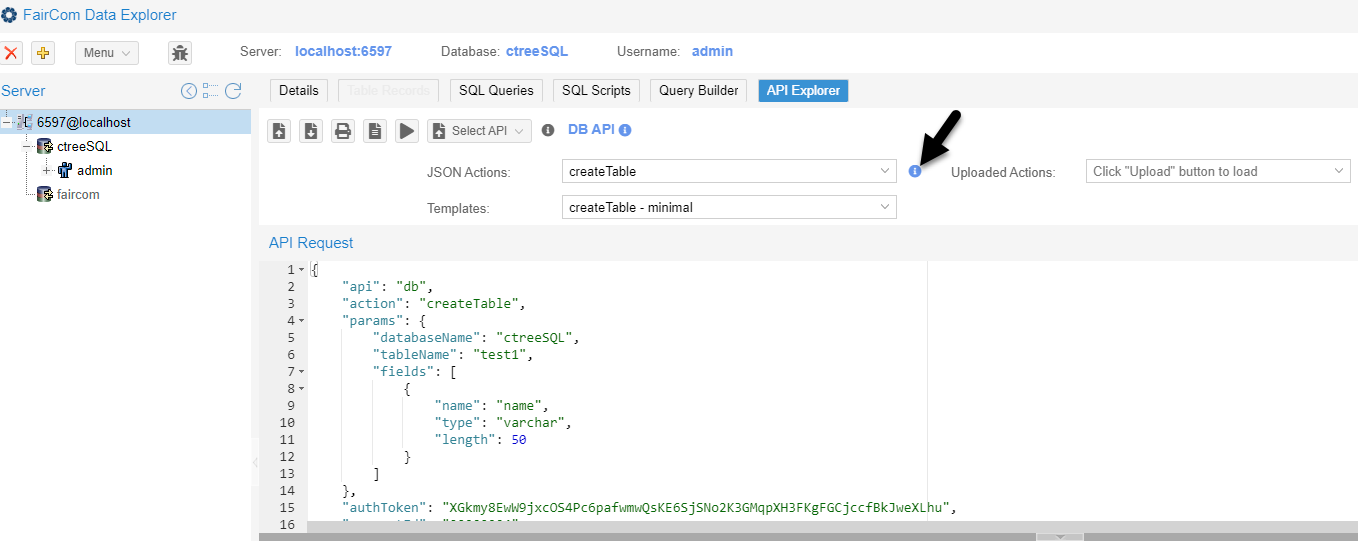
Observe the documentation in a new tab.
When you select an action from the JSON Actions dropdown menu, API Explorer loads an example JSON request into the API Request editor.
If preferred, select from pre-formatted templates in the Templates dropdown menu.
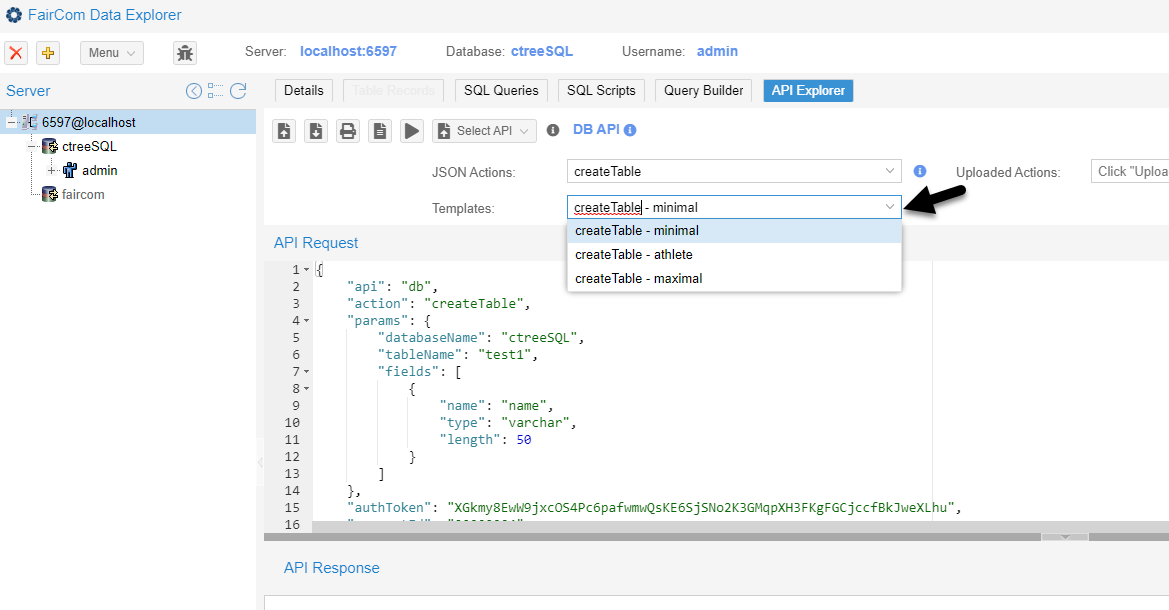
In the API Request editor, edit the existing example JSON.
Alternatively, paste or type in your own examples.
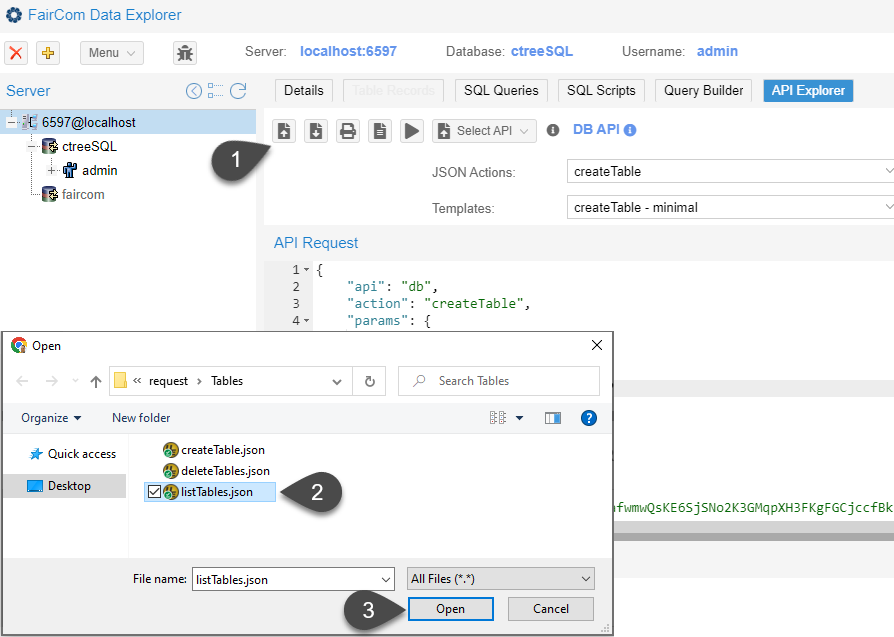
Click the Upload set of JSON files icon (
 ).
).Select the JSON example file.
Click .
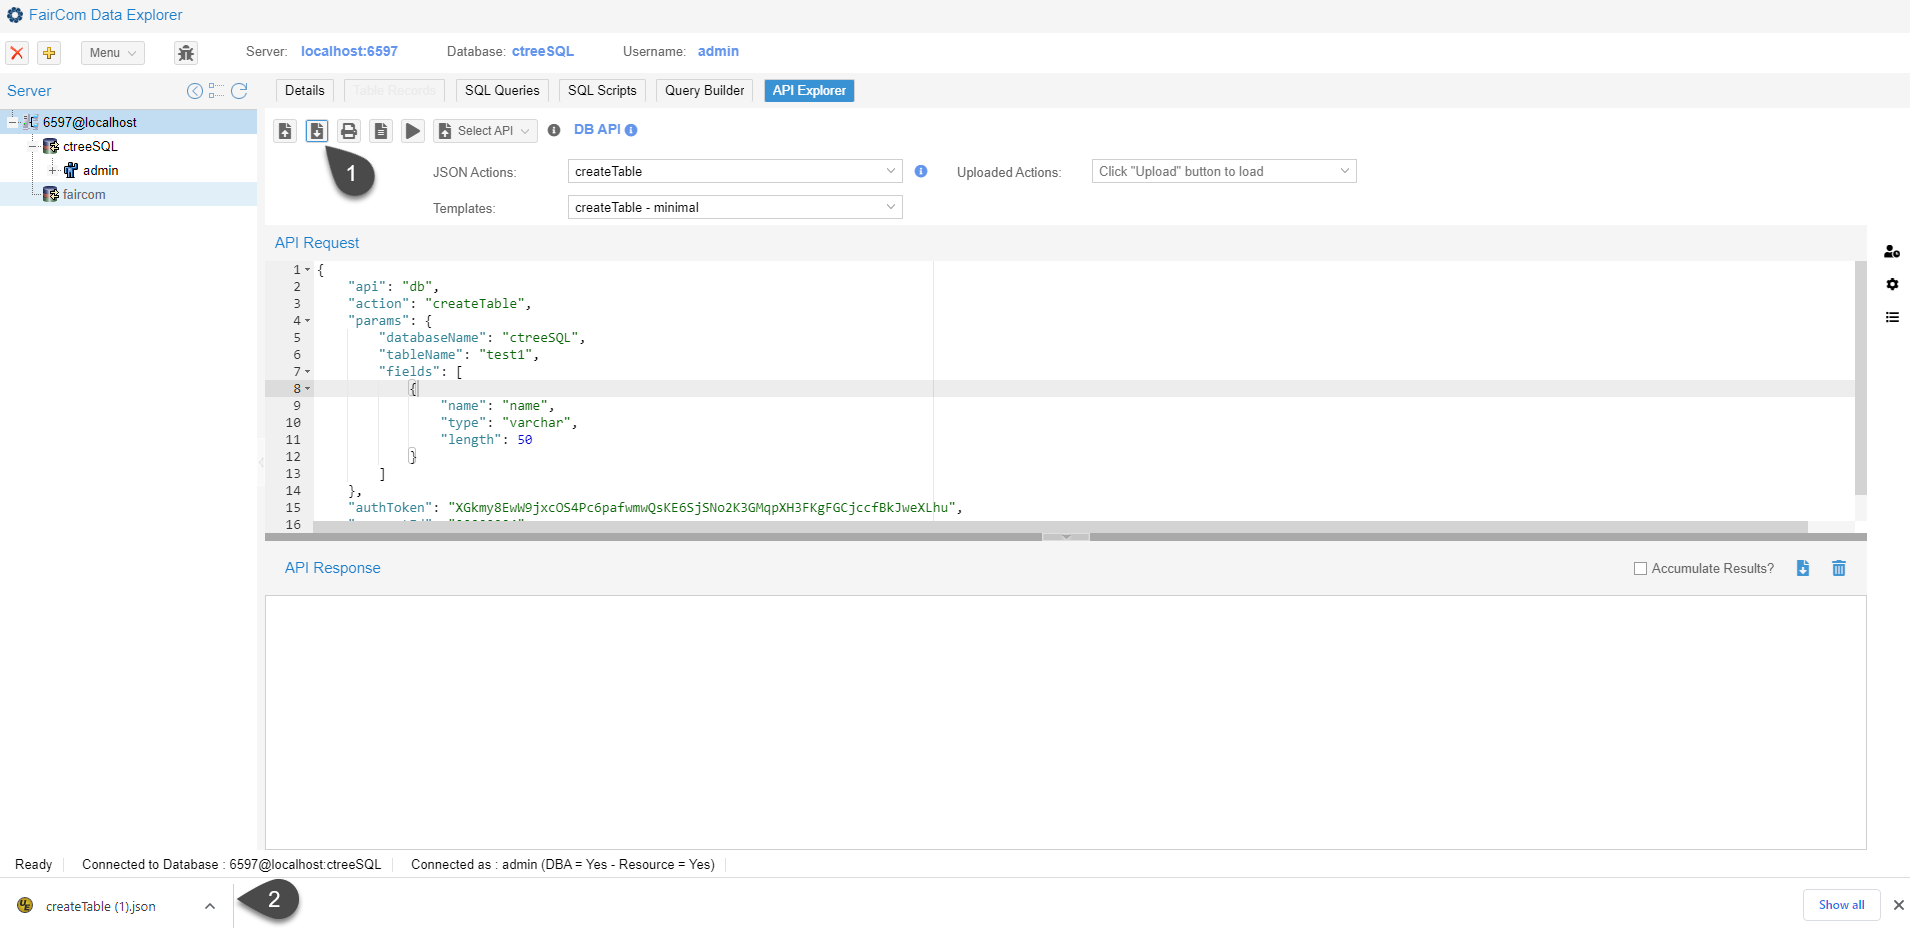
Click the Export JSON icon (
 ).
).Observe the download in the download bar.
To view the Property defaults panel, click the Show property defaults icon (
 ).
).Observe the Property Defaults panel.
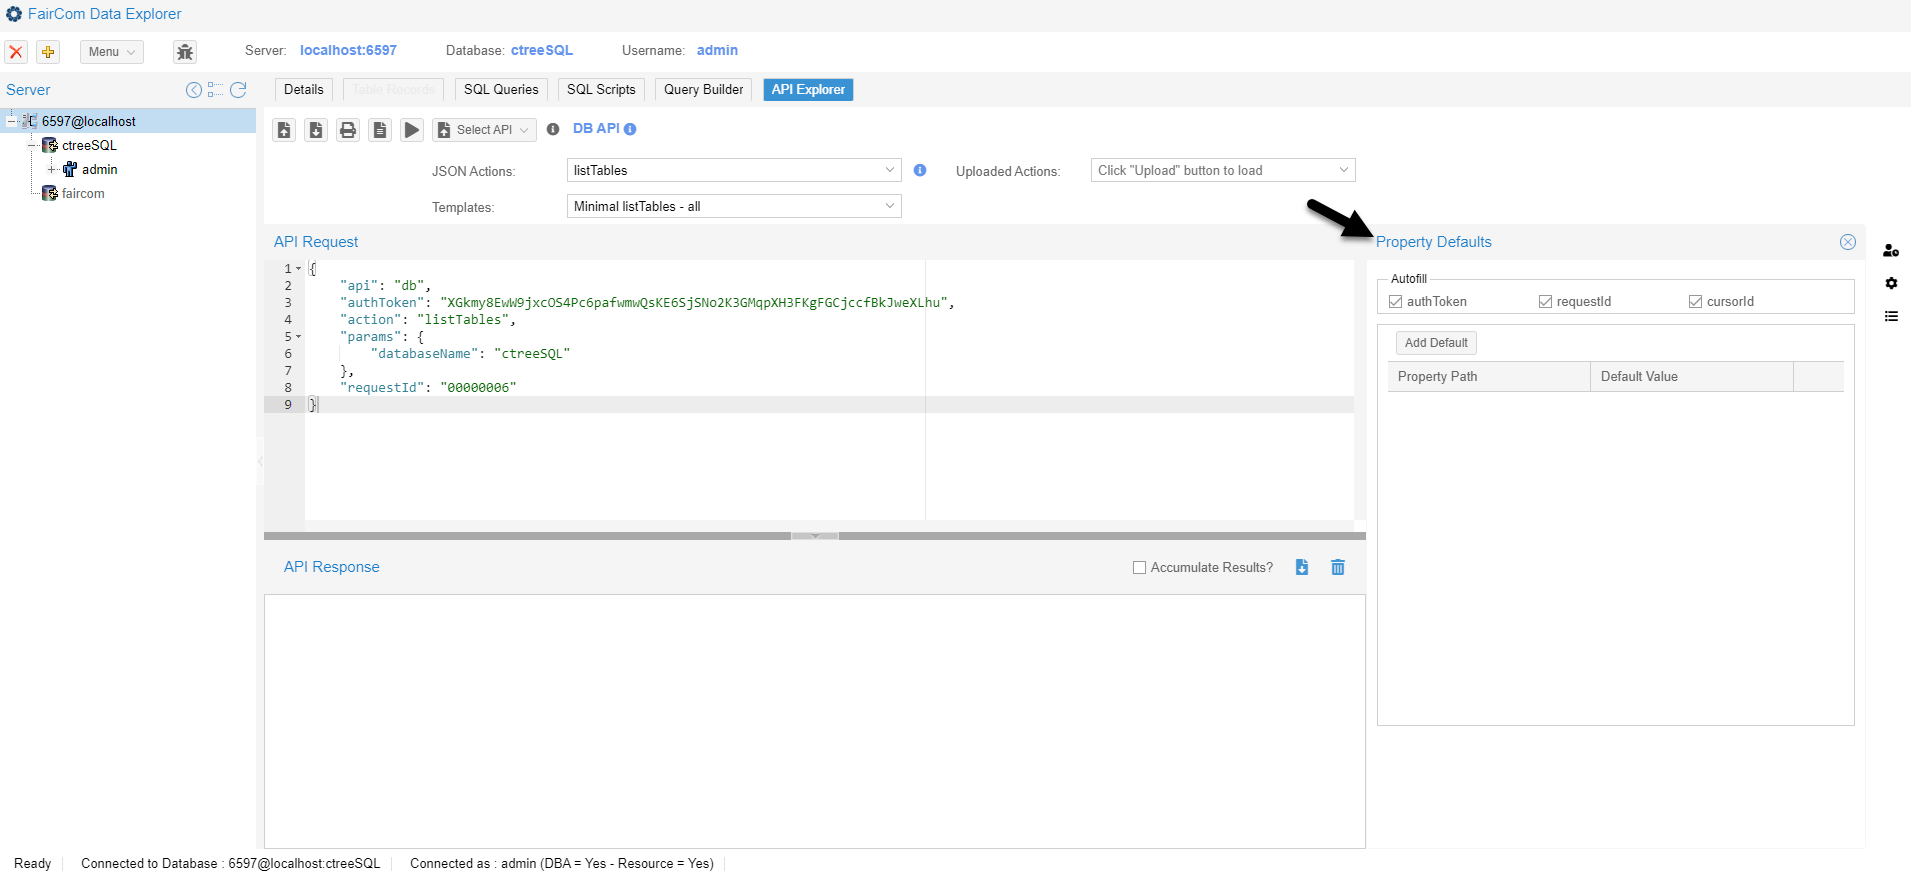
To hide the Property Defaults panel, click the Show property defaults icon (
 ) or the Close Panel icon (
 ).
).Observe the API Explorer without the Property Defaults panel.
The Property Defaults panel allows you to create a list of default values that apply to the JSON example displayed in the API Request editor.
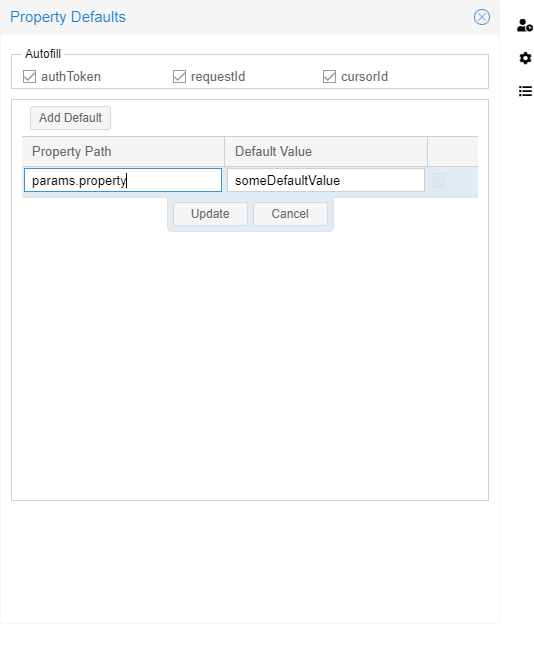
Click the Show property defaults icon (
 ) to view the Property Defaults panel.
Click the button (
 ) to add a property to the list.
Edit the Property Path to match the path that identifies the property in the JSON — for example,
params.databaseName(see Figure 5, “Property Defaults panel with an added default”).Edit the Default Value to your desired default value — for example, edit the
params.databaseNamedefault value totest_db.Click to save your changes.
Click the Apply defaults to JSON request defaults to JSON request icon (
 ) to apply the new default values.
Alternatively, click the Remove icon (
 ) next to the default property to remove it.
To hide the Property Defaults panel, click the Show property defaults icon (
 ) or the Close Panel icon (
 ).
).
To view the Action Properties panel, click the property Show all action properties icon (
 ).
).Observe the Action Properties panel.
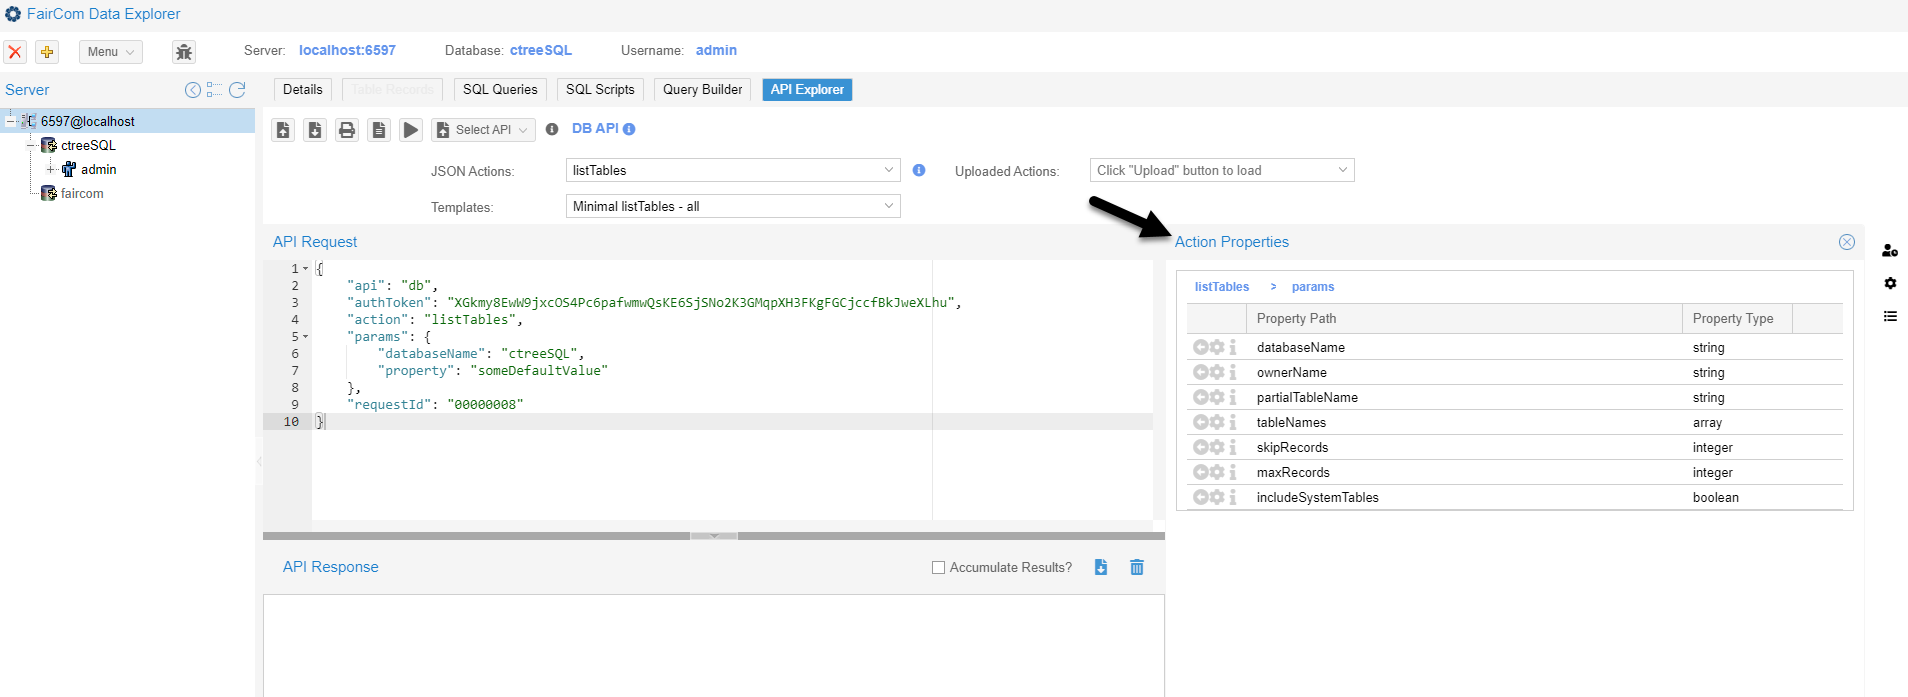
To hide the Action Properties panel, click the property Show all action properties icon (
 ) or the Close Panel icon (
 ).
).Observe the API Explorer without the Action Properties panel.
The Action Properties panel is a list of available properties for the selected action.
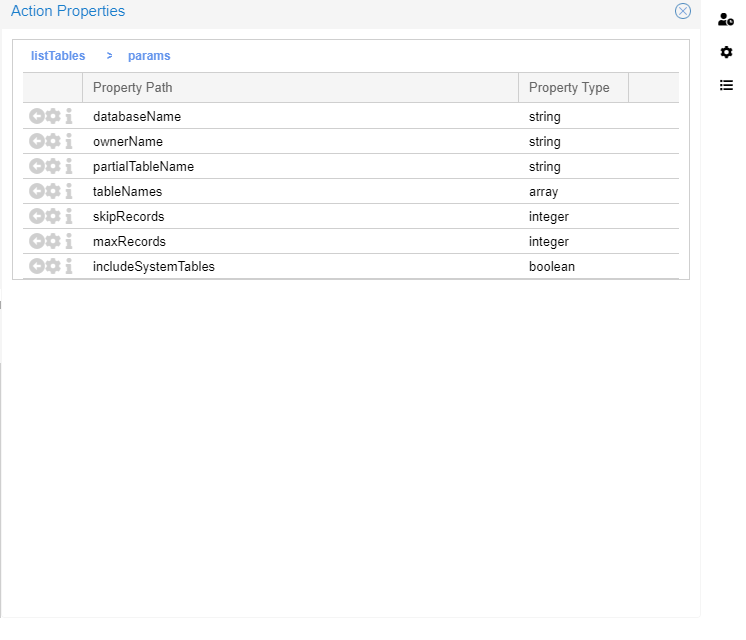
Use the Add property to request body icon (
 ) to insert a property into the API Request example.
Use the Add property to Property Defaults panel icon (
 ) to add a property to the Property Defaults list.
Use the Show property definition icon (
 ) to display any information about a property.