Expose data to accounts
Securely expose data and grant rights to user accounts
This page contains instructions for securely exposing data and granting integration table rights to user accounts.
Create a user account
Navigate to the
toolssubfolder within the<faircom> installationfolder.Open a command terminal.
Change
user1to a new username of your choice.Change
password1to a password of your choice.Run the command: sa_admin -aADMIN -pADMIN -sFAIRCOMS -oua user1 -w password1
Log into Data Explorer

Open Data Explorer in the Google Chrome browser.
In the URL textbox, paste:
https://localhost:8443/DataExplorer/Click the User Credentials tab.
If necessary, enter the username
admin.If necessary, enter the password
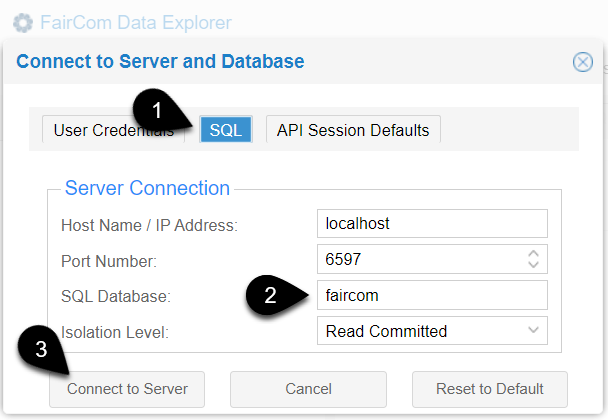
ADMIN.Click the SQL tab (callout 1 Figure 1, “Connect to Server and Database”).
Update the SQL Database to
faircom(callout 2).Click (callout 3).
Grant rights to an integration table
Important
Do not grant alter or delete rights, because integration tables must only be created and deleted through the API actions — "createIntegrationTable" and "deleteIntegrationTable".
Click on the Data Explorer SQL Scripts tab.
Type the following script in the script textbox to grant select and insert rights on an integration table to an account.
Tip
To grant only read rights, leave out all other rights but
select.grant select on admin.table1 to user1; grant insert on admin.table1 to user1; commit;
Update
table1to the integration table name of your choice.Update
user1to your username of your choice.Click .
Repeat steps Step 1 through Step 5 for any additional integration tables.
This example code grants update rights, but doing so allows an account to modify collected data.
grant update on admin.table1 to user1;