In this tutorial you will learn how to use asynchronous replication to replicate the entire database to many other servers in the same data center. Provide multiple duplicate copies of your data without impacting performance.
At least three FairCom Servers have been set up, including two as read-only, and that these servers have been registered with the Replication Manager Server.
The following steps show how to implement a replication plan in “Massive Read Scalability” mode with FairCom Server V12 zip packages. These steps apply to setting up replication between any FairCom Server types: FairCom DB, FairCom Edge, and FairCom RTG.
Connect to Replication Manager
In a web browser, navigate to https://<ReplicationManagerHostName>:19992/
Select Replication Manager.
In the Connection Options dialog, enter appropriate credentials and click Connect.
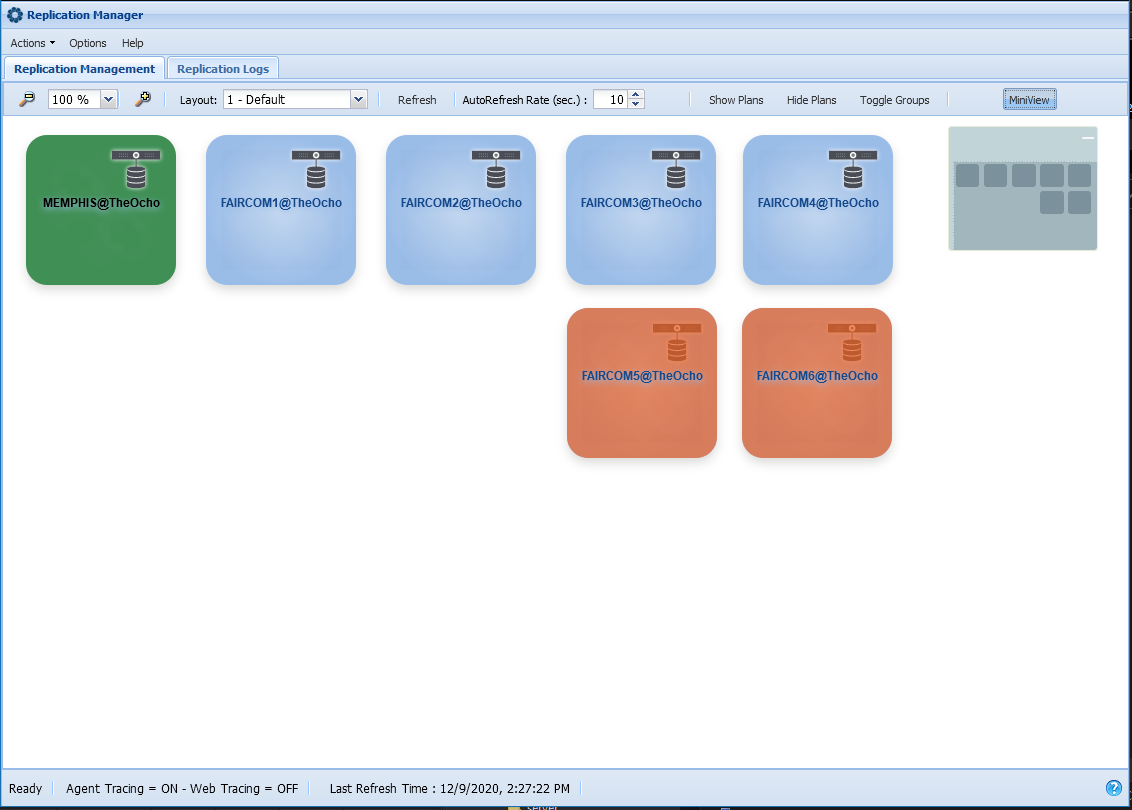
(Shown below is the view with six servers, the orange two are read-only.)
Create a Test Table
Connect FairCom SQL Explorer to the first FairCom Server by doing the following:
In a web browser, navigate to https://<ReplicationManagerHostName>:19992/
Select SQL Explorer.
In the Connect to Server and Database dialog, enter the Hostname (or IP address) and Port Number (19791) for the first FairCom Server.
With appropriate credentials entered, click Connect to Server.
Right-click on Tables in the left-tree and select Create New Table:
Populate the table schema and create a new table:
Click Create. A modal window will say Table Successfully Created. Click OK on that window.
Set a Replication Plan
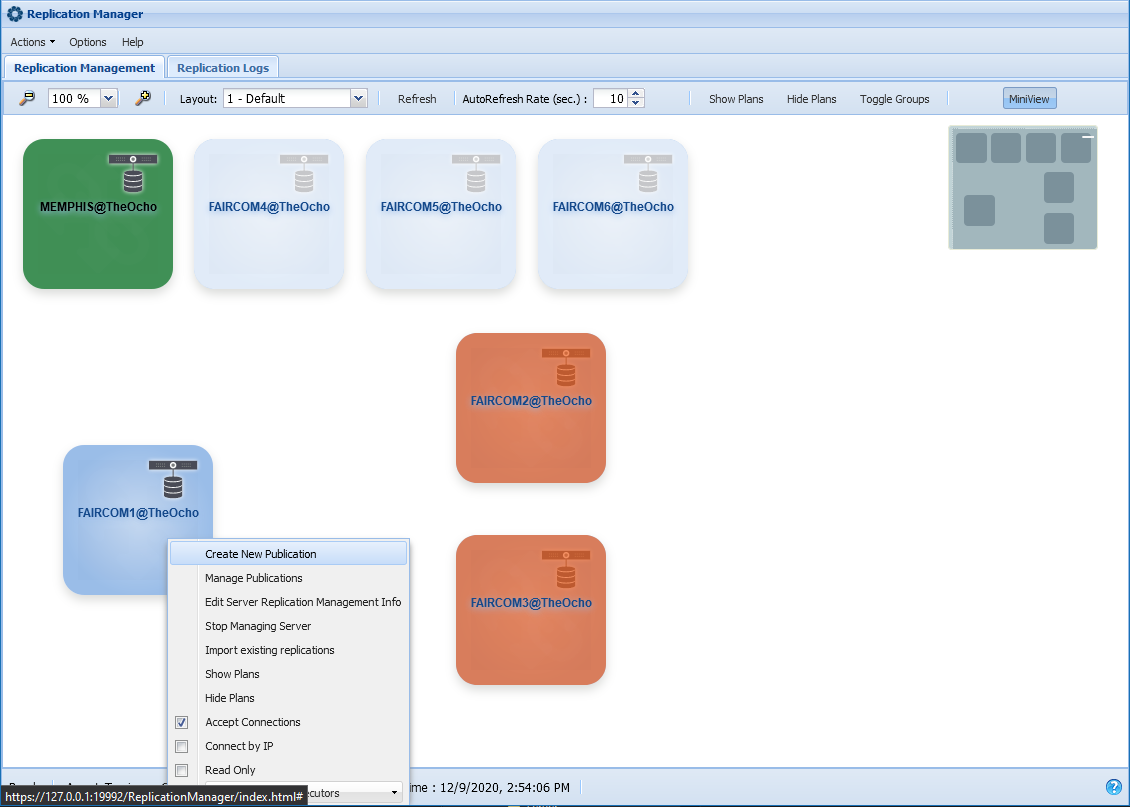
In Replication Manager, drag three servers down into a configuration such as that shown below so that relationships can be drawn between them. Right-click on the replication-source FairCom Server (where a table was just created) and select Create New Publication.
Check the Published check box for the table just created and click Save & Close:
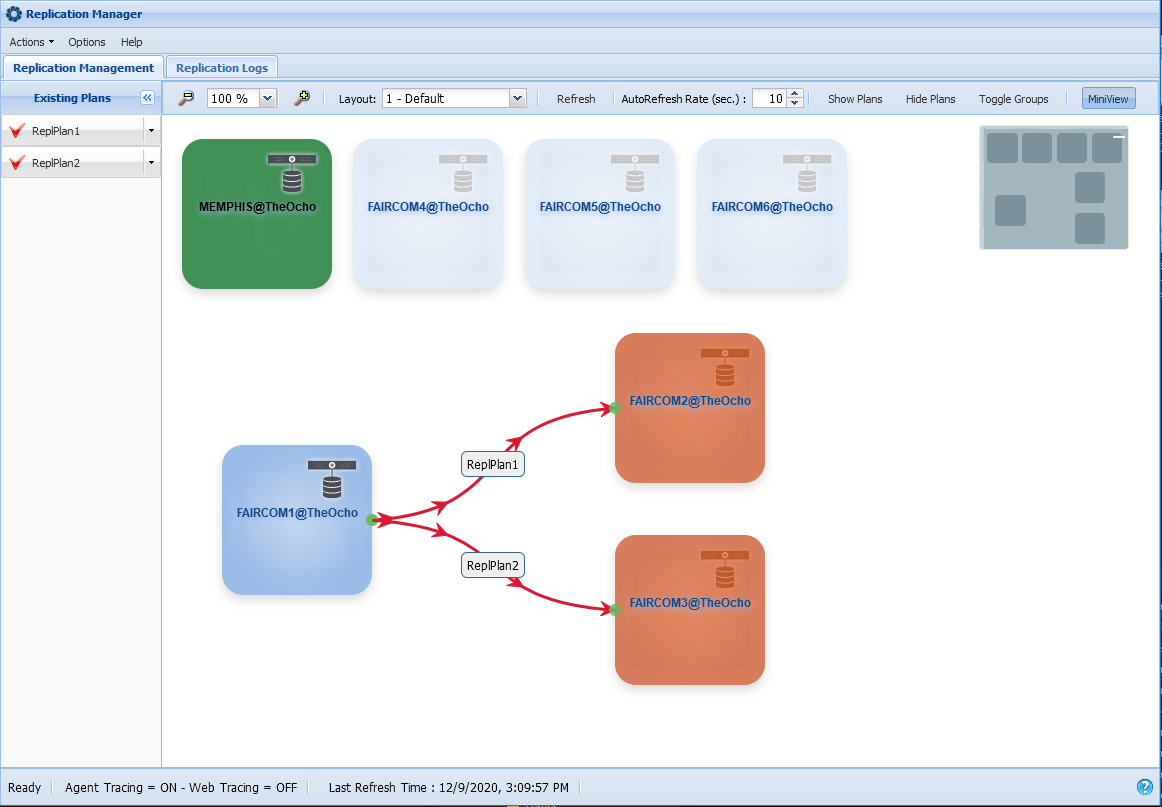
Create a Replication Plan between the source server and the destination servers by dragging and dropping a line between them, from an edge of the source server icon onto each destination server. For each line, a Replication Plan will be created and the following dialog will be displayed. Note that the publication just created in the previous step will be listed on the left panel:
Click Subscribe for the publication just created:
Click Save, subscribing with default options:
Click Close to finalize the Replication Plan creation.
Repeat for all additional destination-servers. Note that for each Replication Plan, the same Publication should be used (e.g. "Publication1")
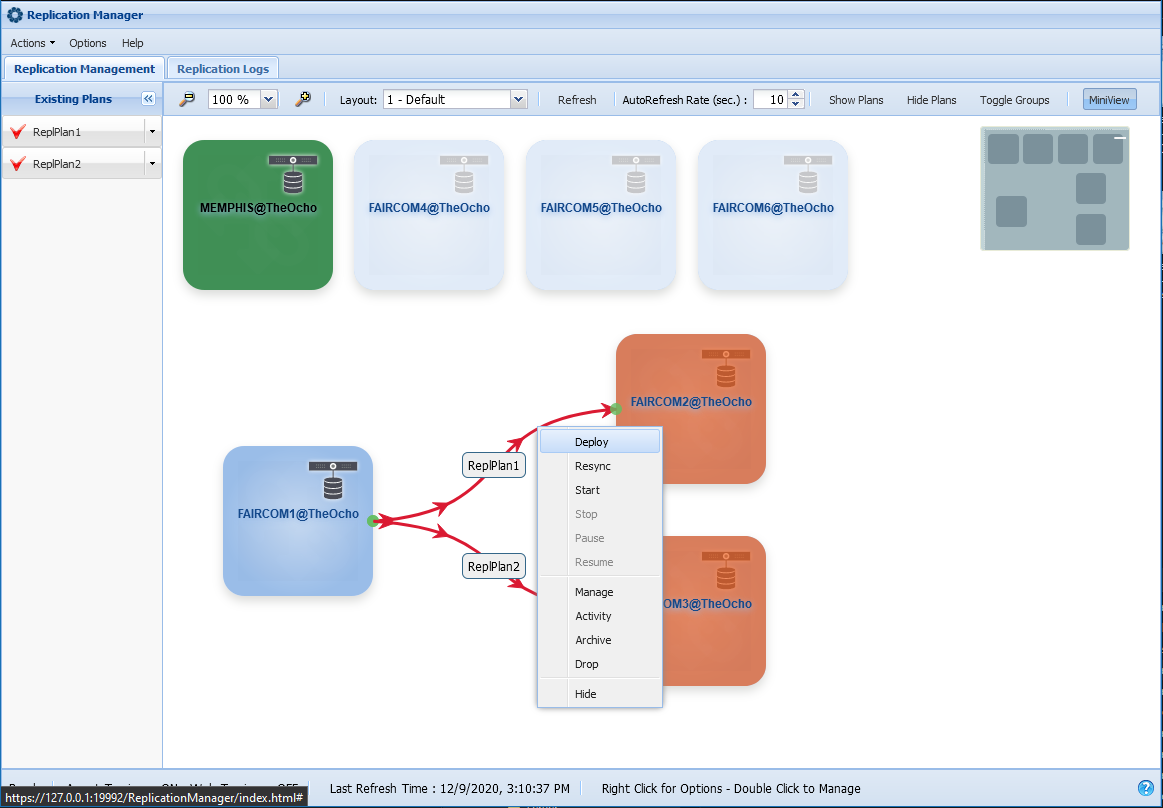
Right-click over each of the Replication Plan lines and select Deploy:
At this moment, the Replication Plan deployment will execute the following actions:
Copies the published files over to the Destination servers.
Starts the replication process, keeping the destination servers in sync with the source.
 Massive Read Scalability