In this chapter you will learn how to use asynchronous replication to replicate an entire database or subsets of it across many remote servers and clients, horizontally scaling the data to support very large numbers of read-only users.
For this tutorial we will model replication across FairCom Servers in three separate data centers: Datacenter1, Datacenter2, and Datacenter3. These data centers will be represented in vertical columns in Replication Manager.
The following steps show how to implement a replication plan in Global Distributed Read Scalability mode with FairCom Server V12 zip packages. These steps apply to setting up replication between any FairCom Server types: FairCom DB, FairCom Edge, and FairCom RTG.
Connect to Replication Manager
In a web browser, navigate to https://<ReplicationManagerHostName>:19992/
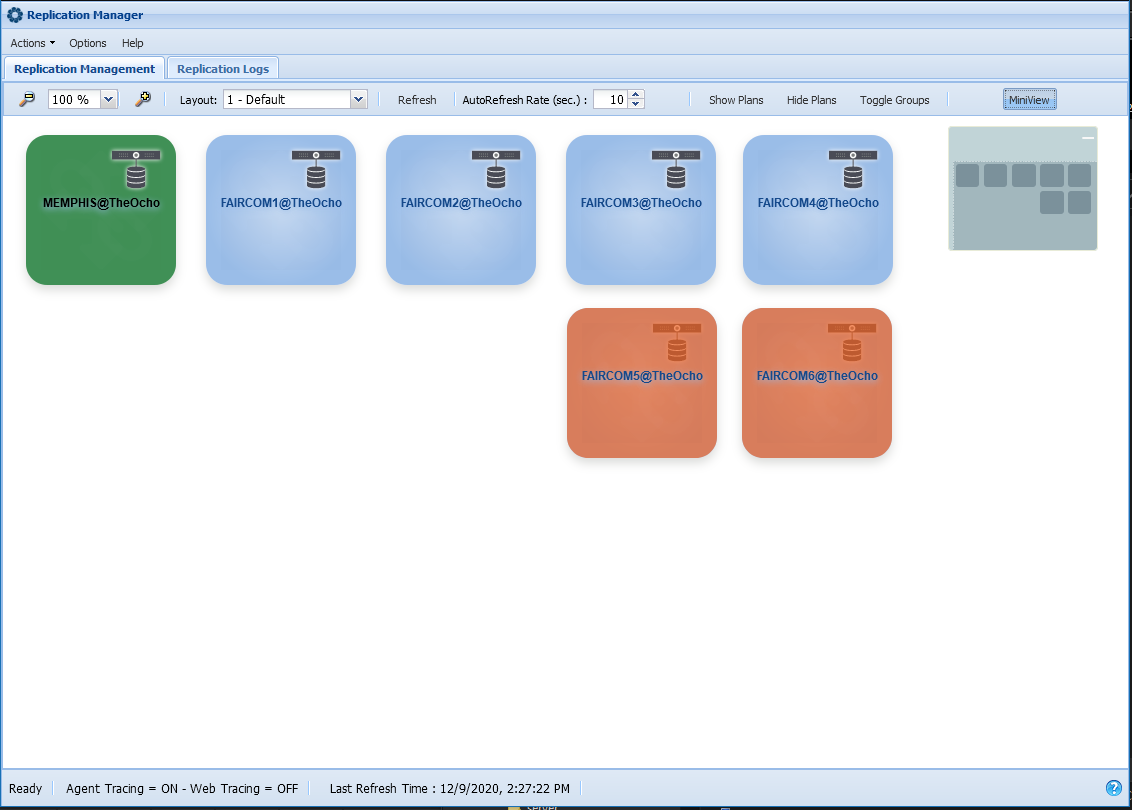
Select Replication Manager.
In the Connection Options dialog, enter appropriate credentials click Connect.
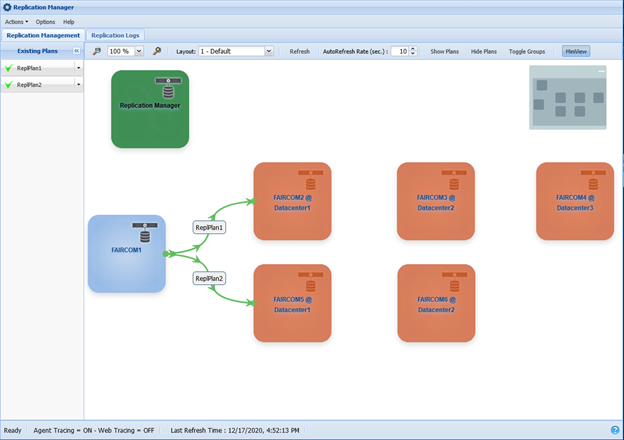
(Shown below is the view with six servers, the orange two are read only, which result from the common setup steps above.)
Set FairCom Servers to Read-Only
Set five of the FairCom Servers to be read-only by doing the following:
Ensure the line below is present (and uncommented) in the config/ctsrvr.cfg file:
READONLY_SERVER YES
The view in Replication Manager should now look similar to the following:
Note: Displayed server names can be changed in the Replication Manager UI by right clicking on the server and selecting "Edit Server Replication Management Info". Changes made here will only affect the name displayed in this UI, not the actual host or FairCom Server name.
Create a Test Table
Connect FairCom SQL Explorer to the first FairCom Server by doing the following:
In a web browser, navigate to https://<ReplicationManagerHostName>:19992/
Select FairCom SQL Explorer.
In the Connect to Server and Database dialog, enter the Hostname (or IP address) and Port Number (19791) for the first FairCom Server.
With appropriate credentials entered click Connect to Server.
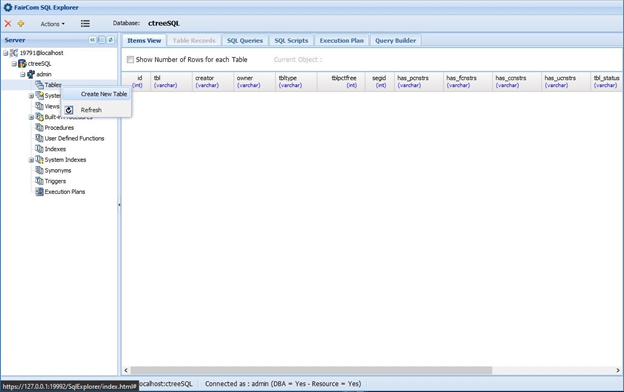
Right-click on Tables and select Create New Table:
Populate the table schema and create a new table:
Click Create. A modal window will say “Table Successfully Created”. Click OK to exit that window.
Set a Replication Plan
Set up a replication plan to multiple FairCom Servers within a data center.
(Below, each column of orange read-only servers represents a different data center)
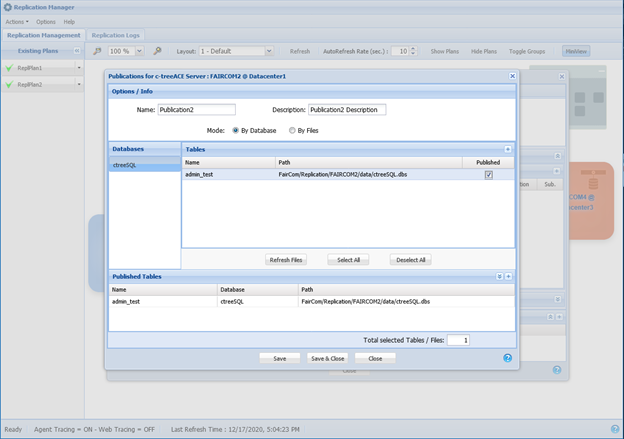
In Replication Manager, right-click on the replication-source FairCom Server (where a table was just created) and select Create New Publication.
Check the Published check box for the table just created and click Save & Close:
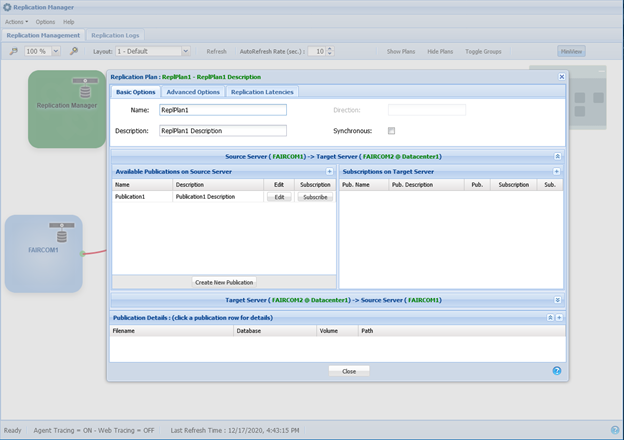
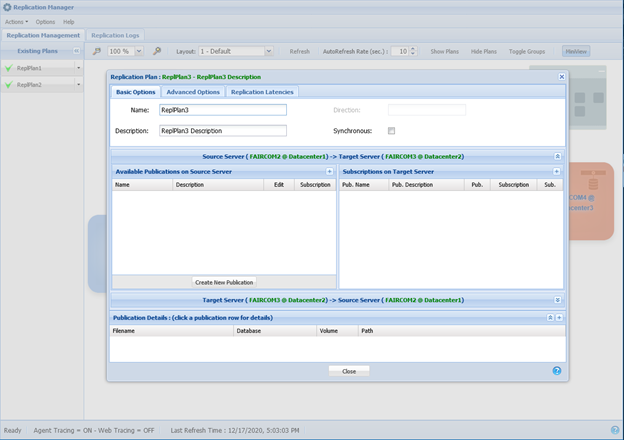
Create a Replication Plan between the source server and the destination servers by dragging and dropping a line from the Source to the Destination. For each line connecting a Source and Destination Server, a Replication Plan will be created and the following dialog will be displayed:
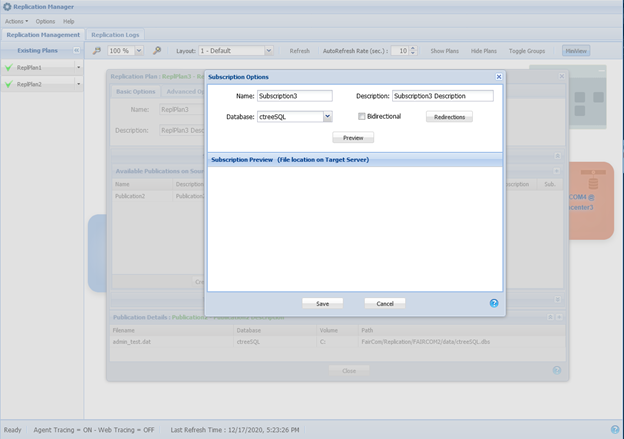
Click Subscribe for the publication just created:
Click Save, subscribing with default options:
Click Close to finalize the Replication Plan creation:
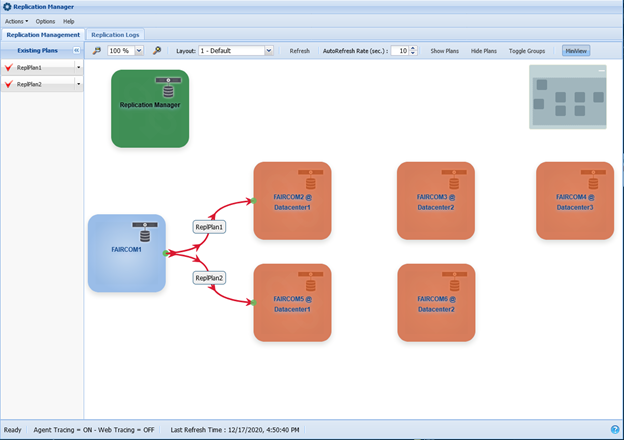
Follow the steps above to create a Replication Plan between the Source Server (light blue) and another destination server (FairCom5 in view below):
Note: ReplPlan2 can use the same publication as ReplPlan1.
Right-click over both Replication Plan lines just created and select Deploy:
At this point, the Replication Plan deployment will execute the following actions:
It will copy the published files over to the Destination servers.
It will start the replication process, keeping the destination servers in sync with the source.
Set up additional replication plans from the read-only servers in the first datacenter to the servers in the second datacenter. (i.e. FairCom2 @ DataCenter1 to FairCom3 @ DataCenter2 and FairCom4 @ Datacenter1 to FairCom5 @ Datacenter2):
Note that setting up a Replication Plan must be done from a source server with data already on the server. In the example below, Replication Plans need to be set up in left-to-right order.
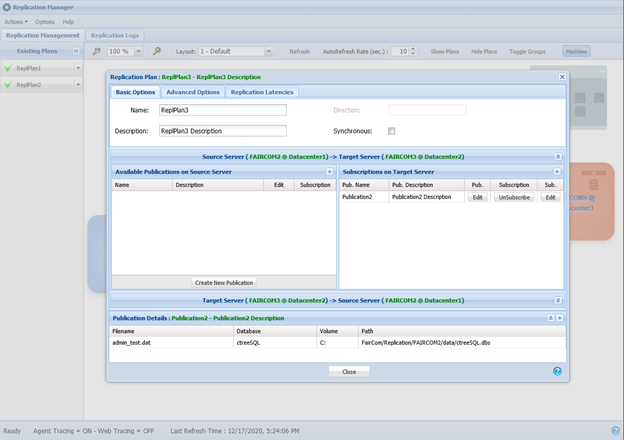
Drag a line from a read-only server in Datacenter1 to a server in Datacenter2 in order to create a Replication Plan between them. The new Replication Plan dialog should be displayed:
Click Create New Publication to bring up the publication editor:
The table should be listed (typically prepended with “<username>_”). If the table is not listed, go back to step 3 and check your work. Ensure the Published option is checked and click on Save & Close:
The new publication should be listed in the left panel. Click Subscribe:
Click Save to create the subscription based on the default options:
Click Close to confirm the Replication Plan creation:
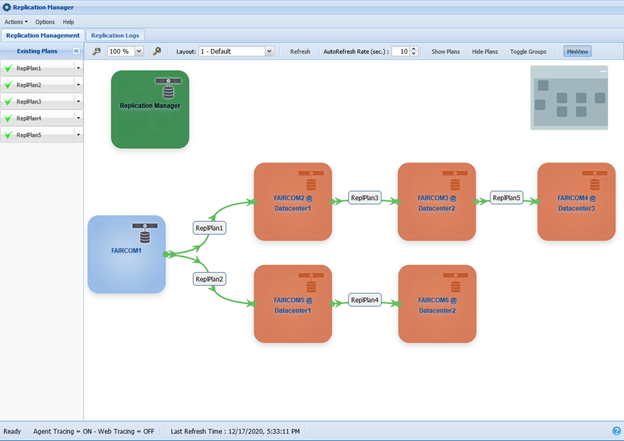
Create and deploy replication plans for the remaining servers. The final result should look similar to the following:
Replication is now live and scaled between multiple servers in multiple data centers. Additional tables and servers can be added as needed.
 Global Distributed Read Scalability