In this chapter you will learn how to selectively replicate shared data from a centralized database across and within data centers to globally distributed applications to ensure they all use the same master and lookup data.
Following are the basic steps for implementing a replication plan for "Global Shared Data" mode with FairCom Server V12 zip packages. These steps apply to setting up replication between any FairCom Server types: FairCom DB, FairCom Edge, and FairCom RTG.
Connect to Replication Manager
In a web browser, navigate to https://<ReplicationManagerHostName>:19992/
Select Replication Manager.
In the Connection Options dialog, enter appropriate credentials and click Connect.
(If you have set up additional servers, your view will see more servers than shown below. This tutorial will utilize two FairCom Servers along with the FairCom Replication Manager Server.)
Create Test Tables
Connect FairCom FairCom SQL Explorer to the first FairCom Server by doing the following:
In a web browser, navigate to https://<ReplicationManagerHostName>:19992/
Select FairCom SQL Explorer.
In the Connect to Server and Database dialog, enter the Hostname (or IP address) and Port Number (19791) for the first FairCom Server.
With appropriate credentials entered, click Connect to Server.
Right-click on Tables and select Create New Table.
Populate table schema and create a new table:
Click Create. A modal window will say "Table Successfully Created". Click OK on that window.
Connect FairCom FairCom SQL Explorer to the second FairCom Server by doing the following:
Click the yellow "+" in the FairCom SQL Explorer window (upper-left).
In the Connect to Server and Database dialog, enter the Hostname (or IP address) and Port Number (19801) for the second FairCom Server.
With appropriate credentials entered, click Connect to Server.
Repeat the steps above (for creating a table in the first FairCom Server) to create a new table in the second FairCom Server, naming this table differently (e.g. "test2").
Set a Replication Plan
In Replication Manager, drag two servers down into a configuration as shown below so that relationships can be drawn between them.
Create a Replication Plan by dragging a line from the first FairCom server to the second. Make sure the mouse is toward the edge of one server icon before clicking and dragging the line to the second. The Replication Plan dialog should appear:
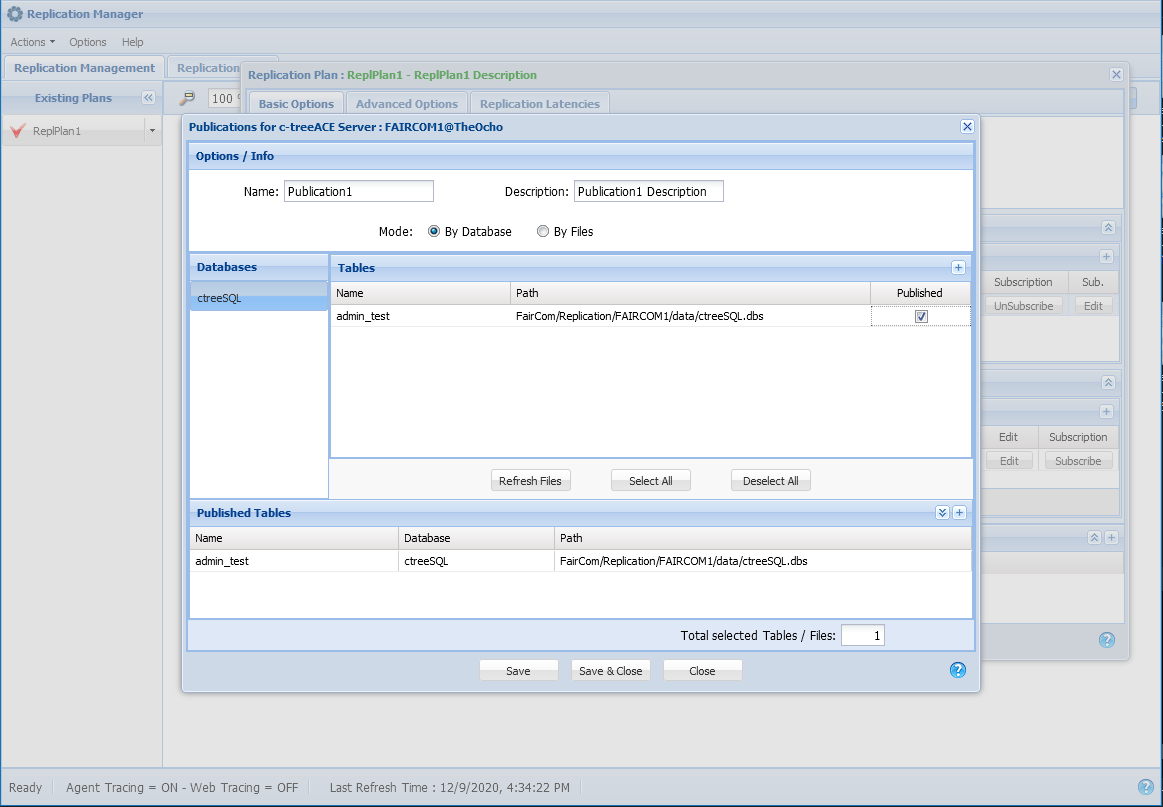
Click the Create New Publication button:
The table should be listed (typically prepended with "<username>_"). If the table is not listed, re-check the procedures in the previous step. Be sure the Published option is checked and click on Save & Close:
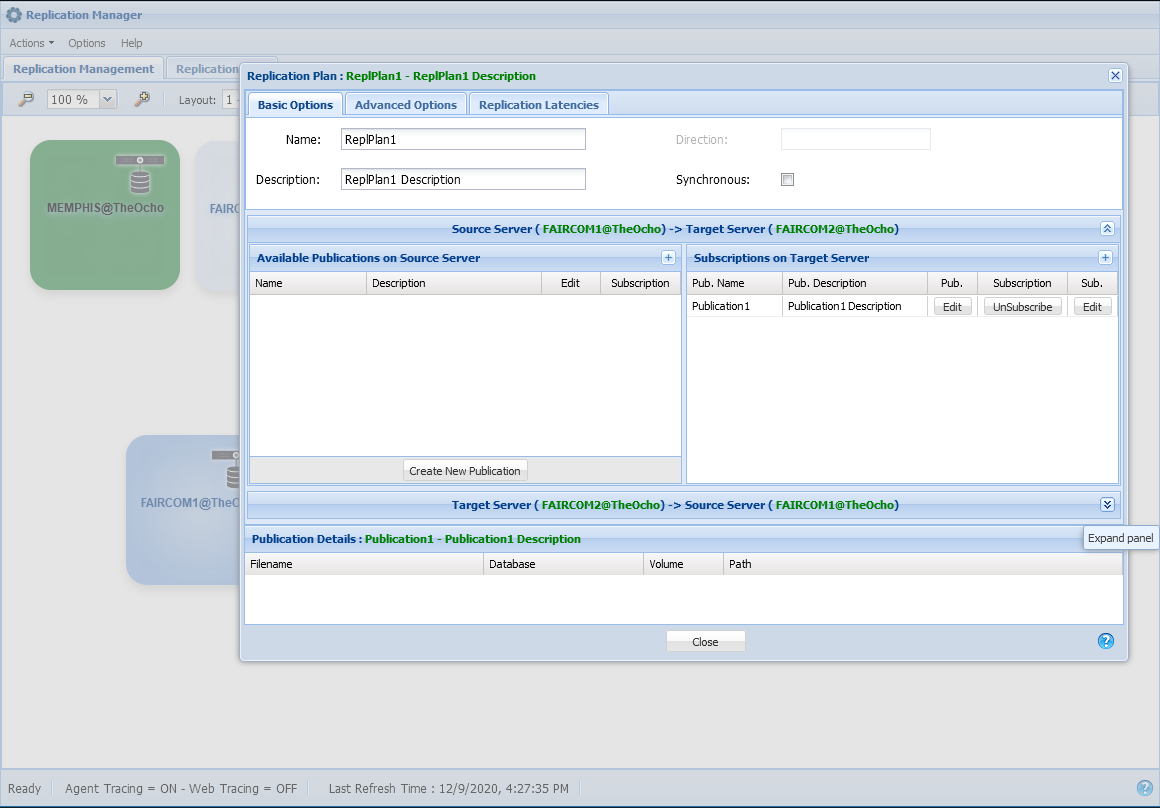
The new publication should be listed in the left panel. Click the Subscribe button:
Click Save to create the subscription based on the default options:
Note: Click the Redirections button and verify that the source server is shown on the left, and the target server is on the right.
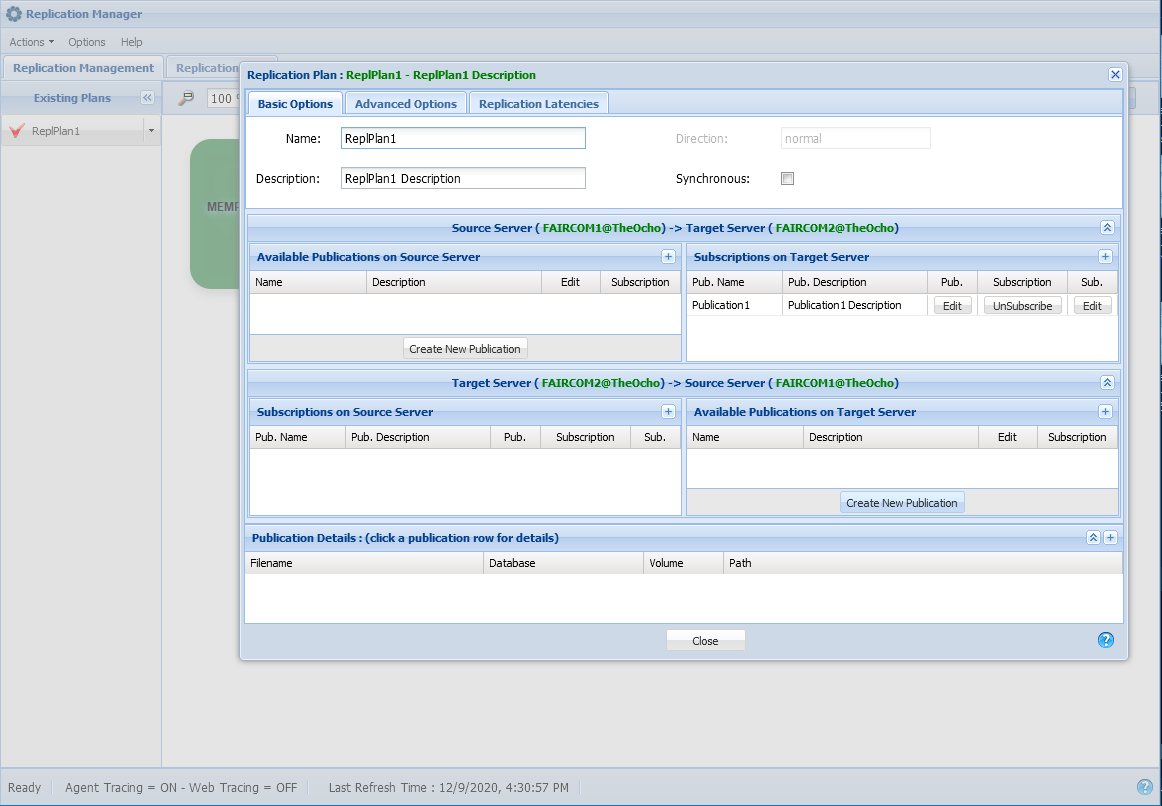
Click the second panel (collapsed by default), with a directional arrow from the "Target Server" to the "Source Server":
Click the Create New Publication button on the bottom right panel to create a publication on the second FairCom server:
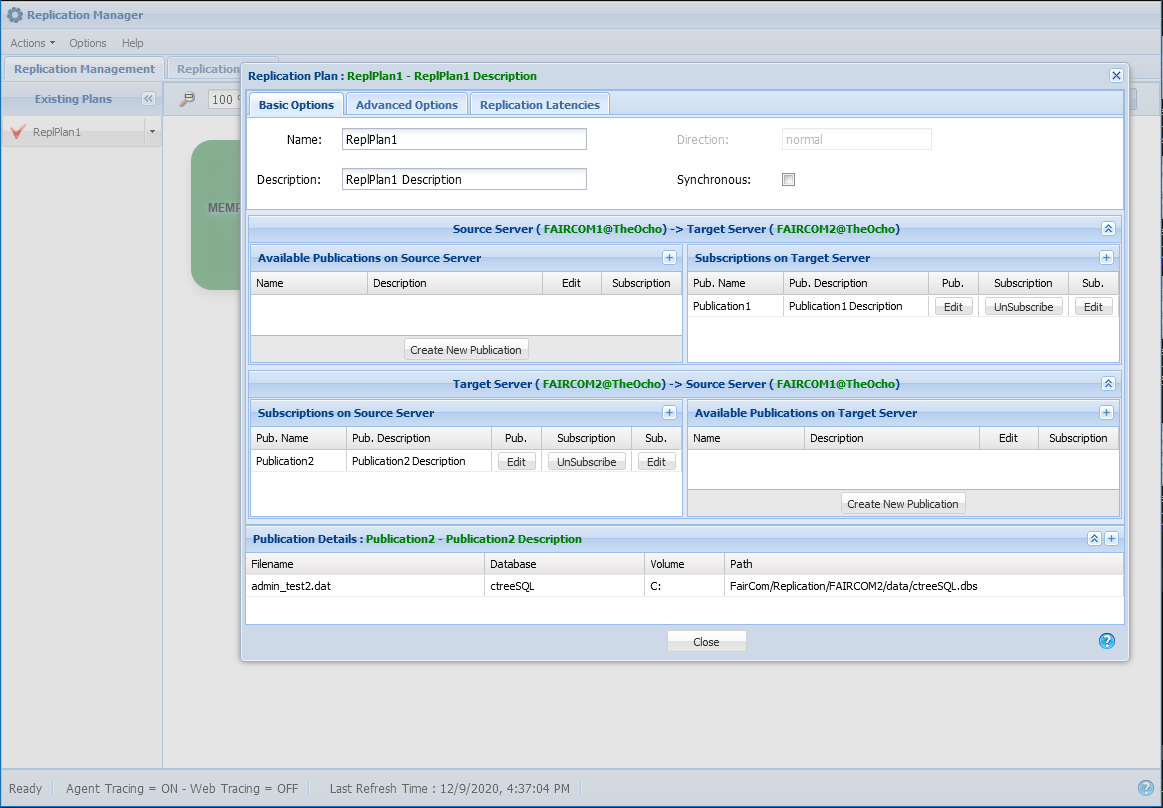
The second table created (e.g. "test2") should be listed. Check the Published option and click Save & Close:
The new publication should be listed in the right panel. Click the Subscribe button:
Click the Redirections button to see more details about the replication plan.
Ensure the intended Source Server is on the left side and that the intended Destination Server is on the right.
Click the Save button to create the subscription based on the default options:
Click the Close button to confirm the Replication Plan creation:
Right-click the Replication Plan line just created and select Deploy:
At this moment, the Replication Plan deployment will execute the following actions in order to keep the read-only servers within the same database in sync:
Copy the published files from source server to the target and also the target to the source.
Start the two-way replication to keep the remote replica in sync.
Replication is now live between two FairCom Servers, each replicating a specific table to the other. Additional tables can be added to the replication plans, and additional servers can be added to the replication plan as needed.
 Global Shared Data