Product Documentation

Clustering for Scalability and Availability

Previous Topic

Next Topic

Automatic Database Failover

In this tutorial you will learn how to set up a cluster of one or more servers. If the database detects a failure of the primary database server, it will automatically fail over to a secondary database server. This model does not require the operating system to provide clustering.

For more information, see Automatic FairCom Database Failover in Use Cases for FairCom Replication.

Preparation

To prepare for this tutorial, please ensure that:

The following steps show how to implement a replication plan for “Automatic Database Failover” mode with FairCom Server V12 zip packages. These steps apply to setting up replication between any FairCom Server type: FairCom DB, FairCom Edge, and c-treeRTG.

The following process uses the "Availability Group" feature in Replication Manager.

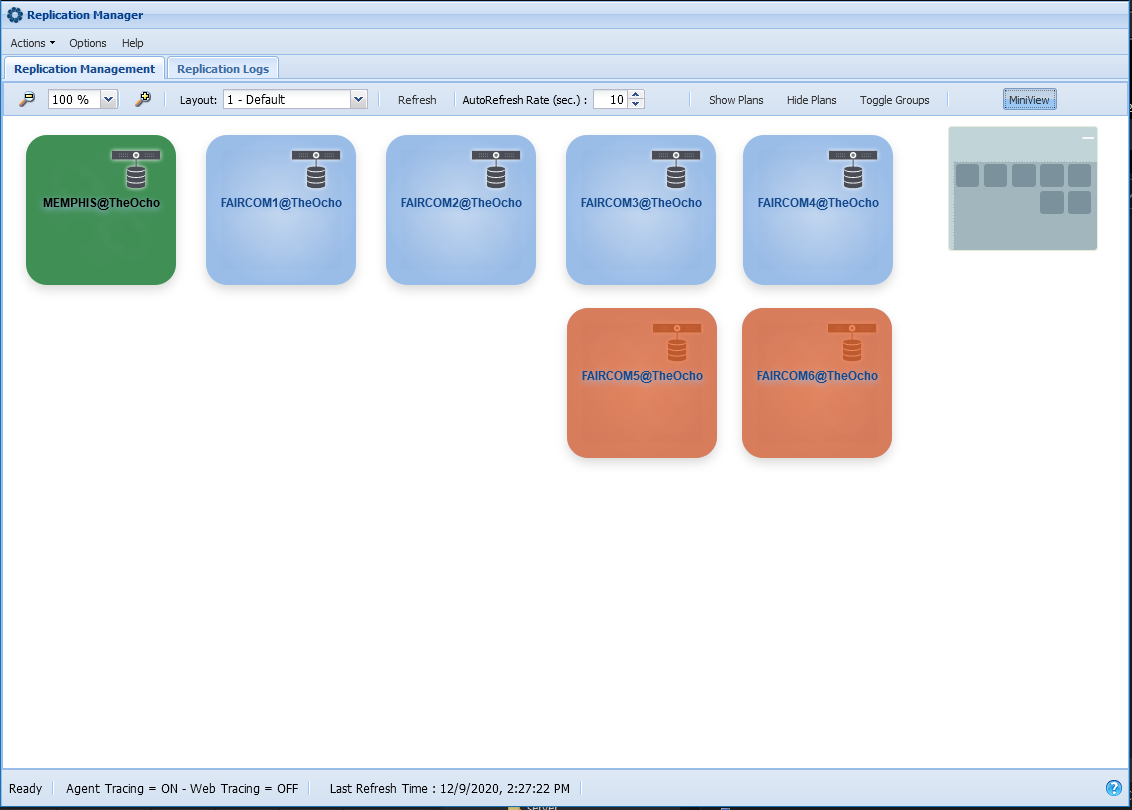
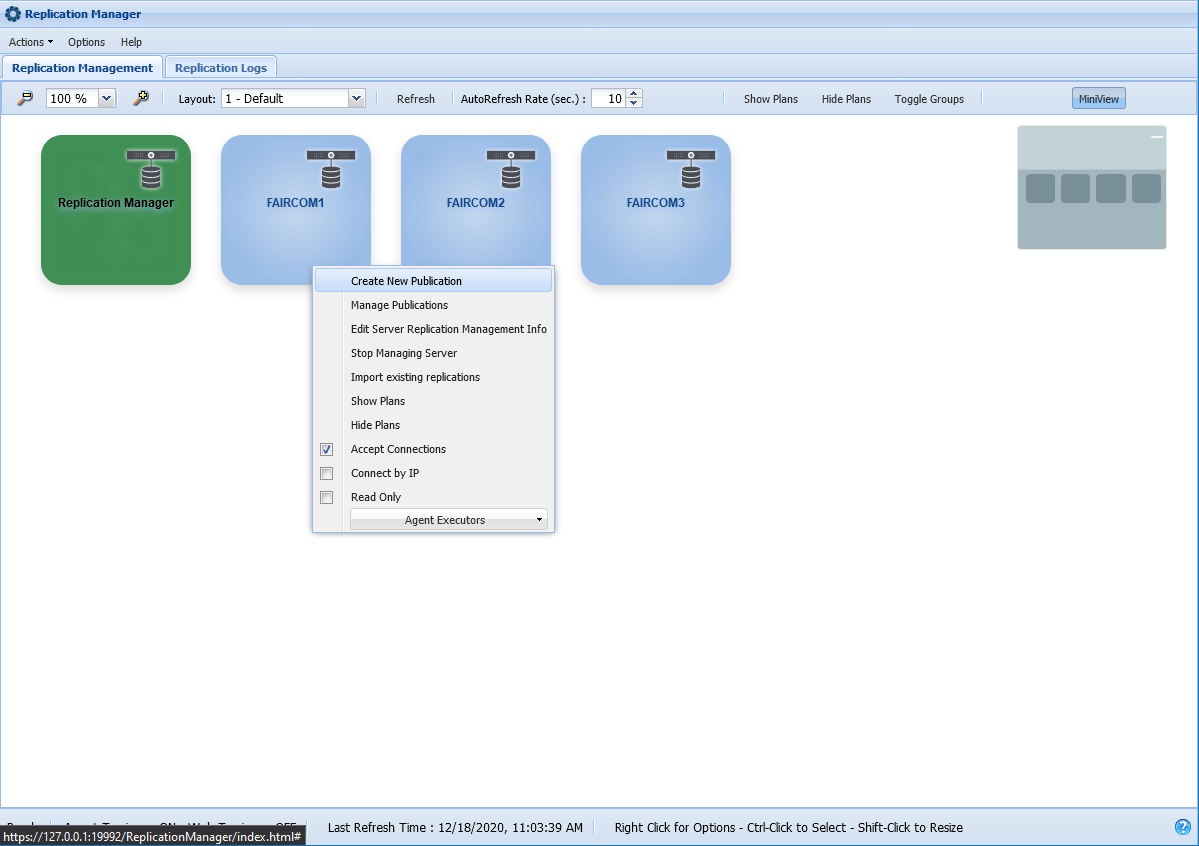
Connect to Replication Manager

  1. In a web browser, navigate to https://<ReplicationManagerHostName>:19992/
  2. Select Replication Manager.
  3. In the Connection Options dialog, enter appropriate credentials and click Connect.

    (If you have set up additional servers then your view will show more servers than shown below. This tutorial will utilize two FairCom Servers along with the FairCom Replication Manager Server)
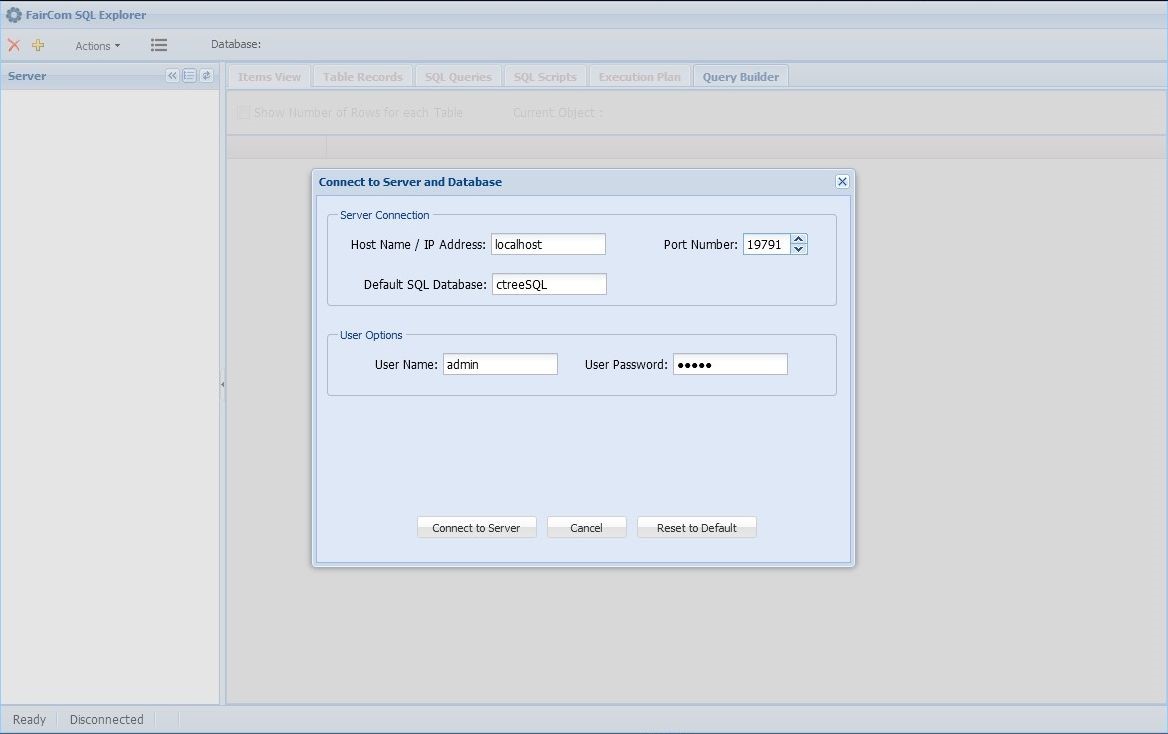
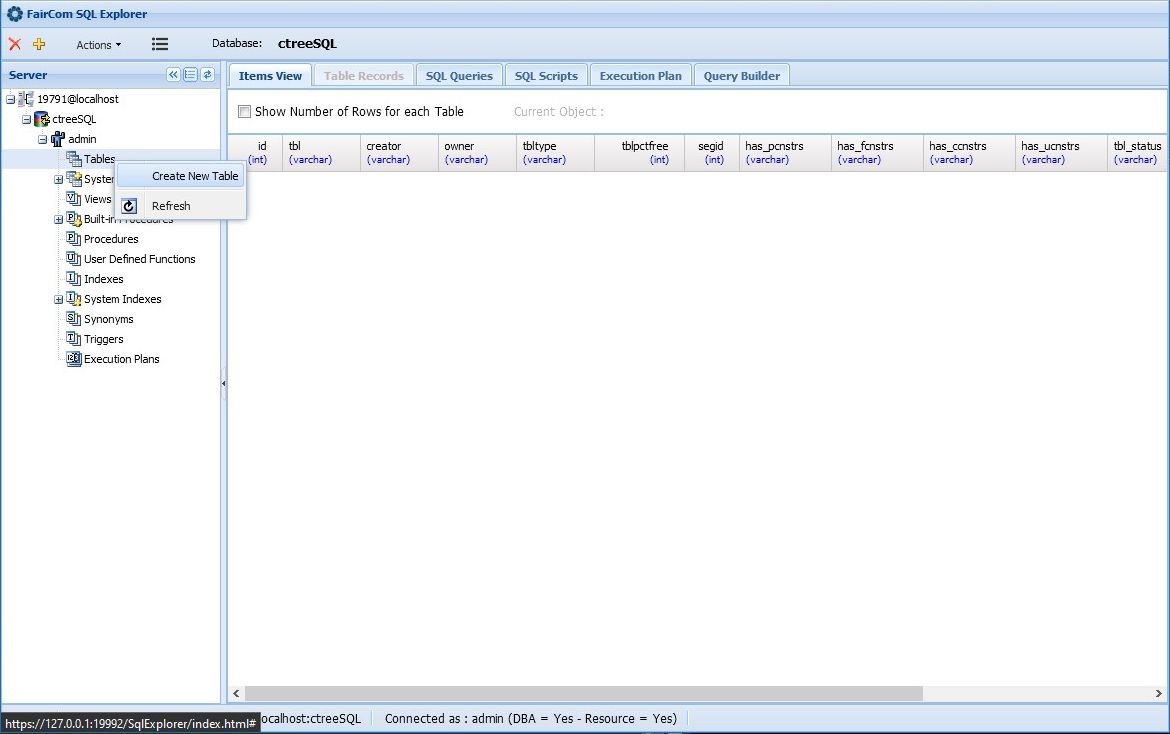
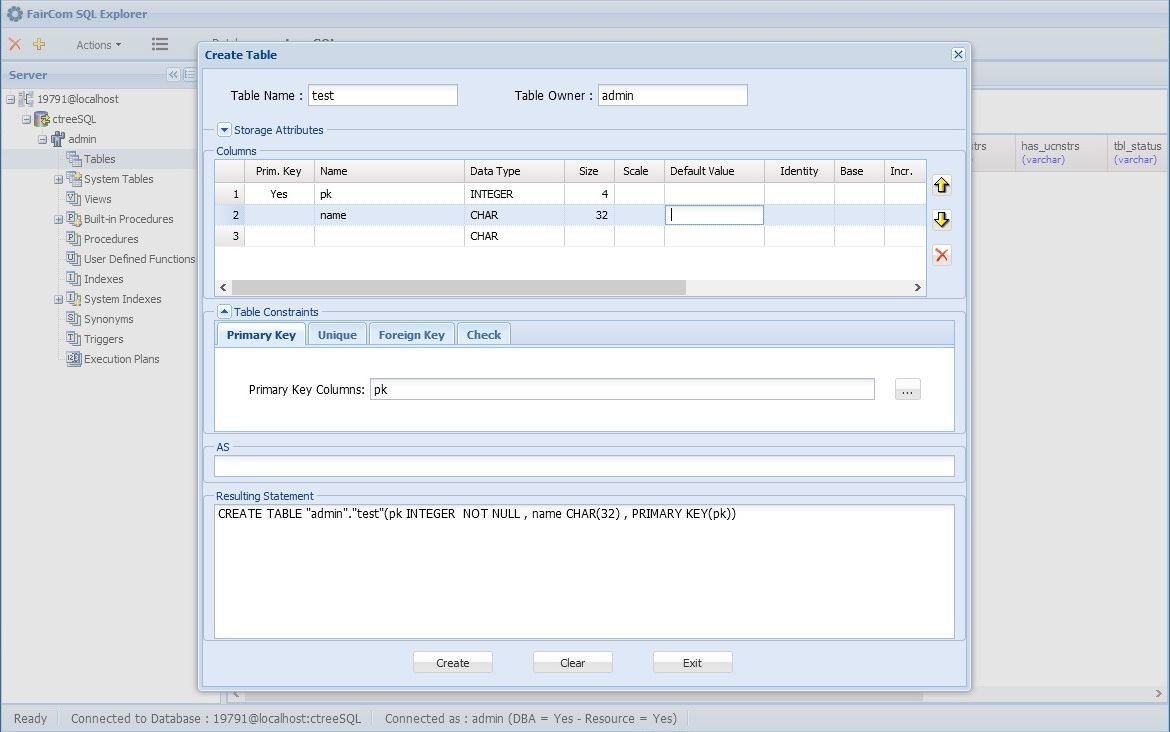
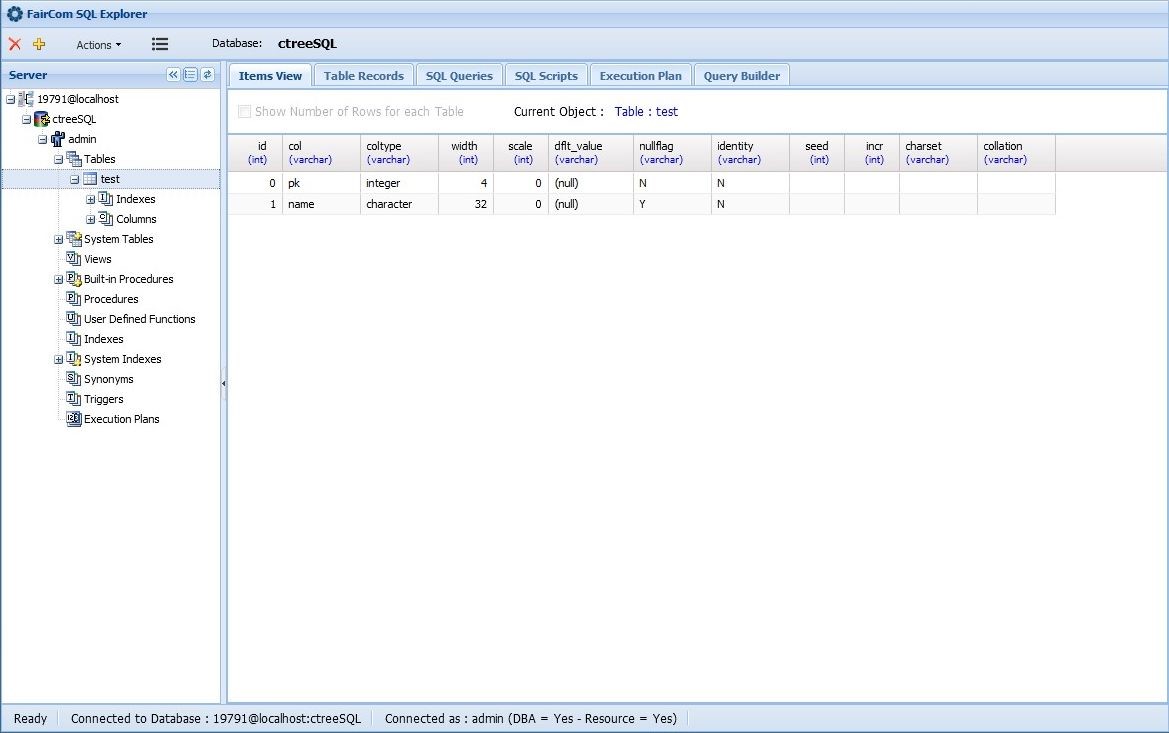
    auto_01

Create a Test Table

  1. Connect FairCom SQL Explorer to the first FairCom Server by doing the following:
    • In a web browser, navigate to https://<ReplicationManagerHostName>:19992/
    • Select SQL Explorer.
    • In the Connect to Server and Database dialog, enter the Hostname (or IP address) and Port Number (19791) for the first FairCom Server.
    • With appropriate credentials entered click Connect to Server.

  2. Right-click on Tables in the Server pane and select Create New Table:

  3. Populate table schema and create a new table:

  4. Click Create. A modal window will say Table Successfully Created. Click OK to close that dialog.

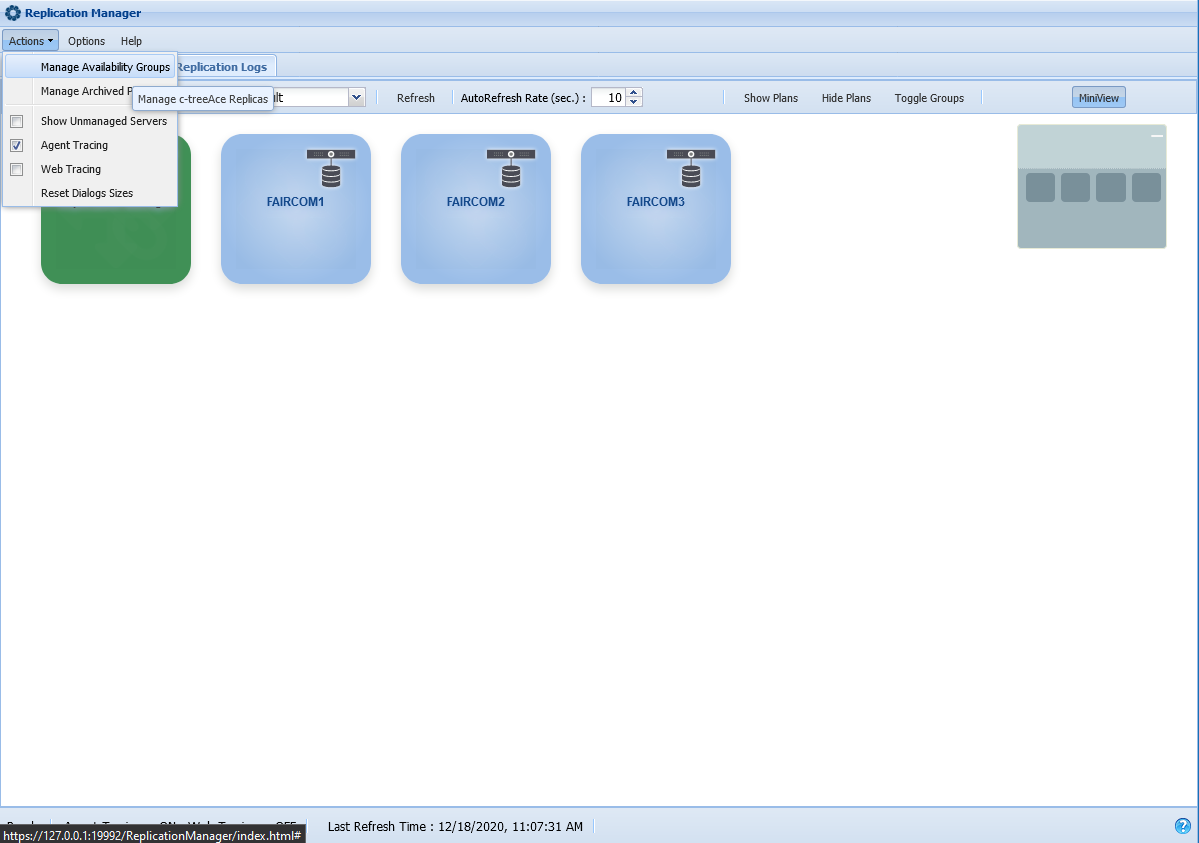
Set an Availability Group

  1. In Replication Manager, right-click the replication source FairCom Server (where a table was just created) and select Create New Publication.

    auto_02

  2. Check the Published check box for the table just created and click Save & Close:

  3. From the Actions option in the main menu, select Manage Availability Groups:

    auto_03

  4. Enter a new Availability Group Name and click Save:

    auto_04

  5. From the list of servers displayed, find the publication created above. For this server, check both Included and Primary columns and in the Publication column select the publication created:

    auto_05

  6. Check the Included column for the other servers that are supposed to be added into the Availability Group and click Save & Close:

    auto_06

  7. Hint: If the Availability Group does not organize the servers to your liking, you can rearrange them into a configuration that makes sense for your needs:

    auto_07

  8. From the Settings button in the top-right corner, select Deploy:

    auto_08

  9. At this point, the Availability Group will execute the following actions:
    • Change the secondary servers to be read-only, so they will be represented in orange.
    • Copy the published files over to the secondary servers.
    • Start the replication process, keeping the destination servers in sync with the source.

    auto_09

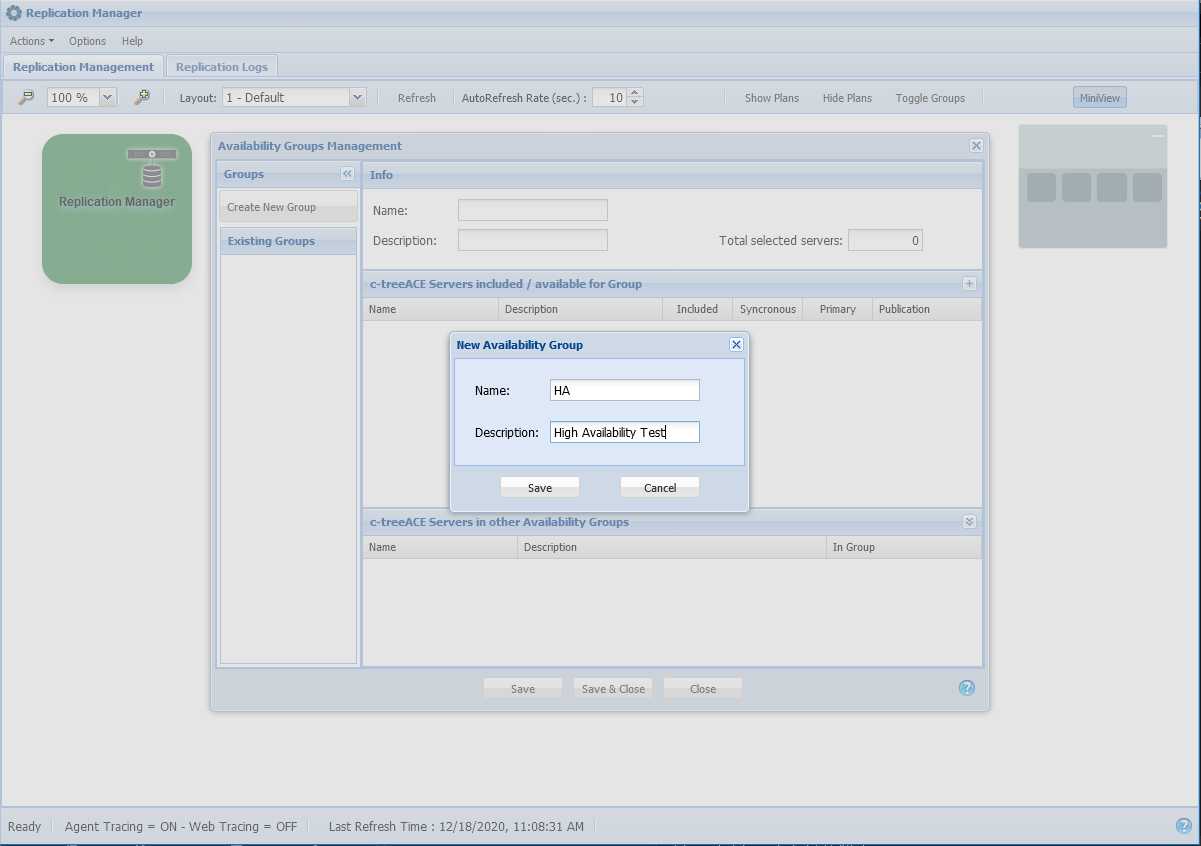
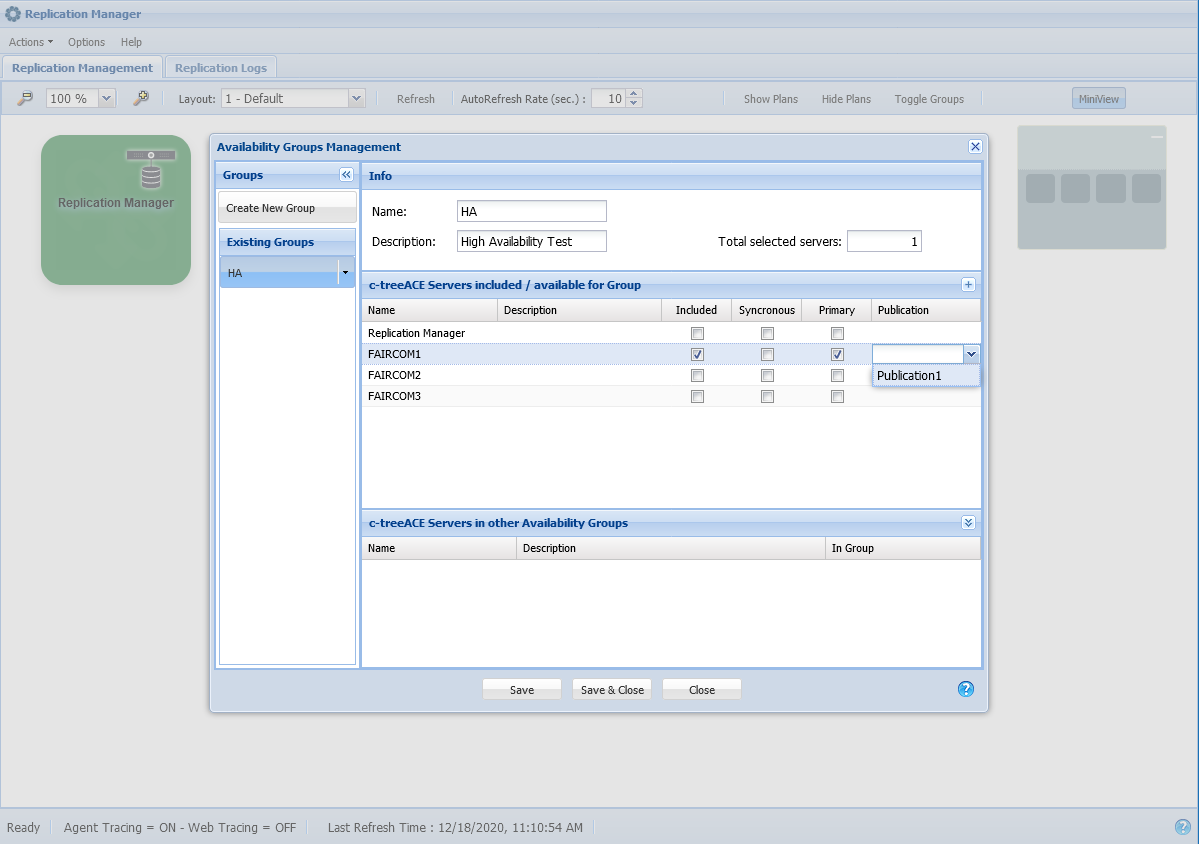
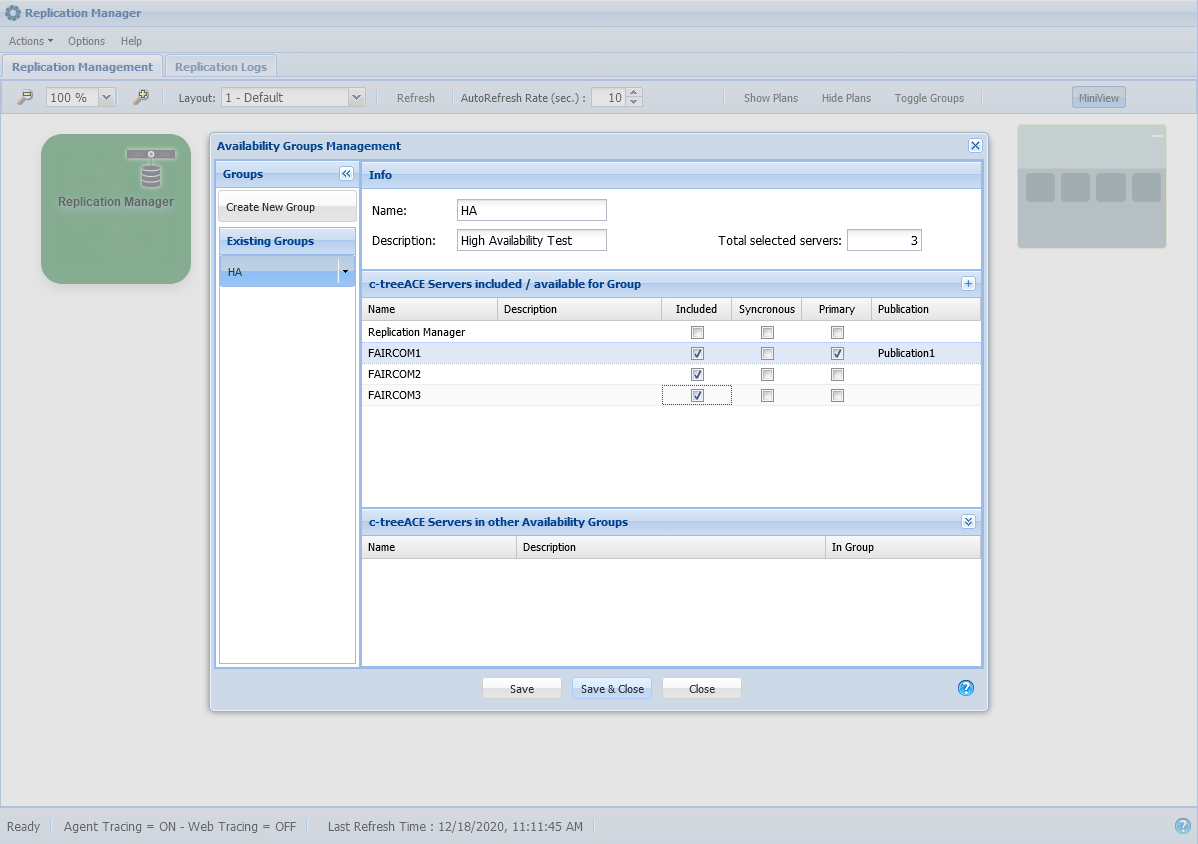
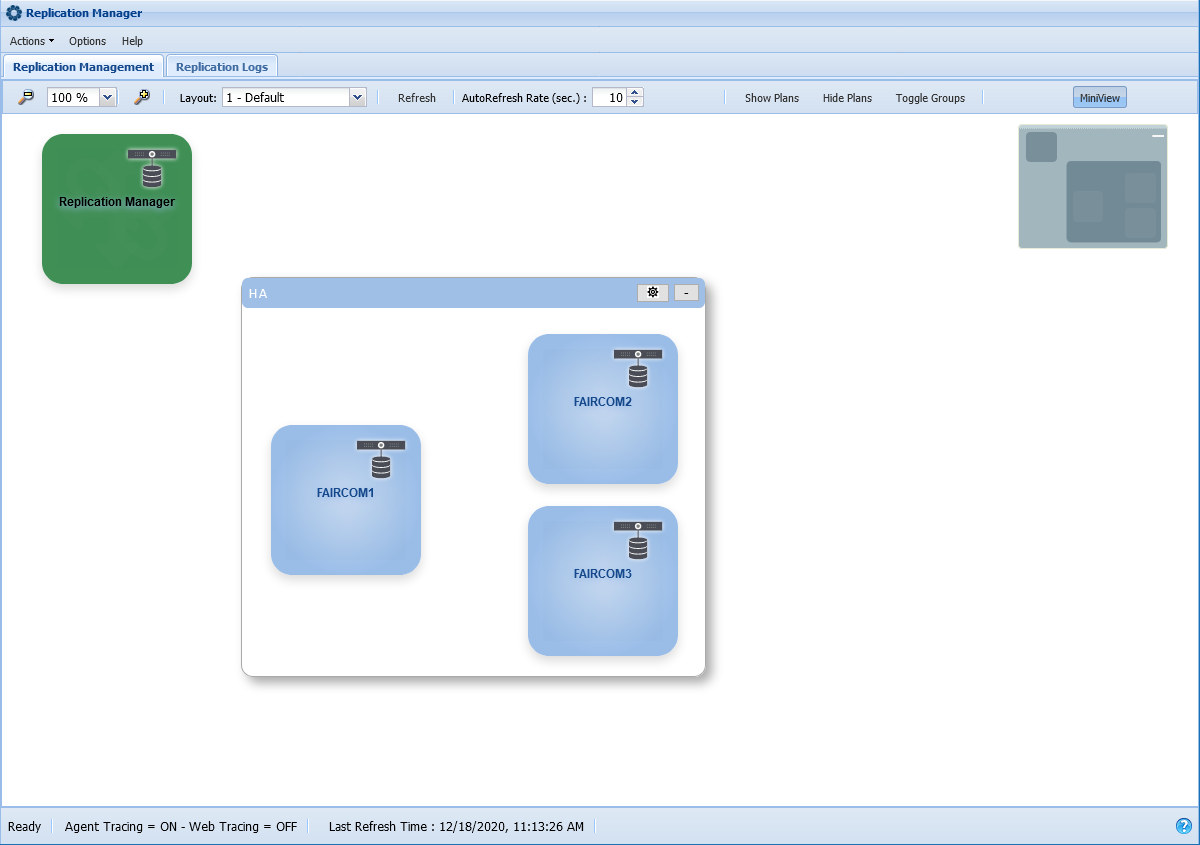
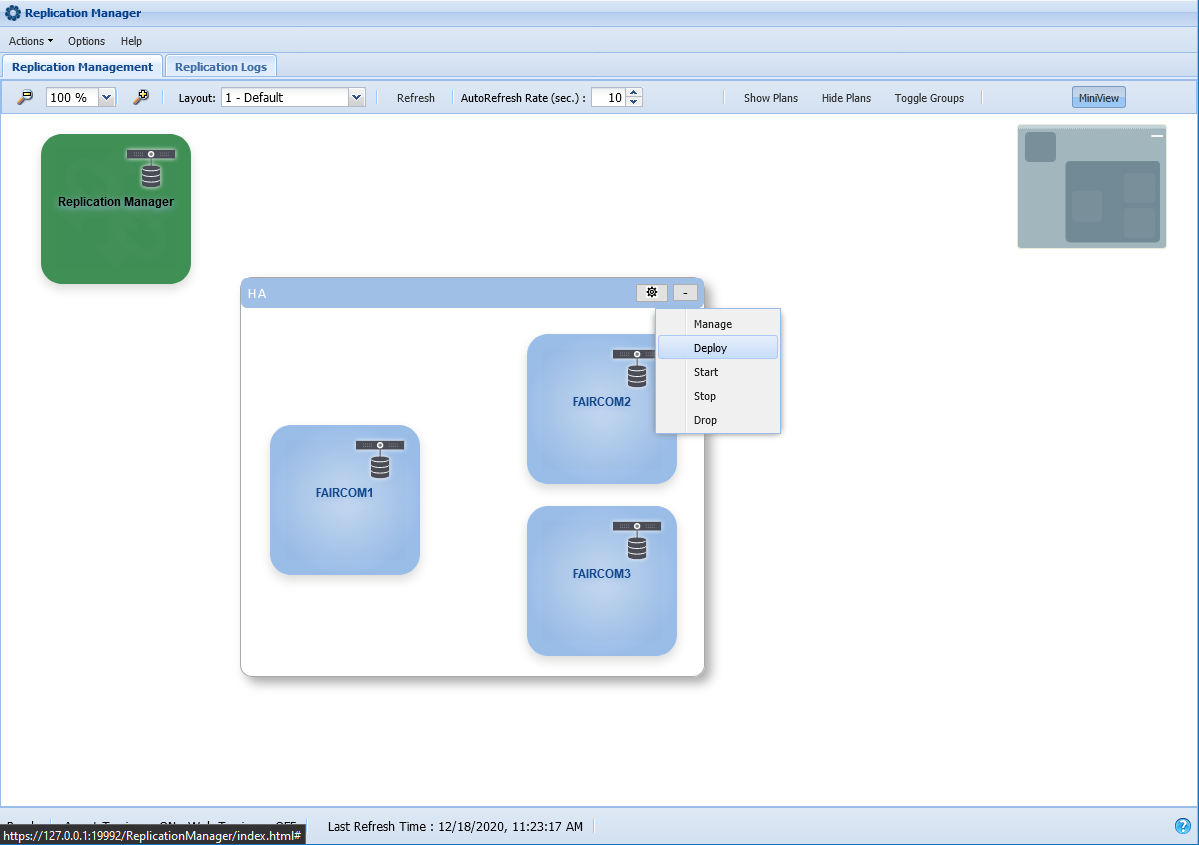
Replication should now be live with High Availability and Database Failover configured via Availability Group functionality.

Connecting to the Availability Group

The following steps are required to get your application working with the Availability Group that was just configured.

  1. Open the source code in any of the following tutorials directories:

    <faircom>/drivers/c.isam/tutorials/

    <faircom>/drivers/c.nav/tutorials/

    <faircom>/drivers/cpp.nav/tutorials/

  2. Locate the Initialize() function.
  3. Just before the logon is executed, add the following lines of code (to configure the connection to take advantage of the Availability Group features):

    ctSetClusterOption( ctCLUSTER_OPTION_FAILOVER, "Y" );

    • This enables the failover feature.

    ctSetClusterOption( ctCLUSTER_OPTION_SERVER_LIST, "FAIRCOM2@127.0.0.1;#19810@localhost" );

    • This function establishes a list of servers available for failover.

    Shown above are two ways to identify the secondary servers included in the Availability group. The first (FAIRCOM2@127.0.0.1) shows the server as name@ip_address, the second (#19810@localhost) example shows the server as port@hostname.

    Please note that, with failover enabled, there is no manual connection made to a specific server in the Availability Group. Connections are determined and handled automatically by the Availability Group interface.

    ctSetClusterOption( ctCLUSTER_OPTION_SERVER_REQUIREMENTS, "{\"connectionMode\": \"read\",\"acceptableLatency\": 60}" );

    • connectionMode can be either \”read\” (read-only) or \”write\” (read/write). Based on this setting, the Availability Group will determine which node to connect to.
    • acceptableLatency time is set in seconds (60 seconds above)

    Additional parameter options for configuring the connection request will be included in a future release.

Adjust the logon function to use settings that will work for the read/write server in your configuration (FAIRCOM1 in the example above), then compile and run that code.

TOCIndex