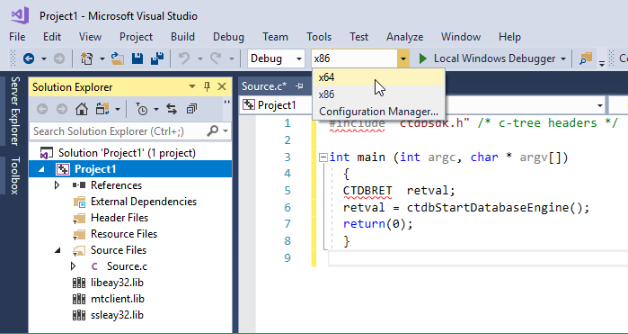
To build your C project, the following three library files need to be added to your project:
Note that the paths need to be adjusted based on your circumstances. The first portion of the paths is based on where you installed c-tree on your computer ("C:\FairCom" in the examples above). The next portions are based on the version of c-tree you have ("V11.5.0") and whether you are using a 32-bit or 64-bit build of c-tree ("winx64"). The latter portion of the path is based on the version of Microsoft Visual Studio you are using ("Microsoft Visual Studio 2017" in the example above).
To add the first library (mtclient.lib), right-click on the project (not the solution) in Solution Explorer and then select Add > Existing Item.

Then navigate to the first file listed above (mtclient.lib), select it, and click the Add button. “mtclient.lib” should appear in the Solution Explorer.
To add the other two files, repeat the process, but navigate to the lib\License.Lib\openssl folder instead. Note that you can select both libeay32.lib and ssleay32.lib at the same time by control-clicking the file names.
After adding the libraries, you must choose a Solution Platform in Visual Studio based on whether you are using a 32-bit or 64-bit build of c-tree. For example, if you are using a winX64 build of c-tree, you need to tell Visual Studio to do a 64-bit (not a 32-bit) build.

Select x86 for 32-bit builds and x64 for 64-bit builds.
Note that some versions of Visual Studio require you to use the Configuration Manager to select between 32 and 64-bit builds. To get there, right-click on the Solution (not the Project) in the Solution Explorer and select Configuration Manager.