|
|
|
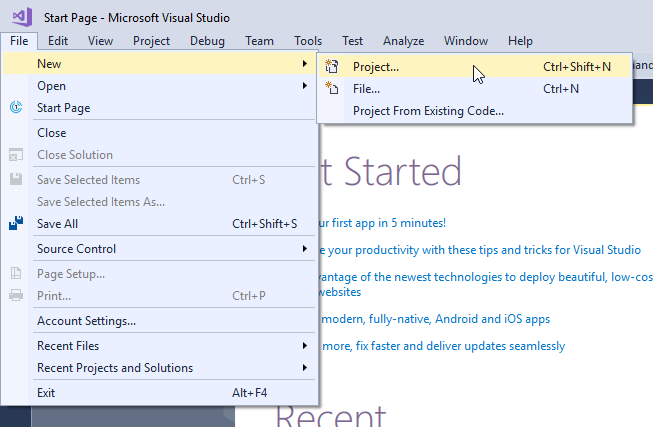
To create a new project from scratch, in Visual Studio, select File > New > Project from the menu bar.
Specify that your new project should be an Empty Project, give it a name and a location, and then click the OK button. Note that this New Project Wizard looks different for different versions of Visual Studio.
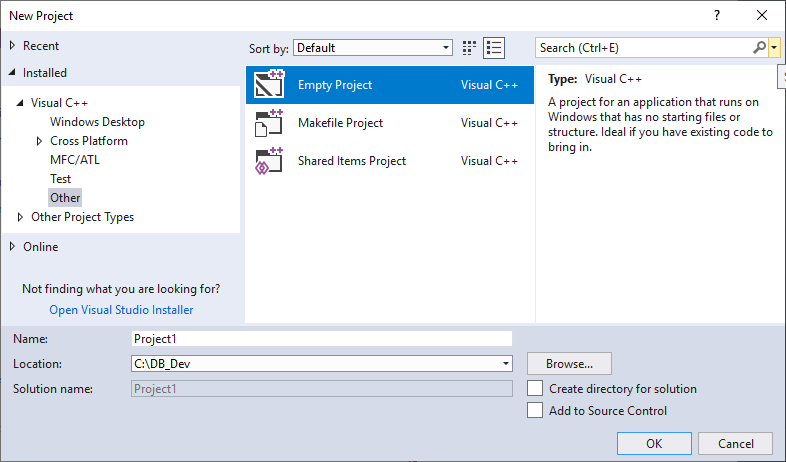
Note also that some versions of Visual Studio put the Empty Project template under Visual C++ / General. Other versions of Visual Studio do not allow you to select Empty Project from the New Project Wizard. If your version is this way, select Win32 Console Application instead and, when the Win32 Application Wizard appears (after you click OK), click the Next button (not the Finish button). This will display Application Settings, where you can select Empty Project and de-select Precompiled Header before clicking the Finish button.

