Product Documentation

FairCom ADO.NET Driver

Previous Topic

Next Topic

Microsoft Visual Studio - Alternate Approach

This chapter illustrates creating a ToolBox Tab and adding the FairCom DB ADO.NET Framework component to make it accessible for all projects. You can then use these components in your own data grid programs.

Before starting this project, be sure you have met the Prerequisites listed in Compiling Your Projects.

Perform the following steps to integrate the Data Provider components with the Visual Studio IDE:

  1. Start the Visual Studio IDE.
  2. From the File > New > Project menu, create a new Visual C# Windows Application (or "Windows Forms Application" in later versions of Visual Studio). Choose any name you wish.

    If your copy of Visual Studio does not have templates for those project types, open Visual Studio’s New Project dialog and click the link labeled Not finding what you are looking for? Open Visual Studio Installer. Then add the .NET desktop development workload, as discussed in the Prerequisites section of Compiling Your Projects.

    ADO.NET Visual Tutorial New Project

  3. Be sure the Toolbox window is open by clicking View > Toolbox or pressing the key combination Ctrl+Alt X.
  4. Right-click on the Toolbox window and select the Add tab option from the pop-up menu.

    ADO.NET Visual Tutorial Toolbox RighClick

    Give your new tab the name “FairCom DB” and press Enter.

    ADO.NET Visual Tutorial Toolbox

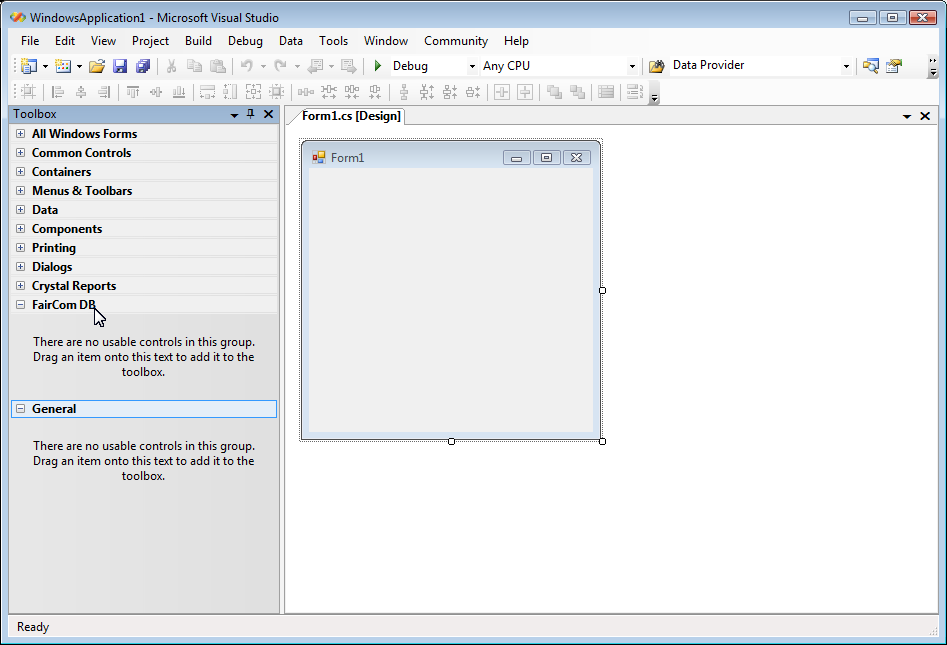
    Click on the new FairCom DB tab with the right mouse button and select Choose items. The Choose Toolbox Items dialog is displayed. You might have to wait a few moments for the ”.NET Framework Components” list to populate.

    ADO.NET Visual Tutorial Toolbox Choose

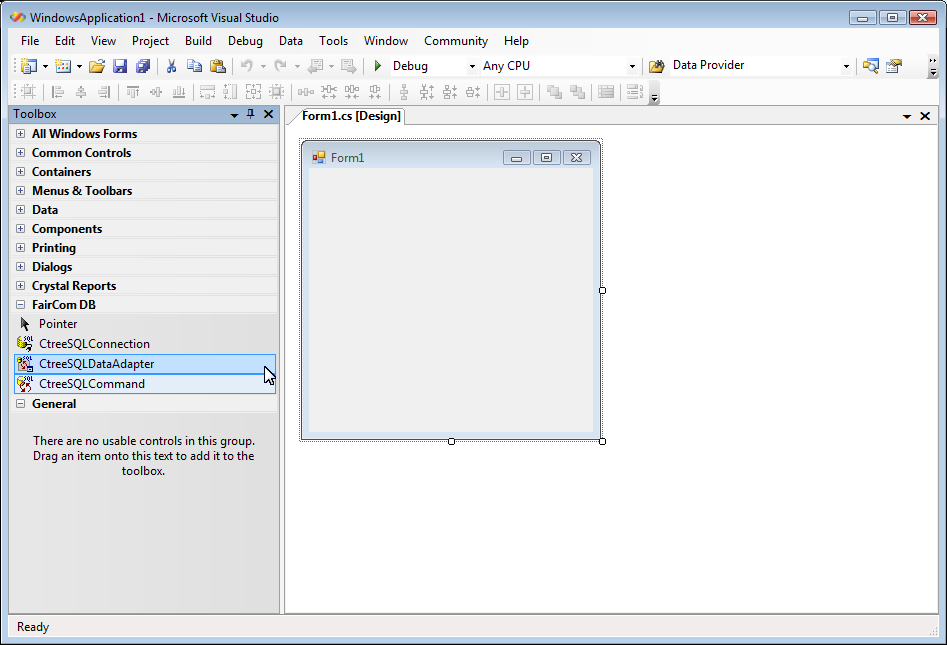
    Scroll down and look for the following components: CtreeSQLCommand; CtreeSQLConnection; and CtreeSQLDataAdapter.

    ADO.NET Visual Tutorial Choose Items First One

    If you do not see these components in your list, select the Browse button and navigate to the drivers\csharp.sql.ado.net folder.

    Select the DLL file named Ctree.Data.SqlClient.dll and click Open.

    ADO.NET Visual Tutorial Browse Select

    The components should now appear as shown below. Note that sometimes the DLL won’t load correctly the first time you try it and an error message will be displayed. If this happens, try to load the DLL again, and, usually, it will work the second time you try:

    Choose Toolbox Items

    Select and highlight the components: CtreeSQLCommand; CtreeSQLConnection; CtreeSQLDataAdapter, and click OK.

  5. The FairCom ADO.NET Data Provider components are now available in the “FairCom DB” item that you added to the toolbox.

    Components now available

  6. From the FairCom DB Toolbox tab, select and drag a CtreeSQLDataAdapter, to your application's form. The FairCom DB Data Adapter Configuration Wizard will be invoked, as shown below. Click Next:

    ADO.NET Visual Tutorial Config Wizard

  7. Click the New Connection button.

    ADO.NET Visual Tutorial New Connection Click

  8. A dialog should appear as displayed below. Click the Verify Connection button. It should display a "Successful Connection" message. This confirms your FairCom DB database engine is running and ready to go. If it is not, the FairCom DB database service failed to start during installation. Examine your Windows Event log for messages, or contact FairCom for assistance.

    If you are using a developer's license, it is also possible that the FairCom Database Engine has timed out and needs to be restarted. See Monitoring the FairCom Database Engine.

    Click OK from the "Connection Options" dialog box.

    ADO.NET Visual Tutorial New Connection

  9. A ctreeSQLConnection1 connection component will be created, as shown here. Note that it is OK if the connection has different capitalization than what is shown here.

    ADO.NET Visual Tutorial faircomConnection1

    Click Next to continue.

  10. From the next screen, select the "custmast" table with "All" fields as shown (giving both a check mark, as shown in the following image), and then click the Next button. Note that if the tables are not listed, it means that the sample database has not been loaded, or you ran one of the console-based tutorials, which deleted the sample database. Please refer to the prerequisites in Compiling Your Projects to reload the sample database. Then you can refresh the following screen by hitting the Back button and then the Next button :

    ADO.NET Visual Tutorial Custmast ALL Fields

  11. Click Finish on the final Wizard screen:

    ADO.NET Visual Tutorial Finish Wizard

  12. Right-click the ctreeSQLDataAdapter1 component that you just dragged onto your form (not the similarly-named one in the toolbox), and select Preview Data. Note that it is OK if the capitalization is different from what is shown.

    ADO.NET Visual Tutorial Preview Data1

    ADO.NET Visual Tutorial Preview Data2

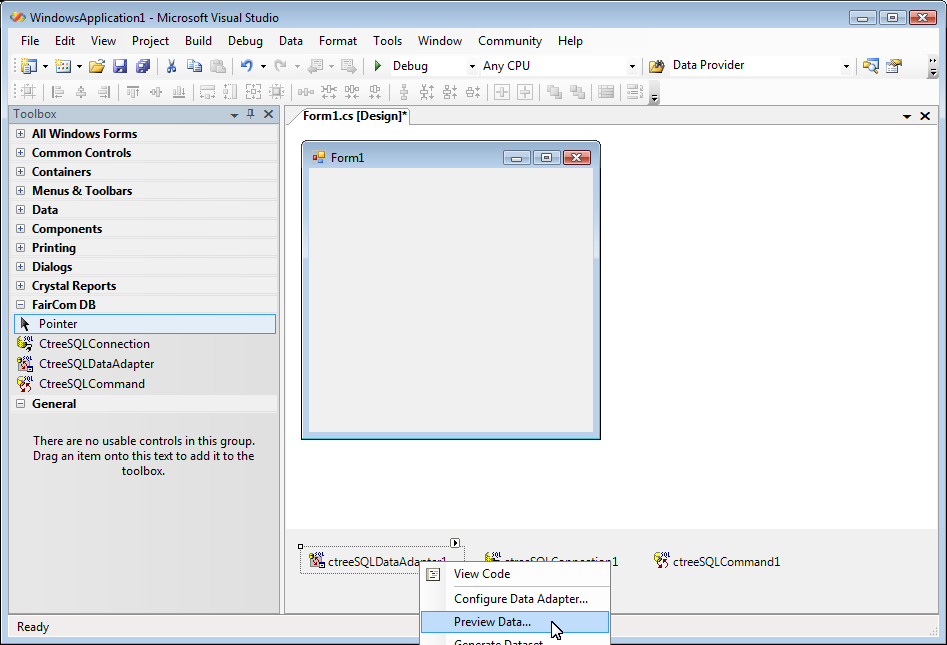
    You can now view the data we inserted into our sample database. Click the Close button on the Preview window shown above.

  13. Right-click the ctreeSqlDataAdapter1 component again, and this time select Generate dataset:

    ADO.NET Visual Tutorial Generate Dataset

  14. Select New and then name it by typing "ctreeSQLDataSet1" and then pressing the OK button.

    ADO.NET Visual Tutorial Generate Dataset2

  15. Now we will add a DataGridView to our form. From the "Data" tab in the "Toolbox", select a DataGridView component and drag it on to your program's form. If “DataGridView Tasks” pop-up windows appear, close them.

    ADO.NET Visual Tutorial DataGrid1

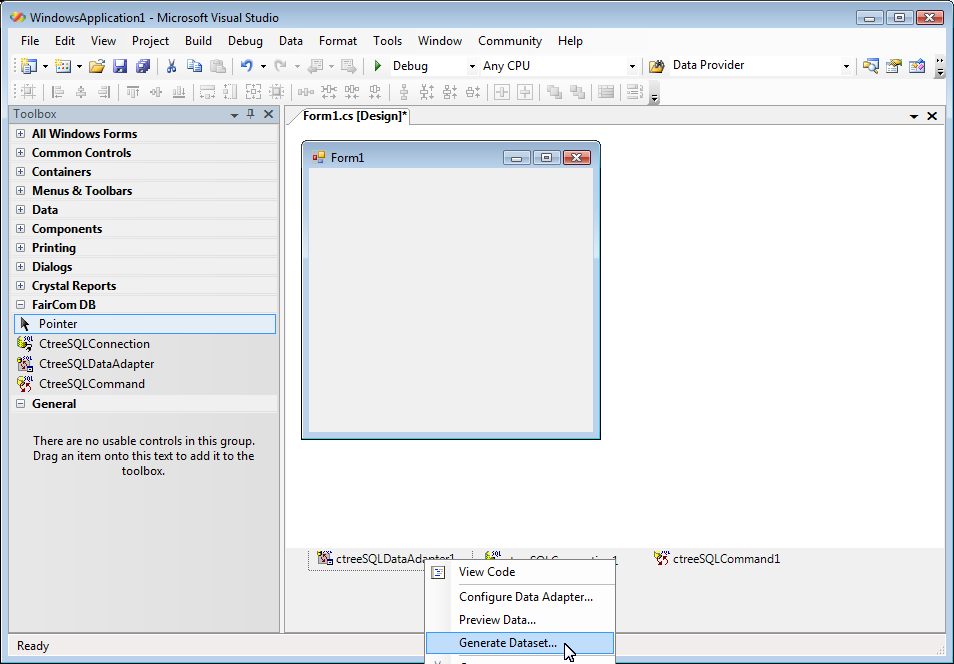
    Drag the Form and the DataGridView component a little wider so you can view all of the columns in the table. From the Property Inspector for your new DataViewGrid, edit the "dataSource" property (it’s near the bottom of the list, under the bold Data heading) by clicking its drop-down menu. Drill down into the “Other Data Sources” list until you find the "ctreeSQLDataSet1" component, and then select that component.

    ADO.NET Visual Tutorial DataGrid3

  16. Still from within that area of the DataViewGrid’s Property Inspector, edit the "datamember" property. Click the drop-down menu, and select Table:

    ADO.NET Visual Tutorial Set DataMemberProperty

  17. From the “Common Controls” section of the Toolbox, drag a new button component to the form. Double-click the new button to open its event source code. Insert this one line of code into the button1_Click() function:

    ctreeSqlDataAdapter1.Fill(ctreeSQLDataSet1);

    ADO.NET Visual Tutorial Fill Button

    ADO.NET Visual Tutorial Event Code

  18. You are now ready to build and run the program. Press F5 to build and run the application you just created and then click the button you just added, button1 in this example, to see the sample data contained in the test database.

    ADO.NET Visual Tutorial Run program

This tutorial gave you a quick glimpse at using the FairCom DB ADO.NET Data Provider within the Microsoft Visual Studio IDE. There are numerous publications available on ADO.NET programming. Any of these resources are appropriate starting guides for this standard .NET interface.

Our next tutorial drops down to the code level, illustrating actual .NET Provider API calls you can place directly in your applications. We encourage you to try this tutorial: API Focus - Console Based

TOCIndex