In addition to the main Replication Management tab and the Replication Logs tab, the Replication Manager provides several other windows to help you manage replication.
Replication plans can be archived, which removes them from the list of existing plans without deleting them. Archived plans can be viewed in the Archived Plans Management window.
To archive a plan, select Archive from the drop-down menu under Existing Plans or from the context menu when you right-click the graphic that represents the plan. See Deploying & Managing Your Replication Plans in the online documentation.
Note: This window is read-only. To edit a plan, restore it and use the Manage option in the Existing Plans menu.
To open the Archived Plans Management window, select Manage Archived Plans from the Actions menu.
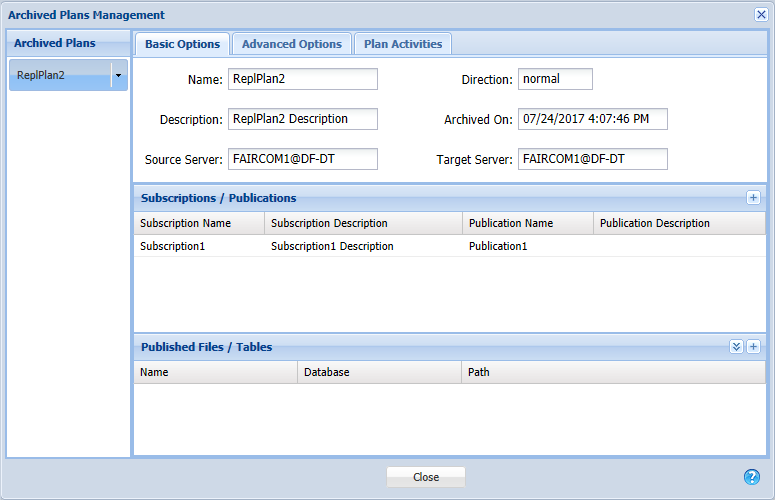
A list of Archived Plans is shown on the left side of this window. Each plan includes a drop-down menu:
Three tabs are provided to allow you to edit the archived plan: Basic Options, Advanced Options, and Plan Activities.
Basic Options
This tab shows basic information, such as name, description, the date it was archived, etc. It also lists the subscriptions and publications and shows the files or tables affected.
Advanced Options
This tab corresponds to the information shown in the Advanced Options tab of the Replication Plan window.
Plan Activities
This tab corresponds to the information about the plan shown in the Plan Activity window. See Monitoring Plan Activity.
To see this window: Right-click on the server icon that is configured for replication and select Import Existing Replications.
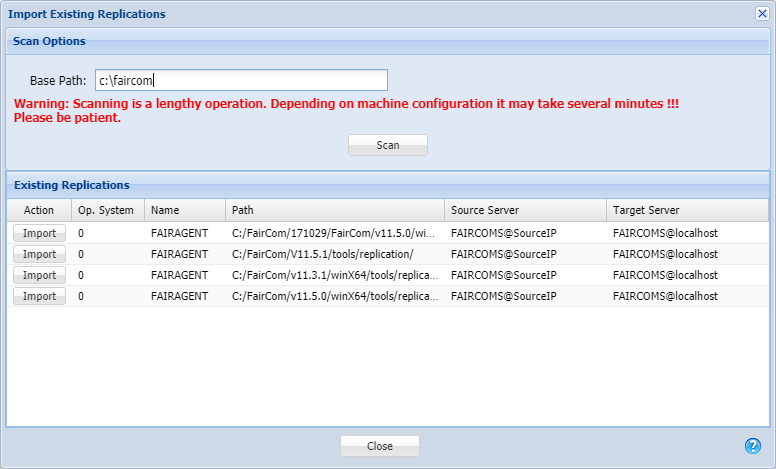
If you know where replication configuration files are located on the selected server, enter the path in Base path. You do not need to know the exact path; you can type a portion, such as C:\FairCom.
Note: Scanning for replication configuration files can be time consuming, so it is helpful to enter a base path to restrict the search.
Click Scan to scan the server for replication configuration files.
The list labeled Existing Replications shows the configurations found on the server.
The Action column provides an Import button for each item in the list. Click to import the desired replication. It will be converted into a Replication Plan.
Resync allows you to synchronize a target "replica file" based on the current "source file" with minimum impact in runtime.

Use this in the rare occasion when the replica file becomes out-of-sync with the source. For example, a lost transaction log file that was not applied to the target, a conflict while applying the modification to the target, or an inadvertent update to the target while replication was inactive.
To see this window: Click a replication plan listed under Existing Plans or right-click a plan in the main window. Select Resync.
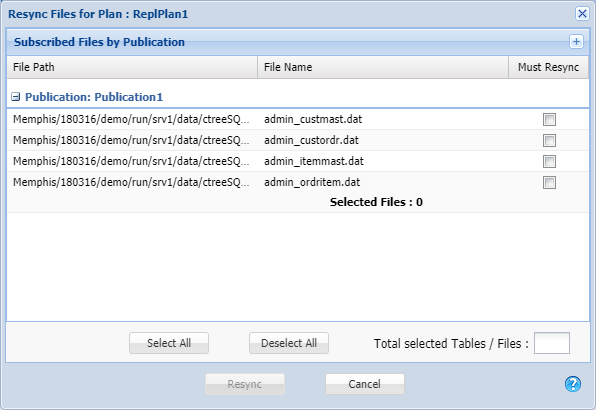
To synchronize files:
Click Options in the main menu to see the Options window. This window provides several tabs to allow you to configure the default settings for various Replication Manager features. The Options window provides the following tabs:
General Tab
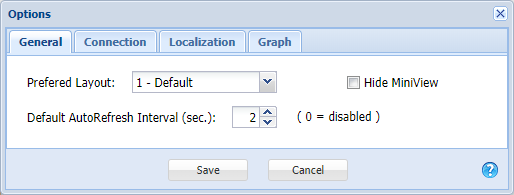
Preferred Layout – You can select one of the saved layouts to use as the default. See Managing Layouts in the online documentation.
Refresh Interval (0=disabled) – The information shown in the Replication Management tab of the Replication Manager can be refreshed automatically at a rate of your choosing. The default is to disable auto-refresh so you must click the Refresh button to see updated information. You can set the time (in seconds) between automatic refreshes.
Hide MiniView – This check box allows you to shut off the display of the MiniView described in Arranging Your Canvas in the online documentation.
Connection Tab
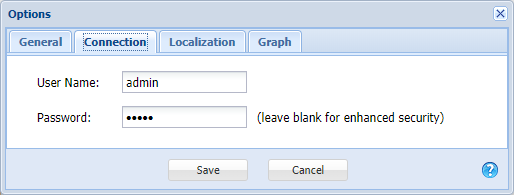
User Name and Password – This tab allows you to store the user name and password so you don't need to use them to log in. If you leave both fields blank, you will need to enter your user name and password every time you log in. Hint: You can enter your user name and leave the password blank.
Localization Tab
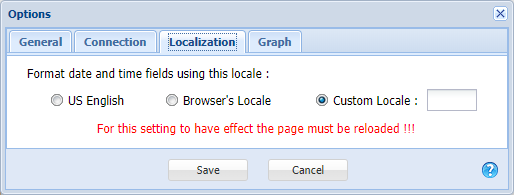
Use this tab to select the way date and time are formatted:
Please notice the text indicating that changes on the Localization tab require the page to be reloaded. This means you must exit from the Replication Manager and re-enter to see your changes.
Graph Tab
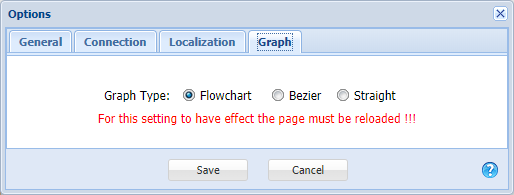
This tab affects the graphical display of the connections between servers, which represents the flow of data in the replication plans. This setting does not affect the operation of the tool: it is merely provided so you can select the style of display you prefer.
Flowchart forces the connecting lines to be either horizontal or vertical. |
|
Bezier allows the connecting lines to be curved. |
|
Straight uses straight lines to connect the servers. |
|
Notice that changes on the Graph tab require the page to be reloaded, so you must exit and re-enter to see your changes.