|
|
|
With a first project created, Android Studio IDE is now open, and we have a test project ready to go. Before we get into Application development, let’s set up our Desktop Emulator.
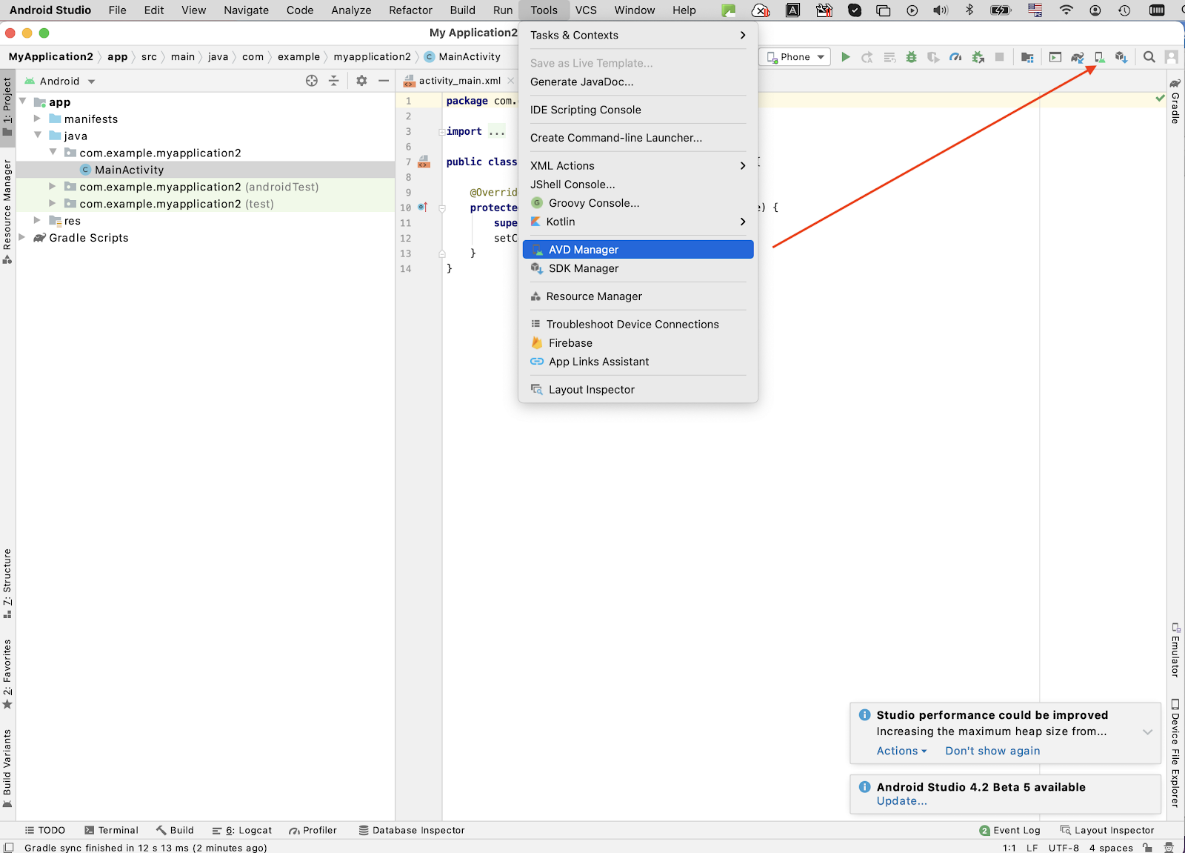
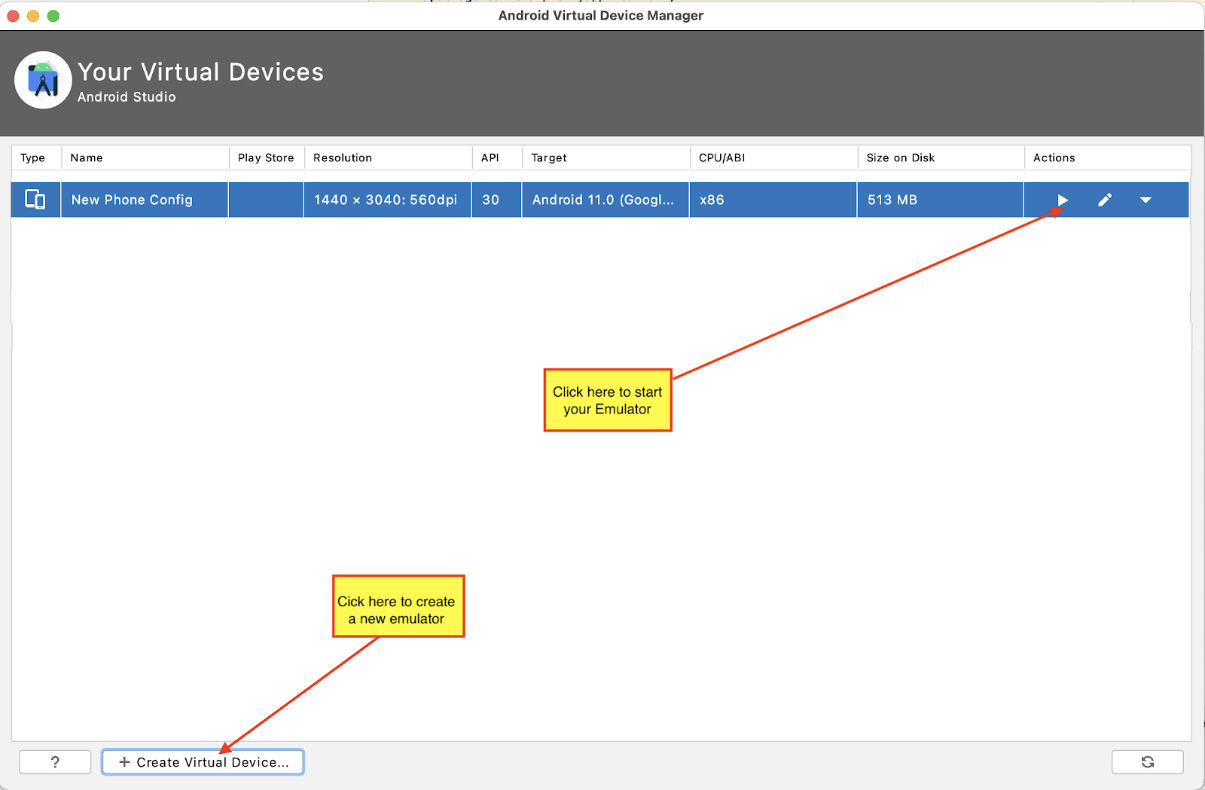
From the Android Studio IDE, launch the AVD manager in order to create your Android device Emulator. Select AVD Manager from the Tools menu, or the AVD Manager button on your IDE (see red arrow in the image below):
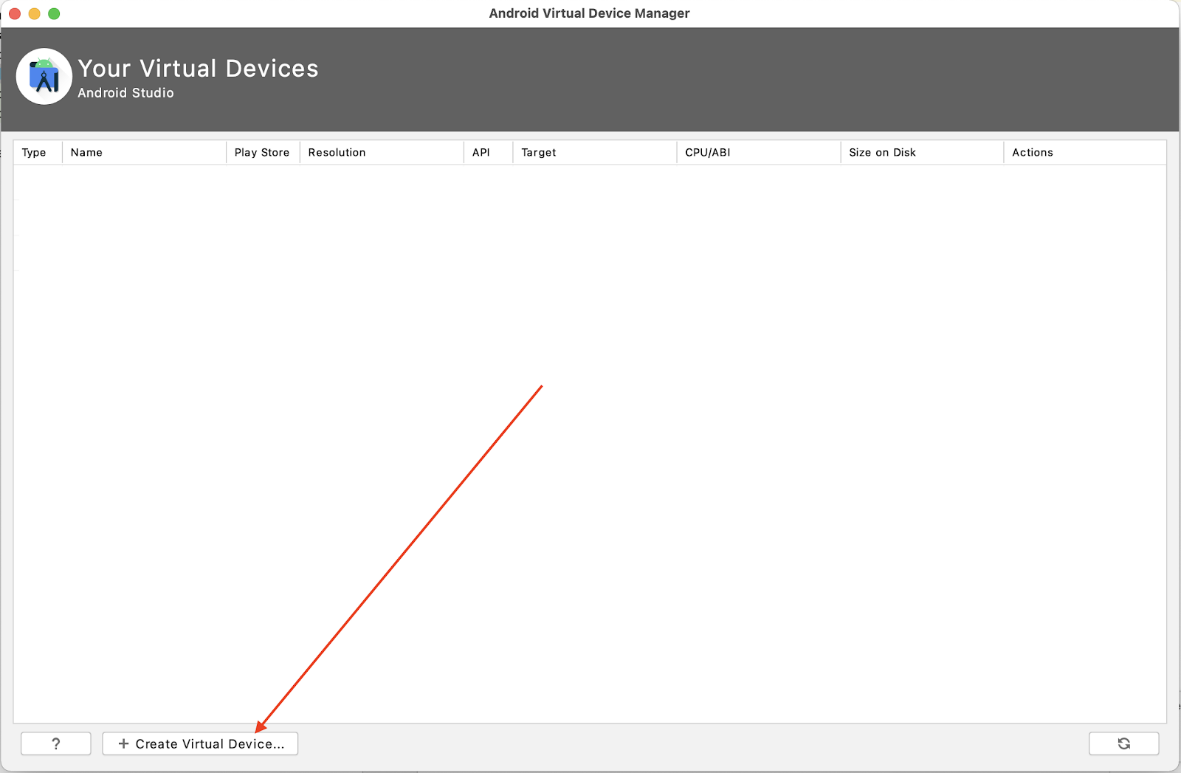
Click the option to + Create Virtual Device:
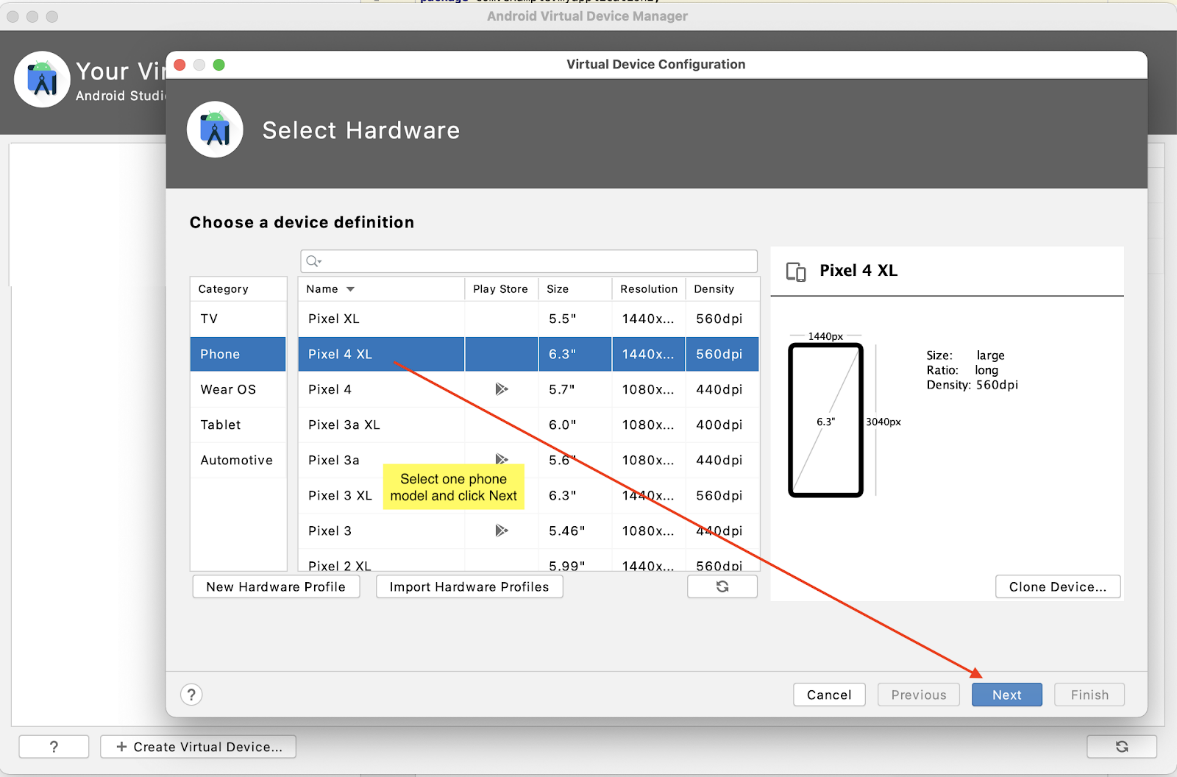
In the new screen, pick one phone model and click Next:
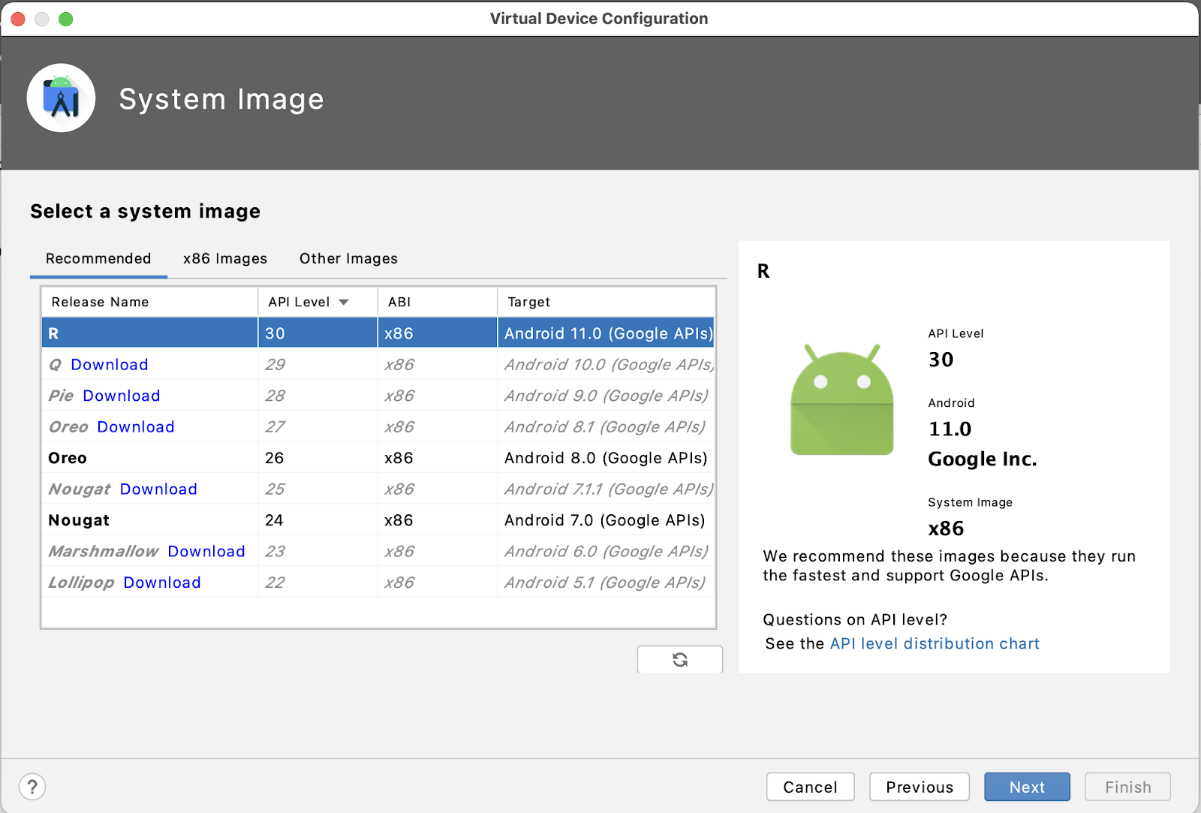
Here is where we remember the ‘API 24’ from when we created our test projects earlier. We will ensure our OS image selection for our Emulator matches or is compatible. We picked Nougat – API level 24:

The needed components will be downloaded and automatically installed - when this is done, click Finish.

If we don't need other API's, we can click Next:
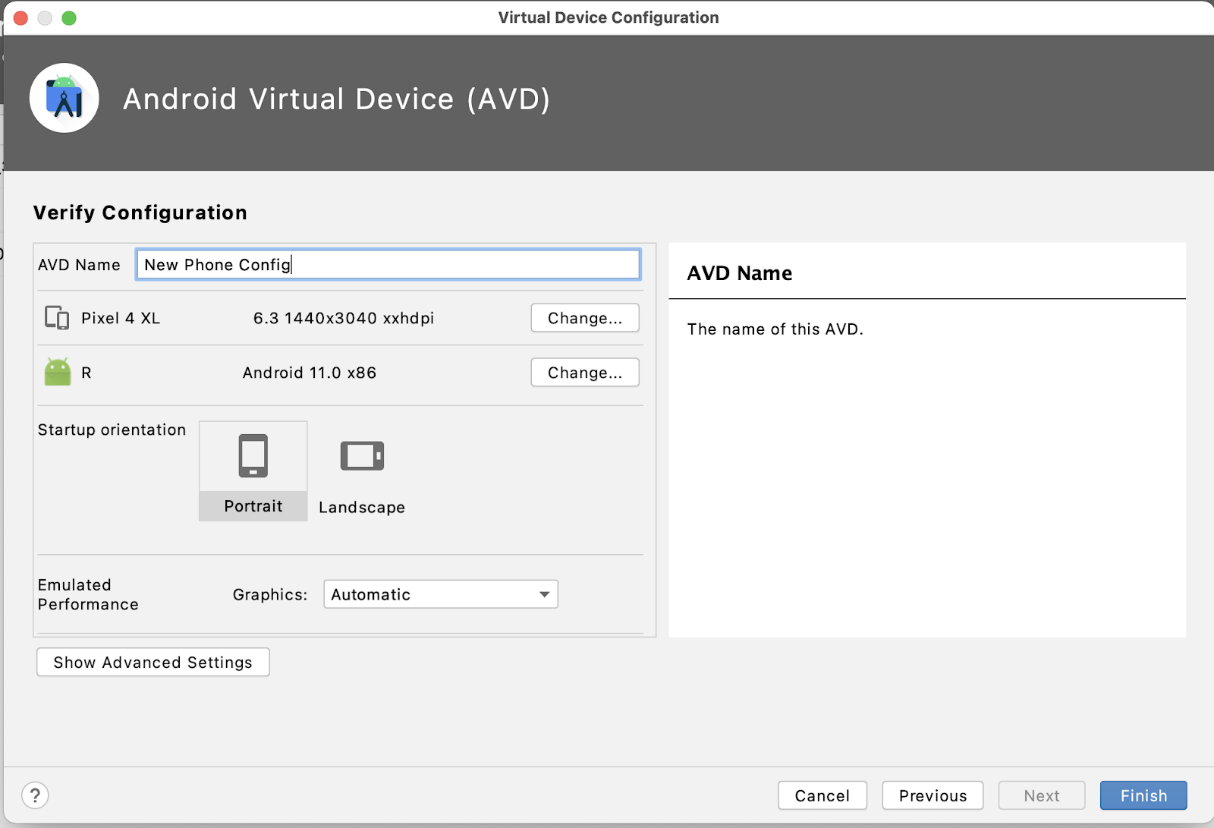
Define the final configuration, like the AVD name and orientation. When done, click Finish.
And your new device is shown in the list of virtual devices.

OK, super! We have our TV emulator, let’s Launch it. Be patient the first time you launch it; it could take a while to initialize, depending on the speed of your desktop machine.
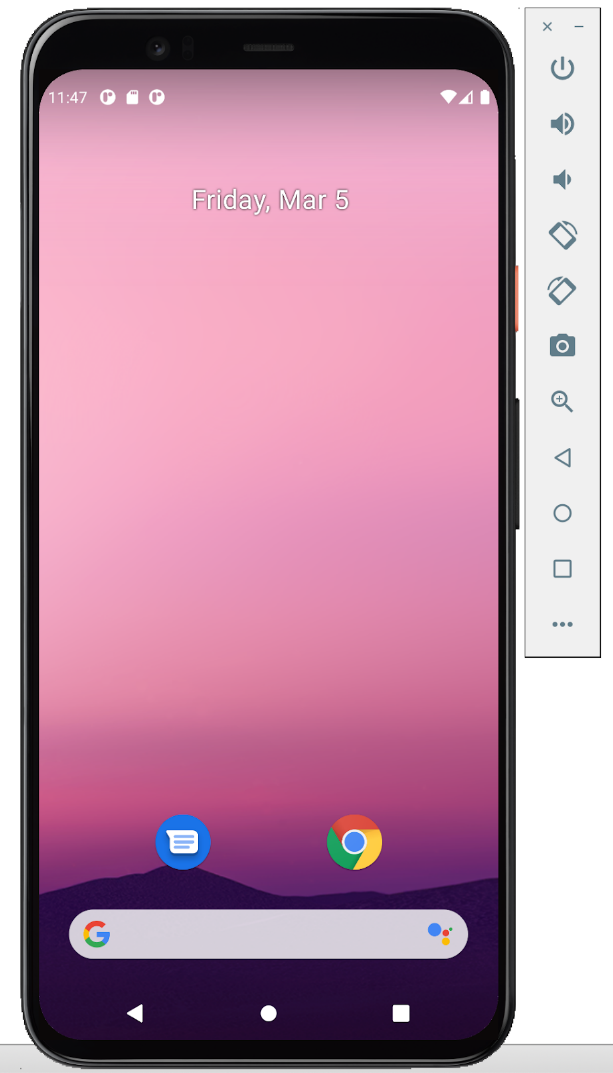
Starting the Phone Emulator, you will see:
Here is a link if you want to learn more about command-line launching of your emulator:
https://developer.android.com/studio/run/emulator-commandline

