|
|
|
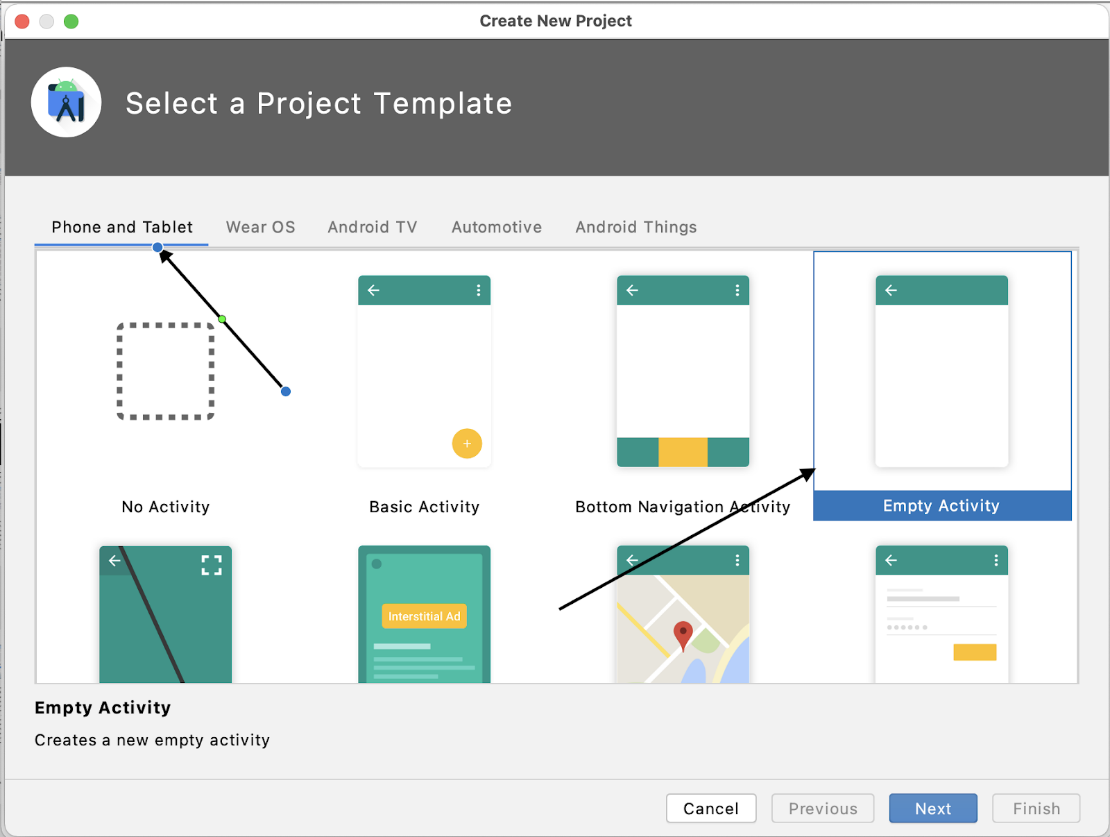
Once the Android Studio is up and ready to go, select New Android Studio project. In this exercise, we will use a Phone/Tablet Emulator, but it should be very similar to a real device or any other emulator. We will quickly make a default Project, just to get the IDE open, and select New Android Studio project.

Let’s select Phone and Tablet for our Project Template, and an Empty Activity.
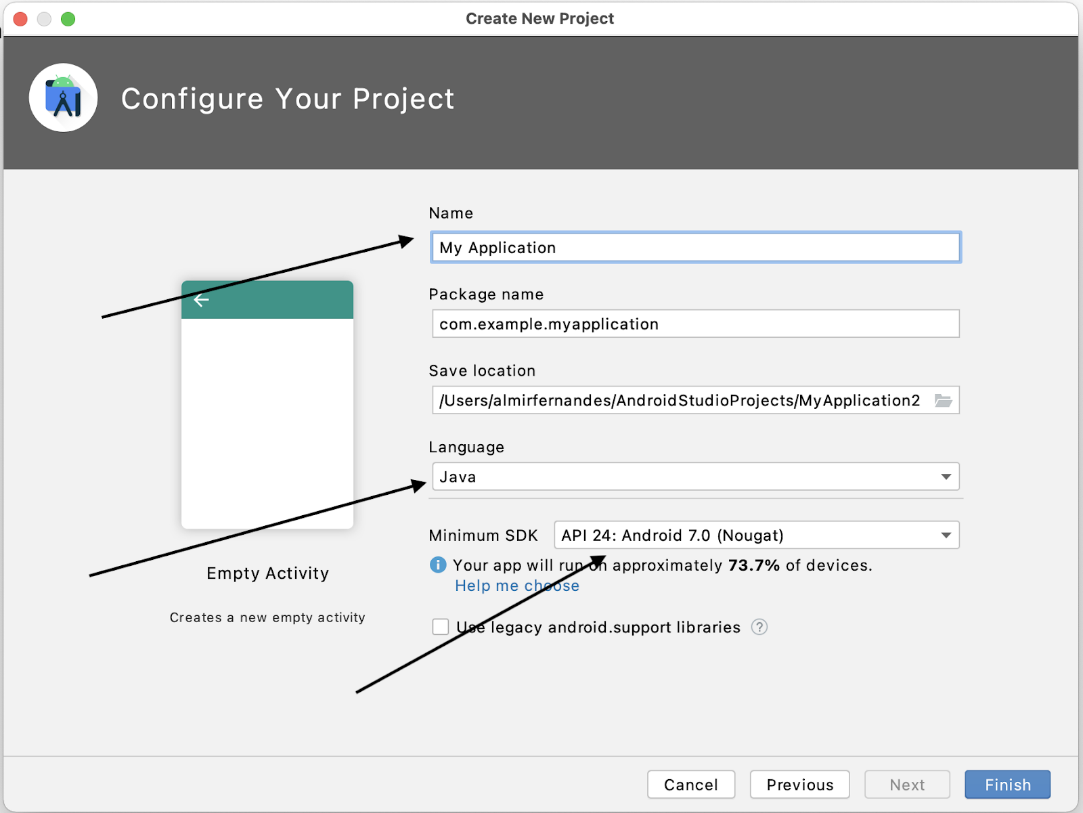
For this initial project, we have kept the suggested name and set the Language to Java. Note the Minimum ‘SDK level’. The Android platform is relatively new and Google engineers are constantly progressing. You will have to determine what level is proper for you, yet for now, in this tutorial, we will stick to ‘API 24: Android 7.0 (Nougat)’. Depending on your project or device, a different API may be required. It is important to remember the choice we do at this step since this information will be required when preparing our Emulator or physical device. The lower the API, more devices may be supported (for cell phones, at least), but less features may be available.
Click Finish to create your first Android project.
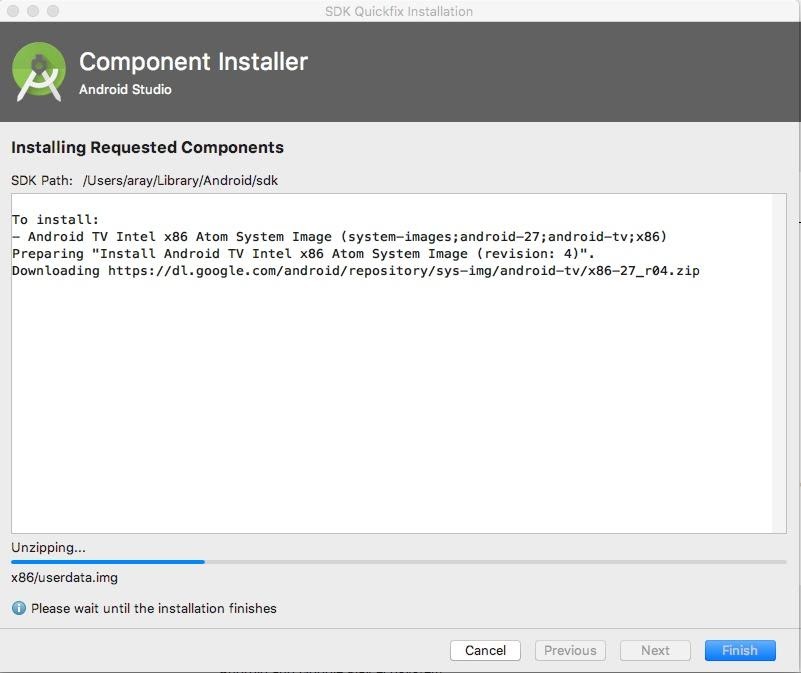
Please note: If this is your first time using the Android Studio, you might be prompted to download and install versions of the Android SDK. Android Studio makes this very convenient. Choose YES if prompted. Here is an example screen of a typical SDK download: