|
|
|
Your project needs to be told where it can find the c-tree header files: ctdbsdk.hpp in the example code, and the various other header files that ctdbsdk.hpp includes.
With the Property Pages window that we used in the previous step still set to All Configurations and All Platforms, navigate to Configuration Properties > C/C++ > General > Additional Include Directories.
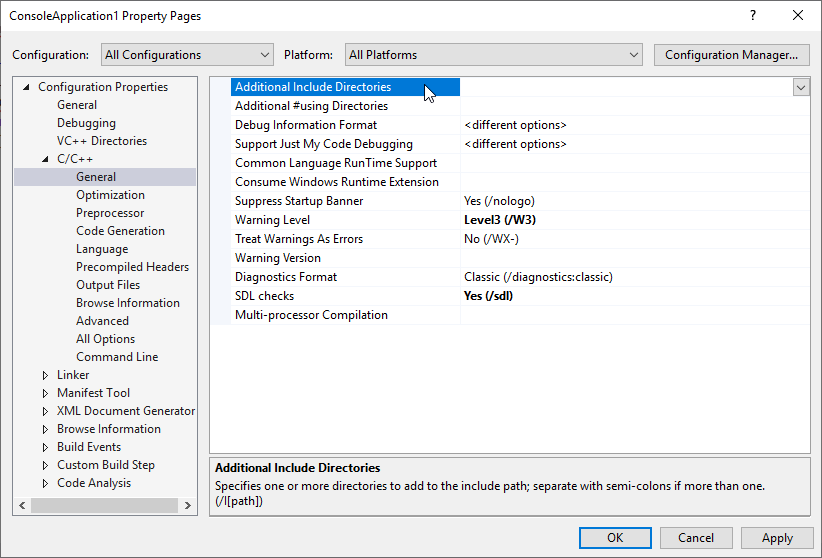
The following two folders need to be added to Additional Include Directories:
As before, the first part of the path is where you installed c-tree on your computer, the next part is your version of c-tree and whether you are using a 32-bit or 64-bit build. When you are done, the Additional Include Directories entry should look something like the image below. Note that the directories are separated by semicolons and the %(AdditionalIncludeDirectories) entry is automatically added by Visual Studio.

Be sure they are in the order shown above (sdk\ctree.cpp is listed first).
You can now dismiss the Property Pages window by clicking OK. Do not click Cancel or all the changes you made in steps 4-5 will be lost.
Save all of your changes to disk by selecting File > Save All from the menu bar.

