For usage with the Java Enterprise Edition, we will use the NetBeans IDE, Version 8.x (you can do the same basic thing in all other Java Enterprise IDEs).
Start NetBeans 8.
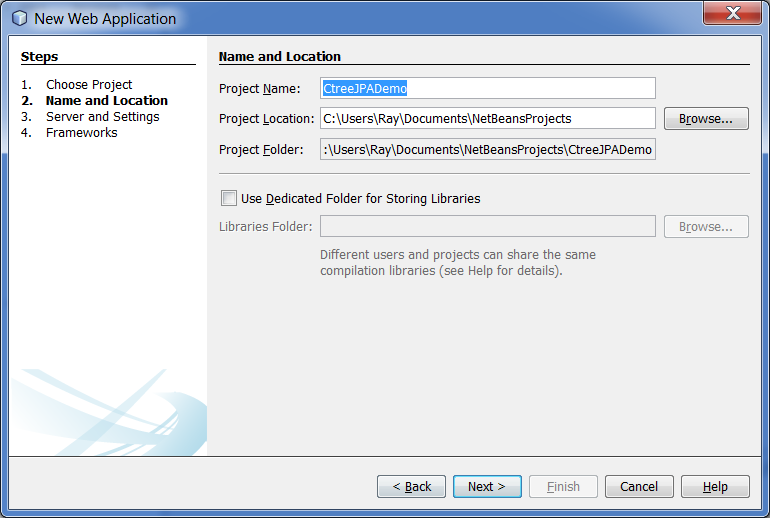
Create a new Web Application using File > New Project.
Choose Java Web > Web Application.
Give it a name like CtreeJPADemo.
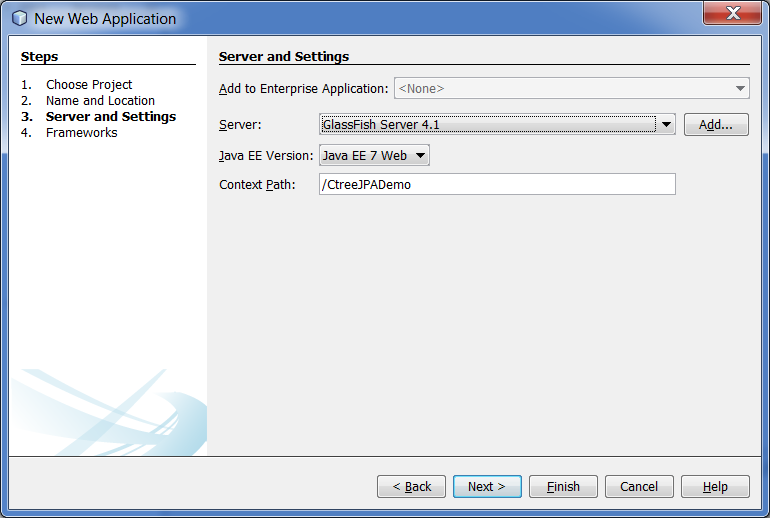
Leave the next page as is:
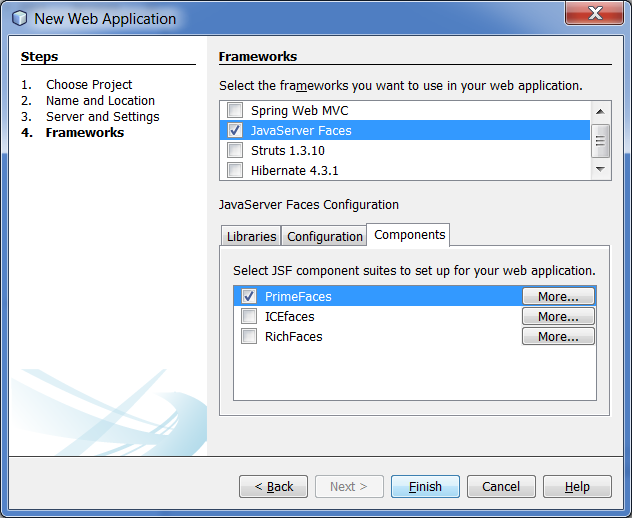
On the last page, select Java Server Faces as our user interface framework and also select the PrimeFaces component.
Next make sure the two mtclinjni*.DLL or .so files from the drivers/java.jpa.nav folder are in your system path, for example by copying them into C:\Windows.
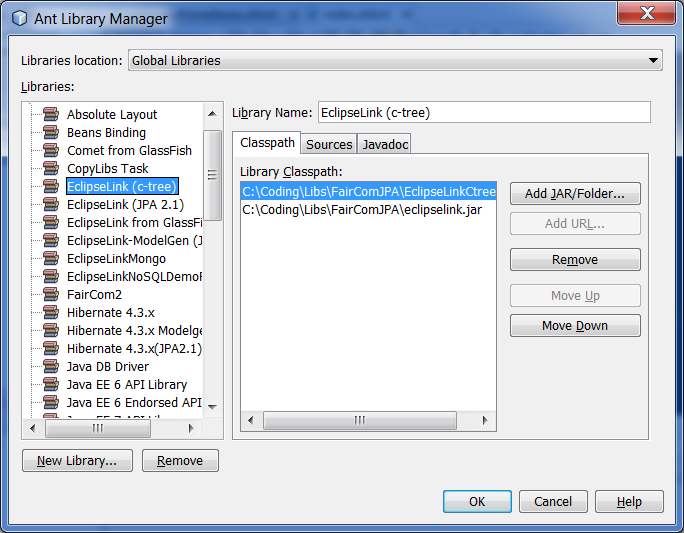
To use the FairCom DB JPA plugin for EclipseLink with NetBeans we need to register it as a library. To do this, click Tools > Library, create a new Library, and call it for example EclipseLink (c-tree). Finally add the two jar files from the lib\ctree.isam.jpa directory and click OK.
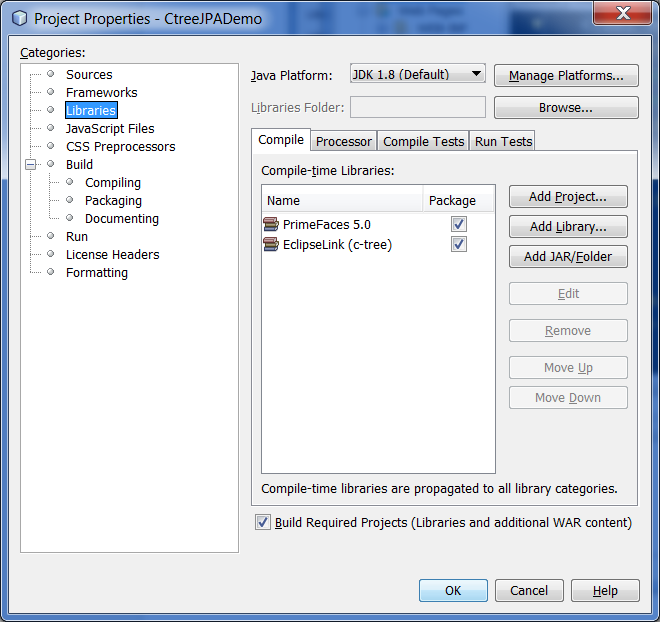
Right-click your new Web Application and select Properties.
Go to Libraries, click Add Library, add EclipseLink (c-tree), and exit the Properties dialog.
Right-click the Web Application again, select New > Persistence Unit, and click Finish (we will completely replace it with the libraries from the drivers/java.jpa.nav directory).
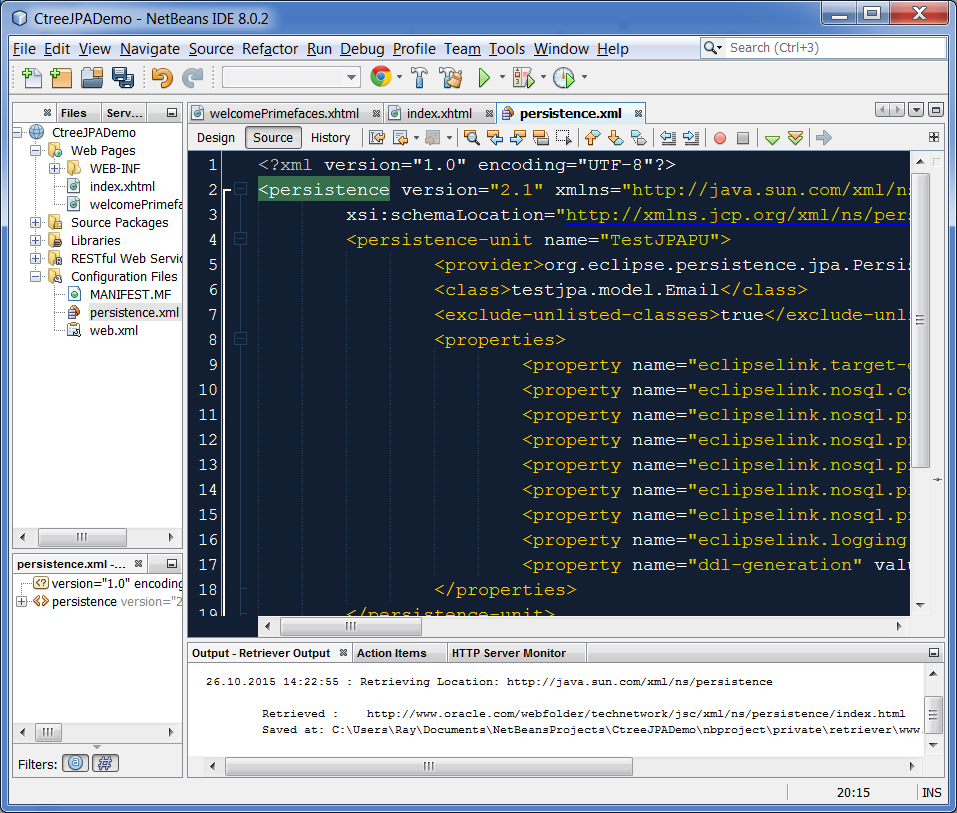
Copy the contents of the persistence.xml file from the drivers/java.jpa.nav/tutorials folder, paste it over the contents of the persistence.xml in NetBeans, and save the file. (You can see the file contents when you click Source.)
Please make sure you use a database setting in the persistence.xml that exists in your running FairCom DB instance either creating the database or adapting the setting.
Copy the Email.java file from the drivers/java.jpa.nav/tutorials directory into the Source Packages folder of your Web Application and open it in the code editor.
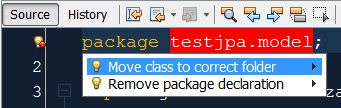
Fix the Incorrect Package error by clicking on the little yellow light bulb next to it and selecting Move class to correct folder.
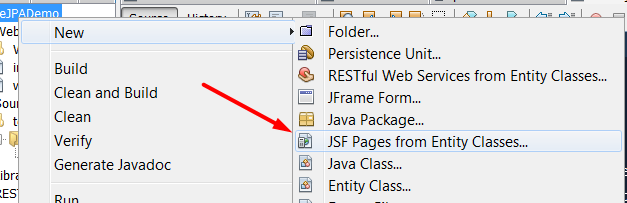
Right-click the Web Application again and select JSF Pages from Entity Classes.
This will open a new dialog called New JSF Pages from Entity Classes.
It can be helpful (although not necessary) to change the Session Bean Package and the JSF Classes Package to testjpa.generated because this step will create computer-generated code.
Be sure to change the selected Template to be PrimeFaces and then click Finish.
That’s it! You have just created a Web Application using JSF and JPA. Press Play and enjoy!